Qwen Image Models Training 0 to Hero Level Tutorial LoRA and Fine Tuning Base and Edit Model
Full tutorial link > https://www.youtube.com/watch?v=DPX3eBTuO_Y


This is a full comprehensive step-by-step tutorial for how to train Qwen Image models. This tutorial covers how to do LoRA training and full Fine-Tuning / DreamBooth training on Qwen Image models. It covers both the Qwen Image base model and the Qwen Image Edit Plus 2509 model. This tutorial is the product of 21 days of full R&D, costing over $800 in cloud services to find the best configurations for training. Furthermore, we have developed an amazing, ultra-easy-to-use Gradio app to use the legendary Kohya Musubi Tuner trainer with ease. You will be able to train locally on your Windows computer with GPUs with as little as 6 GB of VRAM for both LoRA and Fine-Tuning.
The post used in tutorial to download zip file : https://www.patreon.com/posts/qwen-trainer-app-137551634
Requirements tutorial : https://youtu.be/DrhUHnYfwC0
SwarmUI tutorial : https://youtu.be/c3gEoAyL2IE
Video Chapters
00:00:00 Introduction & Tutorial Goals
00:00:59 Showcase: Realistic vs. Style Training (GTA 5 Example)
00:01:26 Showcase: High-Quality Product Training
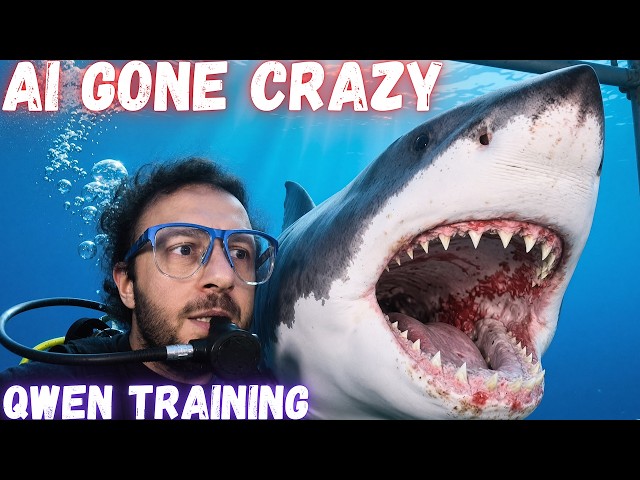
00:01:40 Showcase: Qwen Image Edit Model Capabilities
00:01:57 Effort & Cost Behind The Tutorial
00:02:19 Introducing The Custom Training Application & Presets
00:03:09 Power of Qwen Models: High-Quality Results from a Small Dataset
00:03:58 Detailed Tutorial Outline & Chapter Flow
00:04:36 Part 4: Dataset Preparation (Critical Section)
00:05:05 Part 5: Monitoring Training & Performance
00:05:23 Part 6: Generating High-Quality Images with Presets
00:05:44 Part 7: Specialized Training Scenarios
00:06:07 Why You Should Watch The Entire Tutorial
00:07:15 Part 1 Begins: Finding Resources & Downloading The Zip File
00:07:50 Mandatory Prerequisites (Python, CUDA, FFmpeg)
00:08:30 Core Application Installation on Windows
00:09:47 Part 2: Downloading The Qwen Training Models
00:10:28 Features of The Custom Downloader (Fast & Resumable)
00:11:24 Verifying Model Downloads & Hash Check
00:12:41 Part 3 Begins: Starting The Application & UI Overview
00:13:16 Crucial First Step: Selecting & Loading a Training Preset
00:13:43 Understanding The Preset Structure (LoRA/Fine-Tune, Epochs, Tiers)
00:15:01 System & VRAM Preparation: Checking Your Free VRAM
00:16:07 How to Minimize VRAM Usage Before Training
00:17:06 Setting Checkpoint Save Path & Frequency
00:19:05 Saving Your Custom Configuration File
00:19:52 Part 4 Begins: Dataset Preparation Introduction
00:20:10 Using The Ultimate Batch Image Processing Tool
00:20:53 Stage 1: Auto-Cropping & Subject Focusing
00:23:37 Stage 2: Resizing Images to Final Training Resolution
00:25:49 Critical: Dataset Quality Guidelines & Best Practices
00:27:19 The Importance of Variety (Clothing, Backgrounds, Angles)
00:29:10 New Tool: Internal Image Pre-Processing Preview
00:31:21 Using The Debug Mode to See Each Processed Image
00:32:21 How to Structure The Dataset Folder For Training
00:34:31 Pointing The Trainer to Your Dataset Folder
00:35:19 Captioning Strategy: Why a Single Trigger Word is Best
00:36:30 Optional: Using The Built-in Detailed Image Captioner
00:39:56 Finalizing Model Paths & Settings
00:40:34 Setting The Base Model, VAE, and Text Encoder Paths
00:41:59 Training Settings: How Many Epochs Should You Use?
00:43:45 Part 5 Begins: Starting & Monitoring The Training
00:46:41 Performance Optimization: How to Improve Training Speed
00:48:35 Tip: Overclocking with MSI Afterburner
00:49:25 Part 6 Begins: Testing & Finding The Best Checkpoint
00:51:35 Using The Grid Generator to Compare Checkpoints
00:55:33 Analyzing The Comparison Grid to Find The Best Checkpoint
00:57:21 How to Resume an Incomplete LoRA Training
00:59:02 Generating Images with Your Best LoRA
01:00:21 Workflow: Generate Low-Res Previews First, Then Upscale
01:01:26 The Power of Upscaling: Before and After
01:02:08 Fixing Faces with Automatic Segmentation Inpainting
01:04:28 Manual Inpainting for Maximum Control
01:06:31 Batch Generating Images with Wildcards
01:08:49 How to Write Excellent Prompts with Google AI Studio (Gemini)
01:10:04 Quality Comparison: Tier 1 (BF16) vs Tier 2 (FP8 Scaled)
01:12:10 Part 7 Begins: Fine-Tuning (DreamBooth) Explained
01:13:36 Converting 40GB Fine-Tuned Models to FP8 Scaled
01:15:15 Testing Fine-Tuned Checkpoints
01:16:27 Training on The Qwen Image Edit Model
01:17:39 Using The Trained Edit Model for Prompt-Based Editing
01:24:22 Advanced: Teaching The Edit Model New Commands (Control Images)
01:27:01 Performance Impact of Training with Control Images
01:31:41 How to Resume an Incomplete Fine-Tuning Training
01:33:08 Recap: How to Use Your Trained Models
01:35:36 Using Fine-Tuned Models in SwarmUI
01:37:16 Specialized Scenario: Style Training
01:38:20 Style Dataset Guidelines: Consistency & No Repeating Elements
01:40:25 Generating Prompts for Your Trained Style with Gemini
01:44:45 Generating Images with Your Trained Style Model
01:46:41 Specialized Scenario: Product Training
01:47:34 Product Dataset Guidelines: Proportions & Detail Shots
01:48:56 Generating Prompts for Your Trained Product with Gemini
01:50:52 Conclusion & Community Links (Discord, GitHub, Reddit)
-
00:00:00 Greetings everyone, welcome to the most comprehensive yet easy-to-follow Qwen
-
00:00:06 models training tutorial. In this tutorial, I am going to show you from scratch to the grandmaster
-
00:00:14 level how to train Qwen models on your local Windows computer. After watching this tutorial,
-
00:00:22 you will be able to train your models locally on your Windows computer and generate amazing
-
00:00:30 images. I am going to show both LoRA training and also fine-tuning training. Furthermore,
-
00:00:36 I will show Qwen base model training and Qwen Edit Plus model training. This tutorial is
-
00:00:45 extremely comprehensive, so therefore, check out the tutorial description to see the chapters.
-
00:00:52 Moreover, in a moment, I will show you the layout of the tutorial, so keep watching.
-
00:00:59 In this tutorial, I am not going to show only realistic images,
-
00:01:03 but I am going to show you style training as well. For example, I have trained GTA 5 style,
-
00:01:11 shared it on CivitAI and also the style dataset, so I will explain how to train your style and
-
00:01:20 generate excellent images with your trained style. Furthermore, I will show you how to
-
00:01:26 train a product like this one and generate amazing product images with highest quality,
-
00:01:33 with small text or the logos, and keep consistency and accuracy of the products.
-
00:01:40 Moreover, after you trained the Qwen image edit model, even without control images,
-
00:01:46 you will be able to make prompt-based editing. For example, I say that replace
-
00:01:52 head of this man and it generates this image. I will show all of that. You will
-
00:01:57 see it. For preparing this tutorial, I have worked over 20 days and spent over
-
00:02:04 $600 for research and development. You see on a single day, $110 I have spent
-
00:02:13 on RunPod. When we also include MassedCompute, I have spent over $700 or $800 for research.
-
00:02:19 Moreover, I have prepared an application so easy to use with pre-made configurations. LoRA training
-
00:02:27 configurations already, as you can see they are all split into each GPU tier. Fine-tuning
-
00:02:35 configurations already, they are also split into GPU tiers. This application fully developed by me,
-
00:02:42 it is using the famous Kohya SS GUI tuner, so easy to use. You just load the configuration
-
00:02:49 and set up a few things and you are ready to go. I will explain everything. Furthermore, we
-
00:02:54 have one-click installers for this application for Windows, RunPod, and MassedCompute, including the
-
00:03:02 base models download. This application supports 1.2.1 and Wan 2.2 models training as well. Also,
-
00:03:09 this model is extremely powerful. If you paid attention to the images that I have shown,
-
00:03:14 you will see that it is able to do a lot of emotions very accurately. It is able to do
-
00:03:20 very hard prompts, very hard complex prompts very accurately. And I didn't even use a very
-
00:03:27 powerful training images dataset. I just used 28 medium quality images. However, with only small
-
00:03:36 and medium quality dataset, I am able to get amazing, mind-blowing quality images like these
-
00:03:43 ones. You see all of them are highest quality, really good, both realistic, and it can do style
-
00:03:50 images already very well. So this Qwen model is extremely powerful and my new favorite model.
-
00:03:58 So let me also show you the flow of the tutorial as well. So the rest of the tutorial
-
00:04:04 flow will be like this. Part 1, initial setup and installation, introduction and finding resources,
-
00:04:11 mandatory prerequisites, the requirement tutorial, core application installation. Then Part 2 will
-
00:04:17 be the downloading training models. Part 3 will be starting and navigating the user interface,
-
00:04:23 the Gradio application that I have developed, loading and training configuration presets,
-
00:04:28 system and VRAM preparation, detailed training parameters setup. Part 4 will be dataset
-
00:04:36 preparation. This is super critical if you are first-time training, this part will be super
-
00:04:42 useful for you. Using the ultimate batch image processing tool, this is another tool that I have
-
00:04:47 developed, dataset quality and guidelines, this is super important. New tool that I have added
-
00:04:53 using the internal image pre-processing, dataset structuring for the trainer, this is important,
-
00:04:59 captioning your dataset and the impact of it, finalizing model paths and settings.
-
00:05:05 In the Part 5, we are going to see monitoring training and performance optimizations,
-
00:05:11 testing and finding best checkpoint, resuming incomplete trainings, either it is a LoRA or
-
00:05:18 fine-tuning. Then in the Part 6, I will show generating high-quality images. I
-
00:05:23 have prepared amazing presets so that with one click you will be able to generate
-
00:05:28 highest quality images with your trained Qwen models, but we are supporting so many models,
-
00:05:33 not just Qwen. Image generation workflow in SwarmUI, fixing some of the images, inpainting,
-
00:05:39 this is also extremely useful, you will love it. Part 7, specialized training scenarios,
-
00:05:44 fine-tuning difference versus LoRA, training on Qwen image edit model. If you are interested in
-
00:05:50 Qwen image edit model training, by teaching model new commands like replace clothing,
-
00:05:56 replace hair color, or colorize this sketch or line art, style training,
-
00:06:02 what is the difference, product training, what is the difference, and the Part 8 is the conclusion.
-
00:06:07 So I really recommend you to watch this tutorial from beginning to the end without skipping any
-
00:06:12 part. This tutorial will also help you significantly in your future trainings,
-
00:06:19 whether it is Qwen or Wan 2.2. Hopefully after this tutorial, I will work on Wan 2.2
-
00:06:24 training. Therefore, this tutorial will help you significantly in the future as well. And
-
00:06:30 I am saying that this is a tutorial, however, this is literally a full course. So therefore,
-
00:06:36 try to learn everything I have explained in this tutorial and improve your skills,
-
00:06:41 your knowledge, and utilize this knowledge in your professional life. This tutorial,
-
00:06:47 I can say that it is a breaking deal, like a full course. I have spent huge time and you
-
00:06:54 will love this tutorial, you will enjoy from this tutorial, and you will learn so much
-
00:06:59 information from this tutorial. This tutorial is a product of experience of two years working on
-
00:07:07 these generative AI models, training them, doing research, doing experimentation. So let's begin.
-
00:07:15 So as usual, I have prepared an amazing post where you will find all of the necessary information,
-
00:07:22 the zip file, instructions. Slowly scroll down. Download the latest zip file from here. Also,
-
00:07:30 it is in the attachments section. Do not start installation right away. Keep scrolling down.
-
00:07:36 I recommend you to read everything. Find the Qwen image tutorial video instructions, this section,
-
00:07:43 and from here we will follow. The very first thing that you need to do is following the requirements
-
00:07:50 tutorial. This is mandatory and super important. When you open this tutorial, you will get to this
-
00:07:56 video. This video shows you everything about the requirements. What are they? Python, CUDA, FFmpeg,
-
00:08:04 and other stuff. So please follow this tutorial with its updated instructions. You see the link
-
00:08:10 is here. This is a fully public tutorial. All of the links are updated. You see it is
-
00:08:17 fully updated 3 September 2025. After you watch this tutorial, apply the steps here, you will
-
00:08:24 be ready to run all of the AI applications that I develop or other developers develop.
-
00:08:30 After you have followed the requirements tutorial, return back to our main post and
-
00:08:35 now we will start installation. So move the downloaded zip file into the disk where you
-
00:08:41 want to install. I am going to install into my Q drive. I will right-click and I will extract
-
00:08:47 here. You can use your Windows extractor. After extraction, enter inside the extracted folder,
-
00:08:53 do not forget that. Then all you need to do is just double-click
-
00:08:57 windows_install_and_update.bat file and run. Do not run anything as administrator,
-
00:09:04 it will break it. So run everything with double-click or select and hit enter. You
-
00:09:09 see that it will generate a virtual environment and install all the libraries inside it. So this
-
00:09:15 will not affect anything else on your computer. All of my applications installed into secured
-
00:09:23 and isolated virtual environment folders. Just wait for installation to be completed. Okay,
-
00:09:28 so the installation has been completed. You can scroll up and see if there are any errors. If
-
00:09:33 there are any errors, select everything like this, control C, save into a text file and message me
-
00:09:41 the text file. You can message me from email, from Patreon, from Discord, anywhere. Then close this.
-
00:09:47 Now we need to download Qwen training models. To download the models, double-click
-
00:09:52 windows_download_training_models, run. It will install necessary requirements, then it will ask
-
00:09:58 you which model you want to download. So you can download Qwen base model or you can download Qwen
-
00:10:04 image edit plus model. I will download both of them because I will show you both of them.
-
00:10:09 So let's download the option one. The option one will download these following models. The option
-
00:10:14 two will download the newer model. It will not download twice. They will be downloaded into
-
00:10:20 training/models/Qwen folder. You will see here. As you have noticed, there are 16 parts because
-
00:10:28 this downloader is extremely robust. It downloads with 16 different simultaneous connections, so it
-
00:10:37 utilizes your entire internet speed. Moreover, it is fully resumable and it is fully robust.
-
00:10:44 For example, I can close this, run the downloader again. Okay, let's run it. Then I will select the
-
00:10:49 option one again, and it will fully resume wherever it is left. You see it is resuming
-
00:10:55 back from wherever it is left. As you can see, it is downloading with 1 gigabit per second on my
-
00:11:01 personal computer. This is an amazing speed. This is maximum speed that my internet connection has.
-
00:11:08 Once the model fully downloaded, it will merge the split parts into a single part, then it will
-
00:11:16 verify its hash value to ensure that it has been downloaded accurately. We will see in a moment.
-
00:11:24 Yes, it is merged, then it is verifying the hash value so that your downloaded models will never
-
00:11:31 be corrupted or have any issues. Then it will move to the next download like this. And it is moving
-
00:11:38 to the next download. When you next time resume or start the downloader, it will just skip the
-
00:11:43 already downloaded files and start with the next file. This is a downloader that I have developed,
-
00:11:49 and I am using this downloader in my all applications. So it is always very fast,
-
00:11:55 robust, and accurate. This downloader works with slow internet connections and also with
-
00:12:00 very high internet connections. This is the best downloader you will ever find.
-
00:12:05 Once the first downloads have been completed, start the windows downloader again and download
-
00:12:10 the Qwen image edit model as well if you want it. And at the end of the downloads, you will
-
00:12:16 see that all the files have been downloaded like this. If you already have the files, you can also
-
00:12:22 move them or you can also use them. However, I recommend you to use the windows downloader to
-
00:12:28 download accurate version of the models. You see these are the models that we are going to
-
00:12:33 use. BF16 version of the models are mandatory. FP8 version or GGUF versions will not work.
-
00:12:41 Then we are ready to start the application. Moreover, if you want to update the application
-
00:12:46 before starting, let's say you are going to use it afterwards, just double-click and start the
-
00:12:52 windows_install_and_update file again and it will update it to latest version. So let's start the
-
00:12:57 application, windows_start_app.bat file, run. It will automatically open the interface like
-
00:13:02 this. Always follow CMD windows as well to see if there are any errors or not or what is happening.
-
00:13:09 So this is our application interface. I will explain everything, don't worry. First of all,
-
00:13:16 begin with selecting your preset. This is super important. So make sure that you are in the Qwen
-
00:13:21 image training tab. We also support one model training, and hopefully it will be the next
-
00:13:26 tutorial after this. I am going to work on that as well. So make sure you are at this tab. Also,
-
00:13:32 whenever you are going to load a new config, refresh page and then load. So for loading
-
00:13:37 the config, click this folder icon, go back to your installation folder. This is where I have
-
00:13:43 installed. Enter inside Qwen-Training-Configs and from here you are going to choose whatever
-
00:13:49 you want to train. I am going to show LoRA training first, then I will show DreamBooth,
-
00:13:54 but both of them are exactly same. So let's enter inside LoRA training, and based on your
-
00:14:00 GPU or how much you can wait, select the epochs. So 200 epochs is the best quality, 100 epochs is
-
00:14:10 a little bit lesser quality, and 50 epochs is lesser quality. Why? Because with more epochs,
-
00:14:16 we are actually using a lower learning rate and we are doing more steps. Therefore, we are able
-
00:14:22 to train more details. So higher epochs, lower learning rate is better. And now you will see
-
00:14:28 the tier 1 and tier 2 and tier 3, 4, 5, 6 configs. You may be wondering what are the differences. To
-
00:14:37 learn the differences, enter inside the folder and you will see LoRA_Configs_Explanation.jpg files,
-
00:14:43 and when you open it, it will tell you what are the each configurations and what are
-
00:14:48 their difference. So based on your GPU, you are going to select the configuration. Therefore,
-
00:14:54 I am going to use 200 epoch, and I'm going to use tier 2 30,000 megabyte toml file. Double-click on
-
00:15:01 the toml file, it will open the file from here, then click this icon to load it, and you see it is
-
00:15:08 saying configuration loaded successfully. Why did I pick this configuration file? Type CMD and open
-
00:15:16 a CMD window, then type nvidia-smi. This will show you your GPU list like this. So I have RTX 5090,
-
00:15:25 it has 32 GB of VRAM, but how much free VRAM I have matters. So to learn that, open a CMD window,
-
00:15:34 type pip install nvitop like this, it will install the nvitop very quickly, then type nvitop. And it
-
00:15:43 will show your GPUs' VRAM usages. Currently, I am using 3.5 GB of VRAM on my GPU. But I need
-
00:15:52 30 GB of free VRAM for this configuration. Don't worry, I will show what you can do. Therefore,
-
00:15:59 I should restart my PC and minimize my VRAM usage. Moreover, you can open Task Manager,
-
00:16:07 go to Startup apps, and in here you can disable all the starting apps except the necessary ones,
-
00:16:14 and after that restart, it will minimize your VRAM usage as well. So I should get
-
00:16:19 this VRAM usage under 2 GB before I start training. Okay, let's continue.
-
00:16:25 You can click this open all panels and it will open all of the panels or you can just
-
00:16:30 hide all the panels. So let's begin with first option, accelerate launch settings. This option
-
00:16:35 is extremely useful when you do multiple GPU training, but if you don't have multiple GPUs,
-
00:16:41 you don't need to set anything here. Multiple GPU training on Windows not working very well.
-
00:16:47 Hopefully, I will show that on cloud tutorial on MassedCompute and RunPod. But if you have
-
00:16:52 multiple GPUs like me, you see I have two GPUs, I can set my GPU ID to 1 and the training will run
-
00:16:59 on my second GPU. However, I'm not going to use my second GPU, I'm going to use my first GPU. Okay,
-
00:17:06 the second tab, click it. Now, this is super important. Where you are going to save your
-
00:17:12 checkpoints. So click this folder icon or you can directly copy paste the folder path here.
-
00:17:17 I will show directly copy paste. I am going to save my models inside my SwarmUI installation,
-
00:17:24 inside models, inside diffusion_models, inside lora, because this is going to be a LoRA
-
00:17:31 training. So copy this path and paste it. Or now I will show with select folder. Click this icon,
-
00:17:38 find wherever you want to save. Okay, let's go to SwarmUI installation, inside models,
-
00:17:44 inside lora folder, then click select folder. And it will select the folder. Both works. Then how
-
00:17:50 frequently you want to save? Each saved checkpoint of LoRA will be 2.3 GB. Currently, this setup is
-
00:17:58 saving eight different checkpoints. How? Because you see it is going to save every N epochs. So
-
00:18:05 after every 25 epochs, it will save a checkpoint. And you may be wondering what is epoch? One epoch
-
00:18:12 means that all of your images are trained one time. I will explain that as we progress. So you
-
00:18:19 can keep this as a 25 epoch or you can reduce this number to get more frequent checkpoints,
-
00:18:25 or you can make it higher to get lesser frequent checkpoints. 25 is decent because after the
-
00:18:31 training, we will compare checkpoints and see which one of the checkpoint is the best one.
-
00:18:37 Checkpoint means that the snapshot of the model during that moment. The output name. Output name
-
00:18:45 means that with which name you are going to save your LoRA files. So I am going to name my LoRAs
-
00:18:53 like this: Qwen-Image-Lora-Tutorial. Okay, you don't need to change anything else in here. These
-
00:18:59 are all set. Then you can move to the next part, but before moving that, I recommend you to save
-
00:19:05 your configuration to be able to load it later. Where should we save? You can save this right
-
00:19:12 away from here. It will overwrite the base config, or the better way is, for example, let's save it
-
00:19:18 inside here, like this. So I am going to save it into this folder, and click save. Actually,
-
00:19:25 let's save it into our new folder to not have any issues. Inside here, and save. Okay, then
-
00:19:33 click save. Yes, it's saved. Don't forget to click save to save. You see it shows that configuration
-
00:19:39 saved. It is inside my new installation folder, and I can see that tier 2 30,000 megabyte toml.
-
00:19:45 Let's move with Qwen image training data set. Now, the dataset part is extremely
-
00:19:52 important. Pay attention to this part. If you are first time going to make a training,
-
00:19:57 preparation of the dataset matters hugely. You need to have your images accurately prepared. To
-
00:20:04 automatically prepare your images, I recommend to use Ultimate Batch Image Processing app. You see
-
00:20:10 it is under accelerate tools section. So let's go to this link. I recommend you to check out these
-
00:20:17 screenshots, read this post. Let's scroll down and let's download the latest version. Then let's
-
00:20:23 move it into our Q drive, right-click, extract here, enter inside it. First of all, we need to
-
00:20:29 install. This is a pretty fast installation. This application is very lightweight, but it
-
00:20:35 has so many features. Okay, the installation has been completed. Scroll up to see if there are any
-
00:20:41 errors or not, then close this. Then let's start the application. windows_start_application,
-
00:20:46 run. Why this application important? Because this will allow you to batch preprocess your training
-
00:20:53 images. You can of course manually preprocess your images, but this makes it much easier and
-
00:21:00 accurate. So I have some sample images to demonstrate you the power of this tool. I
-
00:21:06 will copy this path and enter as an input folder. Then as an output folder, let's output them into
-
00:21:14 my other folder as Pre-process Stage 1. Then the aspect ratio. If you are going to generate images
-
00:21:23 with 16x9 always, you can make your aspect ratio accordingly. However, if you are not sure which
-
00:21:31 aspect ratio you are going to use, I recommend you to use square aspect ratio with 1328 to 1328
-
00:21:39 pixels. This is the base resolution of the Qwen image model or Qwen image edit model. This works
-
00:21:45 best and with this aspect ratio and resolution, you can still generate any aspect ratio. All the
-
00:21:51 images I have shown you in the beginning of the tutorial were trained with 1328 to 1328.
-
00:21:58 Then there are several options. You can select the classes from here to zoom them in. This is
-
00:22:04 extremely useful when you are training a person because you want to zoom in the person. What
-
00:22:10 I mean by that? You see in these images, there are a lot of extra spaces that can be zoomed in.
-
00:22:18 For example, in this image, I can zoom in myself a lot. So you can choose this or there is a better
-
00:22:25 one which is based on SAM2. This takes anything as a prompt. Let's say person. You can set your
-
00:22:32 batch size, GPU IDs, these are all advanced stuff if you are going to process a lot of images. So
-
00:22:39 default is good. Let's start processing. What this is going to do is it is going to zoom in the class
-
00:22:46 I have given without cropping any part of the class. So this will not make these images exactly
-
00:22:52 as this resolution or this aspect ratio. It will try to match this aspect ratio without cropping
-
00:22:59 any part of the subject. So let's see what kind of images we are getting. We are saving them inside
-
00:23:04 here. You see it has generated this subfolder. This is important because in the second stage,
-
00:23:11 we are going to use this to make them exactly same resolution. When I enter inside this folder,
-
00:23:19 you can see that it has zoomed in the person. So this is how it works. And when it is zooming in,
-
00:23:25 it will not crop any parts of the image. And also when zooming in, it will try to match the aspect
-
00:23:32 ratio that you have given like this. Okay, the first stage has been completed. Now the second
-
00:23:37 stage is resizing them into the exact resolution. This will crop the subject if it is necessary,
-
00:23:44 like cropping the body parts to match the exact resolution. So this takes the parent folder,
-
00:23:50 not this folder. This is not the folder, but this is the folder that I need to give. And I need to
-
00:23:56 change the resolution that I want. So this will look a subfolder named it as exactly like this.
-
00:24:02 You can have multiple resolutions actually. For example, in the image cropper, I can add here
-
00:24:07 another resolution. Let's say 16:9. So this is the resolution of 16:9 for Qwen image model. Let's add
-
00:24:14 it like 1744 to 992. Let's start processing. It will process this new resolution as well.
-
00:24:23 And I am going to see a folder generated here in a minute when it is processed. Okay, it is started
-
00:24:30 processing. Now it will try to match this aspect ratio. It may not match it exactly. Why? Because
-
00:24:36 it is not going to crop any body parts. So you see this image cannot match that aspect ratio. This is
-
00:24:43 not a suitable image for that. This is almost still square. However, in the second tab, when
-
00:24:48 I go to image resizer, when I type it, you see I have given the parent folder. Let's wait for this
-
00:24:55 one to finish. Okay, it is almost finished. By the way, if you use this YOLO, it is faster than SAM2.
-
00:25:02 So just delete this and select your class from here. It supports so many classes to focus on
-
00:25:08 them. Okay, it is done. Now, I am going to make the output folder as final images, like this,
-
00:25:15 and I will click resize images. You can also make resize without cropping, so it will make padding
-
00:25:21 expansion. So let's resize images. I recommend cropping, it is better. Then let's go back to
-
00:25:28 our folder, final images. Okay. In here, you will see that it has cropped the body parts, resized
-
00:25:35 it into the exact resolution like this. And these are the square images. They are much more accurate
-
00:25:42 than the other ones. Now I have my images ready. However, this is not a very good collection of
-
00:25:49 images. It is another thing that you need to be careful of. I have used these images to train
-
00:25:55 the models that I have shown you in the beginning of the tutorial. So when we analyze these images,
-
00:26:01 what do you see? I have full body pose like this. I have half body pose. I have very close shot.
-
00:26:08 And when you have images, what matters is that it should have good lightning, good focus. These two
-
00:26:16 are extremely important. It should be very clear. All of these images are captured with my cheap
-
00:26:22 phone, so they are not taken with a professional camera. For example, when we look at this image,
-
00:26:28 you see it is not even a very good quality. Also, these are some old images. I didn't update my
-
00:26:33 dataset yet, but using medium quality images, and I am showing you how much you can obtain with a
-
00:26:40 medium quality. If you use a higher quality, then you will get even better results than I did get.
-
00:26:46 Why these images are medium quality? I mean, let me show you this image. You see this image is not
-
00:26:52 even a very high quality. This is how it looks. And this is a real image. This is a raw image.
-
00:26:58 And when we look at the AI generated image, as you can see, it is even higher quality than my
-
00:27:04 raw image. And therefore, you should add highest possible quality images into your training dataset
-
00:27:12 to get the maximum quality images. What else is important? You should try to have different
-
00:27:19 clothings, so it will not memorize your clothing. This is super important. Try to have different
-
00:27:24 clothings, different times, different backgrounds, all of these will help. Whatever you repeat in
-
00:27:30 your training dataset, the model will memorize them. You don't want that. You want only yourself
-
00:27:37 or the subject if you are training a style, the style or an object, the object to be repeated,
-
00:27:43 nothing else. I will explain them in the style and the item training, the product training part.
-
00:27:49 And one another thing is that you should add the emotions that you want. If you want smiling, you
-
00:27:55 should add it. If you want laughing, you should add it. So whatever the emotion you have will make
-
00:28:02 100% quality difference in your outputs. Try to have all the emotions you want. But this is not
-
00:28:10 all. Also, try to have all the angles you want. If you want to generate images that looks down,
-
00:28:17 you should have an image that has a look down like this, or from this angle, this angle,
-
00:28:23 whatever angle. So do not add the angles and poses that you don't want to see after training, and
-
00:28:30 add the poses and the angles you want to generate after training. So if we summarize again, have the
-
00:28:38 emotions, have the poses, have the angles, have different backgrounds, have different clothings,
-
00:28:45 have highest possible quality, lightning, and focus. Do not have blurry backgrounds,
-
00:28:52 do not have fuzzy backgrounds, they will impact your output quality. So in the AI world, whatever
-
00:28:58 you give, you get it. And with this medium quality dataset, I am able to generate amazing images.
-
00:29:04 If I increase the number of images, the variety in these images, I can get even better quality.
-
00:29:10 Another extremely useful tab we have is Image Pre-processing. The aim of this tab to make
-
00:29:17 you see exact version of your training images dataset during the training. This tab is extremely
-
00:29:25 useful especially if you want to do training with bucketing, with multiple aspect ratio resolutions.
-
00:29:31 So let's say I have a dataset like this and I want to do training with multiple aspect
-
00:29:36 ratios. Remember, for multiple aspect ratios in the Qwen image training dataset, you have
-
00:29:41 to enable bucketing. If you want to find the parameter fast, open all panels, control F, type
-
00:29:48 the name like bucket, and you can find it very easily. So let's say you have enabled bucketing,
-
00:29:54 and you are going to process your images to see their final version which the Kohya SS
-
00:30:00 GUI tuner processes them. So put your input images folder here, define an output like this one, sub,
-
00:30:07 and enable bucketing, then from the architecture, select the architecture. This matters because
-
00:30:13 based on this, the Kohya does bucketing. So I'm going to select Qwen image. You can
-
00:30:19 also make fix exif orientation. Currently, it is broken. If your image has an orientation problem,
-
00:30:24 the Kohya won't fix it. So let's process images, and it is processed, it shows how many processed,
-
00:30:30 the resolutions, the buckets. Now when I open this subfolder where I have processed them,
-
00:30:36 this is how Kohya is going to use my images. You see these images have inaccurate orientation. So
-
00:30:43 it won't be proper training. And furthermore, some of the images have padding. Let me show
-
00:30:49 you one of them. Okay, I couldn't find any example, but in some images, you may see them,
-
00:30:55 they have pad like this to fit into the accurate bucket. This is how you can preprocess your images
-
00:31:03 and see the bucket distribution. This is using the Kohya implementation itself, so this is 100%
-
00:31:10 accurate. This is extremely useful. You can also change your target resolution to see how they are
-
00:31:15 processed actually during the training and you can see the actual images. One another feature we have
-
00:31:21 is in the caching. In the caching section, you can enable debug mode. If you enable debug mode,
-
00:31:28 it will show you each image. However, it won't work. This is just for debugging to see. So
-
00:31:34 you can also enable debug mode image, and when you run the training this way, it will show you
-
00:31:40 every image one by one. Let me demonstrate you like this one. So it will pop up the image and
-
00:31:45 you will see each processed image in your training dataset. We had only one, so we have seen only one
-
00:31:52 image from here. So you can also use this debug mode. It has console, video, image to see how
-
00:31:58 they are actually used during the training. This can be extremely useful to understand how they
-
00:32:03 were actually trained. I really recommend you to use this image pre-processing. You can also
-
00:32:09 fix exif orientation and use the pre-processed dataset as your final dataset. So this screen
-
00:32:16 is extremely important to understand your images dataset, how it is composed.
-
00:32:21 Okay, now we have our images ready. How we are going to structure them? I am going to
-
00:32:26 generate a folder here and I will call it as training_images_dataset. And I am not going to
-
00:32:33 put all the images inside here. I am going to make a subfolder, this is mandatory, 1,
-
00:32:39 and I am going to use ohwx. Then I will paste all the images inside it. This 1 means that it
-
00:32:47 is repeating. Repeating means that how many times these images will be repeated in every
-
00:32:52 epoch. You don't need to try to understand this. The repeating is important when you
-
00:32:58 have different subsets of images, and when you are training a single concept, single subject,
-
00:33:04 you don't need different subsets of images. It is used to balance unbalanced datasets. And with
-
00:33:12 Qwen or with Flux or Wan, we are only able to train a single subject at a time at the moment.
-
00:33:19 So currently, we make all repeating 1. However, in future if we be able to train multiple concepts,
-
00:33:26 multiple persons, subjects, styles at the same time, to balance between different datasets,
-
00:33:33 we can have different repeating. What I mean by that, let me show you. For example,
-
00:33:38 the other folder is BBK. And this folder has only half amount of images. So let's delete this,
-
00:33:46 delete this. Yes. So you see this folder has 14 images, the other folder has 28 images. So in
-
00:33:55 every epoch, these folder images will be repeated two times. So each image will be trained twice,
-
00:34:02 and each image in this folder will be trained once. This is the logic of training to balance
-
00:34:08 unbalanced datasets during training, but we don't need it right now. Just make it as 1. And you see
-
00:34:16 this is ohwx. Why? Because I am going to generate captions with just ohwx. I'm not going to write
-
00:34:24 detailed captions, and I will explain why. So copy this path or from here, click this icon and select
-
00:34:31 the training_images_dataset folder and select folder. So make sure to select the parent folder,
-
00:34:39 not the subfolder, because it will look for the subfolder like this. Then set your resolution
-
00:34:45 and height. It is trained with best this one, but if you want to train with a different resolution,
-
00:34:51 with a different aspect ratio, you can set it. The batch size is 1, this is the best quality. I don't
-
00:34:57 recommend higher batch sizes. It is only necessary when you need speed or when you are going to do a
-
00:35:03 massive training, but when you are training a person or a subject, go with batch size 1,
-
00:35:09 it is the best quality. Also, learning rates are set for batch size 1. When you increase the
-
00:35:14 batch size, you need to set a new learning rate. Create missing captions. Currently,
-
00:35:19 I don't have any captions in my folder, so they will be created. It is going to use the folder
-
00:35:24 name as a captioning strategy. Then there is control directory, I will explain that in the
-
00:35:30 Qwen image edit model training part. You don't need to set anything else in here. All you need to
-
00:35:36 do is generate dataset configuration, and it will generate the dataset configuration automatically.
-
00:35:43 This is formatted for the Kohya. You can open this file and see what kind of dataset it has
-
00:35:51 generated. This is the config we are going to give to Kohya automatically. And when I return
-
00:35:56 back inside my folder, you will see that it has generated caption files with the same name as my
-
00:36:04 images. I recommend to train with only ohwx as a trigger word and do not have detailed captions
-
00:36:11 because it reduces the accuracy of the training. You need detailed captions when you are doing a
-
00:36:16 very big training like thousands of images or when you are training multiple concepts which doesn't
-
00:36:23 work right now. They bleed each other. But if you insist on using captions, we have image captioning
-
00:36:30 here. This is using the Qwen 2.5 VL, which is the text encoder used by the model itself. So how does
-
00:36:39 it work? First, you need to select the model path. Click this icon, go back to downloaded models,
-
00:36:45 which is here, select this one, okay. You can use FP8 precision if you have a GPU lower than 24 GB,
-
00:36:55 but I have it. Then you can drag and drop any image file to here. For example, let's see what
-
00:37:02 kind of captions it generates for this. By the way, don't forget to close your Ultimate Image
-
00:37:07 Processing CMD window after it is done. Okay, you see it has generated this caption. So I can use
-
00:37:13 this, I can modify this. Let's try another one with our training images. For example, let's use
-
00:37:19 this image and generate caption. Okay, so this is another caption. You can give custom command to
-
00:37:26 it. For example, this is a default prompt it takes, you can modify this. Or you can batch
-
00:37:31 process with caption prefix or caption suffix. It supports everything. You can also replace words
-
00:37:38 like it generates with a individual. You can make this as a cheerful ohwx, or it may generate with
-
00:37:45 a man word. So you can replace man with ohwx man, person with ohwx person. This supports everything
-
00:37:53 as a captioning. This is a really powerful captioner. Alternatively, you can use Joy Caption
-
00:37:59 application we have as well. It is here, you see this link. So you can install Joy Caption and use
-
00:38:04 it to generate captions as well. This is also one of the most famous captioning model, image
-
00:38:09 captioning model. It is also amazing. So this is captioning. Let me also demonstrate you batch
-
00:38:15 captioning. So let's delete the existing captions, like this. Select this folder. I'm not going to
-
00:38:22 give output folder so they will be automatically saved there. We can also replace words like man,
-
00:38:27 ohwx man, it will replace the man word with it. You can also add caption prefix like ohwx,
-
00:38:34 it supports everything. You can also auto-unload, this is important, so it won't take your VRAM
-
00:38:40 space. And then we just need to click start batch captioning. It supports copy images, scan folders,
-
00:38:47 overwrite existing captions, or output format as a JSON. Also, there are some other parameters you
-
00:38:53 can play here to see which one is working best for your captioning. It supports everything.
-
00:38:58 You can follow the start from the CMD window. So it is currently generating captions, 10 to 28. It
-
00:39:06 is pretty fast. And we can see the captions are getting generated here. When we open the caption,
-
00:39:11 you see it added this, also replaced man with ohwx man. So it supports everything. However,
-
00:39:17 I recommend to have only ohwx as a caption. I compared it with different captioning strategies,
-
00:39:26 detailed caption or ultra detailed caption, and just the trigger word, ohwx is working best. You
-
00:39:33 can use any trigger word. And the logic of the trigger word is a very random keyword. So it
-
00:39:39 should be random. It should be a rare word, and it should be a single word. Use something like
-
00:39:44 that as a trigger word, and that's it. Okay, so the captioning has been completed, but I
-
00:39:49 will return back to my dataset preparation and I will delete all these generated captions, and I
-
00:39:56 will click the generate dataset configuration and I will save my config and I will proceed.
-
00:40:03 And the next section is Qwen Image Model Settings. Do not change LoRA to DreamBooth or DreamBooth to
-
00:40:09 LoRA because the configurations are automatically set properly. Always use the base configuration
-
00:40:15 from the configs folder. So here, I'm not going to make any changes. However, if you want to use Qwen
-
00:40:23 image edit model, which I will show after training started as a next step, you can enable this, but
-
00:40:28 currently we don't need it. You can train on Qwen image base model. Okay, the next thing that you
-
00:40:34 need to set is the base model checkpoint. So click this, go back to your training models downloaded
-
00:40:40 folder, select the model. So this is the base model, you see. Then you need to set the VAE.
-
00:40:46 Click this, select the VAE, this one. Then select the text encoder, and it is this one. So we did
-
00:40:54 set the folders accurately. Don't change anything else. Don't change any of these unless you get out
-
00:41:03 of VRAM, which can happen if you are using too much VRAM. So since I am already using like 6 GB
-
00:41:10 of VRAM, I can make this like 25. I recommend you to try to reduce this maybe like 1 or maybe like
-
00:41:18 2 and see your speed. If you are getting very slow speeds, try to increase it slowly. So this depends
-
00:41:26 on your computer. I am trying to set them as much as accurately. Probably you shouldn't change this
-
00:41:32 at all, but if you get extremely slow speeds, that means that it is using shared VRAM. Therefore,
-
00:41:39 increase the block swap. Block swap means that it is going to use your RAM memory for swapping and
-
00:41:46 try to fit the trained part of the model into your GPU. Since I'm using more VRAM than recommended,
-
00:41:54 let's make this like 30. My training speed will get slower, or maybe like 25,
-
00:41:59 we can see. Don't change any other settings. And the next thing that you need to change is inside
-
00:42:06 training settings. What you can change here? You can change the maximum number of epochs. People
-
00:42:12 are asking me how many epochs they should do. If you have below 50 training images or even 100,
-
00:42:19 but it depends how much you can wait for training to be finished, use 200 epochs. Then compare each
-
00:42:27 checkpoint and see which one is generating the best. But let's say you have 100 images,
-
00:42:32 then you can reduce this to like 150. Let's say you have 200 images, then you can reduce
-
00:42:38 this to like 100. However, 200 epochs is really good below 50 training images. And as you have
-
00:42:46 more training images with highest quality, with variety like different backgrounds, clothings,
-
00:42:52 angles, poses, it is better quality. So try to increase the number of images that you have,
-
00:42:58 the training images with keeping the quality, then you can reduce these training epochs.
-
00:43:04 As I said, it depends on your GPU, how much you can wait, what is your computer, your GPU speed,
-
00:43:10 but 200 epoch is recommended if you have below 50 images. So I will leave it as a 200 epoch. Don't
-
00:43:18 change anything else in here. You can generate samples during the training, but I don't recommend
-
00:43:24 it. It will slow down your training significantly. Generate samples, the comparison after training,
-
00:43:30 which I will show. And in the advanced settings, you can provide the extra parameters that you
-
00:43:37 might have. Currently, we don't need any extra parameters, and we are all set. Now I will save my
-
00:43:45 configuration and I will click start training. First, it will generate cache files for my
-
00:43:53 training images, so it will first load the Qwen VL model, the text encoder, it will generate encoded
-
00:44:00 caches, you can see the progress here, then it will deload model and start the training. Okay,
-
00:44:05 it is going to load the model. I'm using a lot of VRAM right now. You should restart your PC,
-
00:44:12 minimize your VRAM usage. And this loading speed totally depends on your hard drive speed and also
-
00:44:19 your CPU speed because currently we are on the fly when loading the model converting model into FP8
-
00:44:26 scaled. Why we are doing that? Because currently on Windows, as you use more block swapping,
-
00:44:33 it is way slower than compared to Linux. The Kohya is aware of this and he's working on that. Let me
-
00:44:41 show you. So you see he's trying to eliminate the speed difference between Linux and the Windows
-
00:44:49 based on this issue. Let me also show you the issue that I have generated after doing a lot
-
00:44:54 of test and experimentation. Currently, because of the Windows system, it takes three times more
-
00:45:03 duration to swap between RAM and GPU. And as we use more block swapping, it becomes slower
-
00:45:11 than Linux. And if we don't use FP8 scaled, it becomes even slower because it takes twice
-
00:45:18 amount of RAM memory or VRAM memory. So the model takes twice space on our system. And you will see
-
00:45:26 that the training has started. You should try to get maximum amount of watt usage. Currently,
-
00:45:32 it is lower than what I expect, so I might be using some shared VRAM. So I may reduce block
-
00:45:40 swap and compare again. Furthermore, you should wait more steps because as you do more steps,
-
00:45:45 it will get faster. So wait until like 100 steps to see the duration that is going to take. If you
-
00:45:53 say that it is too long for you, what you need to do is selecting faster configuration from
-
00:46:00 the configs. What I mean by that? Select the 100 epoch or 50 epoch. So these uses higher learning
-
00:46:08 rates and doing lesser steps. Therefore, for example, if I use 50 epoch, it will take 1 over
-
00:46:16 4 times. So it will be four times faster, and the quality is very similar to the 200 epoch,
-
00:46:22 but 200 epoch is the best quality. But it is up to you whether you want faster training or not,
-
00:46:28 choose your configuration accordingly. Make sure that you are using minimal amount of VRAM and do
-
00:46:35 not do different stuffs while training and wait for training to be finished.
-
00:46:41 So can we improve the speed? Yes, as you can see, I am able to push speed further. How? First of
-
00:46:50 all, if you have dual GPUs, connect your monitors to your weaker GPU. This will make a huge impact
-
00:46:57 of the idle GPU usage and with that way you can push your block swapping lower. For example,
-
00:47:04 currently I am just doing seven block swaps on RTX 5090 and I am training highest quality FP8
-
00:47:12 scaled LoRA model. Furthermore, there is a newer feature we have added. This has been added while
-
00:47:19 I was editing the tutorial. You will find it as use pinned memory for block swapping. This
-
00:47:25 is a new feature. It is not merged into the main repository yet. However, when you are watching,
-
00:47:31 hopefully it will be already merged. You can see the pull request here. I am back and forth
-
00:47:37 communicating with Kohya to improve the speed on Windows devices. We are figuring out new stuff,
-
00:47:44 we are trying to make it perfect. Hopefully when you are watching this tutorial,
-
00:47:48 when you are following this tutorial, it will be implemented and it will be working better
-
00:47:52 than right now. You should enable this. This will increase the RAM usage, so if you get out of RAM,
-
00:47:58 out of VRAM errors, then you can disable it. This is using more system RAM, not the GPU RAM,
-
00:48:06 not the GPU memory. So when I say RAM, it is the system RAM. When I say VRAM,
-
00:48:11 it is the GPU memory. For this feature to fully work, open graphics, you see graphics settings,
-
00:48:17 then in here, go to advanced graphics settings, and in here, uncheck this hardware-accelerated
-
00:48:24 GPU scheduling and restart your PC. This should help you to improve your training speed even
-
00:48:29 further. And there is one another thing that you can even push your speed further. You can
-
00:48:35 use MSI Afterburner to increase your GPU clock speed. This should work fairly well because we
-
00:48:42 are still not using the GPU fully because we are spending a lot of time with the block swapping. So
-
00:48:47 how can I make the increase? It depends on your GPU, but on RTX 5090, I can so I can increase
-
00:48:53 the core speed by 320 and I can increase the memory speed with like 1000 and it should work
-
00:49:00 fairly well. I can just apply. You can see the actual speeds of the core and the memory here
-
00:49:07 and this should increase your training speed even further. So these are the tricks that we have
-
00:49:12 right now to improve. And hopefully when this new feature becomes more mature and fully implemented,
-
00:49:19 it will work way faster on Windows and it will get close speed to the Linux.
-
00:49:25 So I have trained previously exactly with these settings. So let's see them how to test them and
-
00:49:32 then we will proceed. So once the training has been finished, you will get exactly like this if
-
00:49:38 you did setup like me, the checkpoints, the LoRA checkpoints. Now we are ready to use them. So I
-
00:49:44 am going to use SwarmUI with the ComfyUI backend. If you don't know how to install and use SwarmUI
-
00:49:51 with the ComfyUI backend, we have an excellent tutorial. You see it is right under the Qwen image
-
00:49:56 tutorial video instructions. The link is here. You need to watch this to learn how to use it.
-
00:50:02 Let's open it. So this is a very recent tutorial that I have made like a few days ago. It is like
-
00:50:08 26 minutes, not much long. Watch this to learn how to install ComfyUI and SwarmUI. You need to
-
00:50:17 set it up to be able to use like me. So this is a fresh install SwarmUI. First of all, I'm going to
-
00:50:23 update my SwarmUI. I recommend that and start the SwarmUI after it. Okay, it is going to start. Yes,
-
00:50:29 it has started. I recommend to get the latest zip file and set the presets. So let's install
-
00:50:35 the presets. These are all shown in the tutorial. Then let's refresh the presets. Okay, our presets
-
00:50:41 arrived. The presets are extremely important because I did update presets and I have made
-
00:50:48 them with the best quality for either stylized generation or realistic generation. So let's sort
-
00:50:54 by name. Then for realistic generation, I am going to use Qwen-Image-Realism-Tier-2. This is a very
-
00:51:03 fast one. Direct apply. When you direct apply, you should see that it has selected this LoRA,
-
00:51:09 this base model. When you watch the tutorial, you will learn how all of these are downloaded,
-
00:51:16 installed, and set up. I recommend to follow that first. Okay. So then let's actually reset
-
00:51:22 params to default and then direct apply. Okay, we are all set. The first thing that
-
00:51:27 you need to do is compare your checkpoints to find out which checkpoint is performing best.
-
00:51:35 And how did I do that? Go to tools, select grid generator, select prompt. Then in this prompt,
-
00:51:43 you need to use some prompts. I have pre-made prompts, but you can write your own prompts as
-
00:51:48 well for comparing. So the prompts are inside Qwen-Training-Tutorial-Prompts,
-
00:51:54 and you will see all the prompts that I used. I'm going to use the prompts for grid find best
-
00:52:01 checkpoint prompts myself. Copy it entirely, paste it into here. Now with these prompts,
-
00:52:08 there is one significant difference. You see that I have written the LoRA name,
-
00:52:14 the fast LoRA name at the end of each prompt. And each prompt is separated with this character. This
-
00:52:21 is the format of the SwarmUI. Why do I need to define it here? Because I'm going to compare LoRA
-
00:52:28 checkpoints and I need this fast LoRA, you see it is also set here, to be able to accurately get my
-
00:52:36 images with low number of steps. Otherwise, you won't get quality outputs. The next step is I
-
00:52:43 am going to select LoRA from here. LoRAs. If your LoRAs doesn't appear here, go to LoRAs and refresh
-
00:52:50 for it to see or restart. Then, depending on how many epochs you did, you should start from the
-
00:52:57 half epoch, like 100, and it will be selected, like 125, click and select, like 150, like 175,
-
00:53:06 the final one is this one. So I'm going to compare these checkpoints and decide which checkpoint I'm
-
00:53:14 going to use. You see as a base model, I am using Qwen image FP8 scaled model because it uses half
-
00:53:21 VRAM. This model is huge. If you use BF16, it uses too much RAM memory and VRAM memory. Therefore,
-
00:53:29 I recommend to use this on your Windows computer. Then set a grid name to your testing, testing
-
00:53:36 grid, and click generate grid. Then the SwarmUI will use the ComfyUI backend and start generating.
-
00:53:44 Let's see the first generated image. First of all, it will load the model. You can see from the logs,
-
00:53:50 debug menu, what is happening. You can also follow the CMD window. This web API is not important or
-
00:53:57 this error is also not important. You can ignore both of them. Okay, I can see the logs. Yes, it is
-
00:54:04 starting. We should see the preview around here. You see it says that there are 61 generations,
-
00:54:11 they are queued. Okay, it is loading. You can watch the nvitop window as well what is
-
00:54:17 happening. It is loading the model, it will move the model into VRAM. Okay. So you see the first
-
00:54:23 thumbnail started to appear. This will also upscale images to 2x. This brings huge amount
-
00:54:32 of quality. However, it will take much more time. If you don't want to wait that much, you can just
-
00:54:37 disable this and generate your grid that way. So it will be way faster. However, if you want the
-
00:54:44 highest quality comparison, you shouldn't disable this. With this preset, it will do four steps for
-
00:54:51 base image generation, then it will do four steps of upscaling into which resolution, into 2536 to
-
00:55:00 2536 because we are doubling the resolution which we set here. We can see the speed here. These are
-
00:55:07 the speeds. The upscaling will take like 4x time. You can see it is like 8 seconds per it, but we
-
00:55:14 are doing only total eight steps. And this will bring highest quality. Currently, it is probably
-
00:55:21 testing the first LoRA, which is 100 epoch. This will be probably under-trained. Okay, let's see.
-
00:55:27 Yes, the first image has been generated. I can say that it is under-trained, not there yet.
-
00:55:33 Then to see the entire grid, I will click this and it will load the entire grid like this. So I
-
00:55:40 have done this previously. Let me show you that. I will close this running SwarmUI and go back to
-
00:55:46 my previous installation. Let's start the SwarmUI. Okay, let's go to tools and grid generator. Let's
-
00:55:53 load the grid config and I have the grid somewhere around here. Yes, LoRA checkpoint test, improved,
-
00:56:00 load grid config. Then let's open the grid. Okay. So this shows all the tests. I am going to change
-
00:56:06 how I view it from LoRAs to prompt. So now, you see the first tested LoRA is here, 75 epoch,
-
00:56:15 and the quality is not great. As I scroll to the right, you see this is 125 epoch. As I scroll to
-
00:56:23 right, this is 175 epoch. It is much better. This is a really good quality. This is exactly the
-
00:56:32 config I used just a moment ago. And this is the final epoch. This is the best one in my opinion.
-
00:56:38 As I scroll down, I can see the other images. So scroll between each image and decide which
-
00:56:47 checkpoint is working best for your case. So this is totally subjective. You need to decide which
-
00:56:53 checkpoint is looking best. However, I can see that 75, 100, 125, even 150 is not very good. They
-
00:57:02 are under-trained. And I can see that now it gets better as I do more training. If you decide to do
-
00:57:10 more training, let's say the final epoch is still not very trained. It is still under-trained. It
-
00:57:15 is not your character or style or whatever you are training. How you can resume training? How you can
-
00:57:21 continue training? With LoRA training, to resume your training, go to LoRA settings and you see
-
00:57:27 there is network weights LoRA weight. So you need to give the path of your final LoRA checkpoint
-
00:57:34 here. What I mean by that? Currently my LoRA is here. So this is the folder of my LoRA. Let's say
-
00:57:40 I will continue from this LoRA, while then copy this path and paste, then put a backslash and copy
-
00:57:48 the entire file name. So this is a full path to my LoRA. Now when I start training, it will start
-
00:57:57 from this LoRA and it will continue training from this checkpoint. However, there is one thing that
-
00:58:04 you need to fix. It will still see as starting from the first epoch. Therefore, let's say I want
-
00:58:11 to do total 250 epochs, and my last checkpoint is 200 epochs, then I type here 50. So it will
-
00:58:20 do 50 more epochs, and new saved files will be actually 250 epochs. I recommend you to change
-
00:58:29 the output folder, otherwise it will overwrite your older LoRAs because it will save them with
-
00:58:37 the same way as before. So it really doesn't see that it is starting from 200 epochs. It sees as it
-
00:58:45 thinks as it is starting from the first epoch. So make sure to change your output directory if you
-
00:58:51 are going to resume training, if you are going to do more epochs with your training. And after
-
00:58:56 analyzing this grid, you pick your best checkpoint and generate images with it. How you can do it?
-
00:59:02 Let's refresh. Okay, then let's reset params to default, let's go to presets, select our preset,
-
00:59:10 direct apply. Then select your checkpoint. The checkpoint that you decided as best. Let's say
-
00:59:17 I decided last checkpoint as best, so I click it. You see now lightning LoRA and my trained
-
00:59:23 LoRA are selected. You can change the impact, the weight of your LoRA from here. Let's say if it is
-
00:59:31 too much overfit, you can reduce your LoRA weight or if it is underfit, you can also increase your
-
00:59:37 weight from here. I don't recommend change the other LoRA weight, it is set accordingly. Then
-
00:59:43 type your prompt and generate. So I have some demo prompts for example here. I can use any of them
-
00:59:51 or I can use all of them. So let's make several examples. For example, let's use this one. Paste
-
00:59:58 it here. If you paid attention to my prompts, you will see that they are constructed for realism.
-
01:00:06 They include prompts that would make model to behave more realistic like Canon 15-35 mm, the
-
01:00:15 lens and such. And I will show how I made it. So then I will click generate, but I want to show you
-
01:00:21 one thing. I will first disable the upscale and I will generate four random images. Okay, let's
-
01:00:29 generate. This should be fairly fast when there is no upscale, it is really fast. And I'm also
-
01:00:34 going to change the resolution. So let's cancel it. Let's make the aspect ratio as 16:9. Okay,
-
01:00:42 let's generate. Okay, for example, this image, it takes only like 14-15 seconds. Why? Because
-
01:00:49 I'm recording a tutorial right now. Also, I made it to reserve VRAM, so it is not the best speed,
-
01:00:56 but it is decent. Okay, then let's say I like this image. I will click reuse parameters. Then I will
-
01:01:04 apply the upscale. So this is a specific upscale. Direct apply. Then the upscale is applied. So pay
-
01:01:13 attention to these values. And if your base model gets changed, if you do fine-tuning, it
-
01:01:19 will get changed, repick your base model. However, currently it is same. Then I will click generate.
-
01:01:26 Actually, I need to make this one. Yes. So we will see the difference between the base generation
-
01:01:32 and the upscaled generation. And I am not doing any face inpainting. If necessary, you can do
-
01:01:39 face inpainting as well. I will show an example of that. You can always from server logs, debug, and
-
01:01:46 watch where it is, where is the SwarmUI currently, what it is doing. Okay, now let's compare the
-
01:01:53 difference. This is the base image and this is the upscaled. You can see how much details and
-
01:01:59 realism it adds. This image may not be perfect so that we may need face inpainting, I will show, but
-
01:02:08 this is it. You see, like this to this. Let's also apply a face inpainting. To apply automatic face
-
01:02:14 inpainting, at the end of the prompt, I will type segment:face and I will type my face prompt, which
-
01:02:22 is photograph of ohwx man. Then go to segment refiner and you see there is segment steps. This
-
01:02:30 is important. I am going to make this seven. Why? Because when I make this seven with 60% of image
-
01:02:40 inpainting, I think it is default 60%, let's see. Yeah, as far as I know it is 60%. It will do four
-
01:02:47 steps. And this is necessary because we are using lightning LoRA. So I have made this segment step
-
01:02:53 seven and the rest is default. Let's generate. This is one option of doing that or you can edit
-
01:03:00 the image and inpaint face. I will show that too after this. Okay, you see first it is inpainting
-
01:03:06 the face. I think after that it will upscale. Oh wait, it used the last generated image then it
-
01:03:13 just did the face inpainting. Nice. Okay, I can see that this is a perfect face. I can play with
-
01:03:20 it with the parameters. So the default parameters are 0.6 to 0.5. I don't remember exactly what were
-
01:03:29 they. So to remember it, let's go to SwarmUI GitHub. In here there is documents. Then in
-
01:03:34 the documents, let's search for segment. Okay, you see there is documents, features, prompt,
-
01:03:41 syntax. I go into features and I go to prompt syntax MD file, then search here segment and
-
01:03:51 let's see if it does tell us the variables. Okay, it explains the variables here. It says that the
-
01:03:59 first parameter is the creativity, the other one is the threshold. So I'm going to increase
-
01:04:03 the creativity to like 70% like this. Let's see. And you can also increase the number of steps it
-
01:04:12 does. It can also increase your quality. Okay, let's see what happens. And yes, this is it. So
-
01:04:19 you can inpaint face to make it perfect. How about inpainting this first image? So to do it, select
-
01:04:28 that image, click edit image, and in here, you see it did set the resolution like this, init image
-
01:04:35 and the upscale, yeah, it is not enabled. Okay, I need to turn off the refine upscale, then I need
-
01:04:43 to mask the face. Okay, here. Let's change the mask radius. Yeah, this needs a total remaking,
-
01:04:51 but let's mask face. Okay, like this. Yes. Then I am going to use the this prompt and still it
-
01:05:00 will use the steps from here. I'm not sure. Let's generate and see what happens. This should only
-
01:05:08 inpaint the face. We can see how many steps it is making. Okay. By the way, the resolution is
-
01:05:14 massive, so I don't know how it will do. Okay, it did only two steps. This is wrong. We need to make
-
01:05:20 at least four steps. Yes. Therefore, I'm going to increase my steps count to like seven. Okay, let's
-
01:05:26 try again. Let's see how many steps it is making. Why it did two steps? The reason is that we have
-
01:05:33 init image creativity 60%. So 60% multiplied with four steps, it does two steps. 60% multiplied with
-
01:05:42 seven steps, it is going to do four steps. Yes, I can see it is doing four steps. Okay, it is using
-
01:05:48 the same amount of time as the upscaling. The advantage of this way is that I can change the
-
01:05:54 seed now and I can generate multiple times until I get the very best one. Yes. Now it is like this.
-
01:06:02 If you are not satisfied with it, what you can do is you can play with the parameters here. You
-
01:06:08 can make this 65%, you can make the mask blur like eight, generate, and decide which one is
-
01:06:16 best. This is the way of doing that. You can change the seed, make it random. So this way,
-
01:06:22 you can mask face or fix any part of the image many times until you get the satisfied results.
-
01:06:31 But usually, the generated images are highest quality, you don't need it. You just need to
-
01:06:37 write good prompts, which I am going to show in a minute. It's upcoming. You can increase the number
-
01:06:43 of generations so it will do multiple times image generation, the face inpainting, and you can pick
-
01:06:50 the best one. For example, let's generate four times with random seed and pick the best one.
-
01:06:55 Okay, now it is going to queue. Yes, four images queued. So I can see which will be the best one.
-
01:07:02 Okay, so with different seeds, we have different results and you can pick the best one with this
-
01:07:09 strategy. So to continue, I will reset params to default, then I will refresh, then from the
-
01:07:15 preset, let's reselect our preset, select back our best LoRA checkpoint like this. And let's say you
-
01:07:24 want to generate hundreds images with different prompts. Select your resolution, decide whether
-
01:07:29 you want to upscale or not. You can upscale later. So let's turn it off. Go to wildcards. In here,
-
01:07:36 create a wildcard, name it like whatever you want, and type each prompt here as a new line,
-
01:07:42 with a new line. So I have got some demo prompts I have generated here. So let's copy all of them,
-
01:07:50 paste and save. Then click it, it will use each generation this one of the prompt randomly,
-
01:07:58 it will insert it here, and let's generate 10 images. Okay, and generate. This way,
-
01:08:03 you can generate hundreds of images with different prompts, then pick the best one and upscale it,
-
01:08:11 inpaint it, work on it. This is a really good way of batch generating images and
-
01:08:17 picking the best image. As you are seeing live right now, it is really fast to generate
-
01:08:23 if you don't upscale because these presets uses only four steps for base generation.
-
01:08:29 I did huge research to find out these presets, and you can see that even without upscale,
-
01:08:36 the quality is decent. But when we latent upscale it, it becomes the next level. So this is the
-
01:08:42 way of finding good images. And how to write these prompts? So for writing these prompts,
-
01:08:49 I am using Google AI Studio. Let's go to Google AI Studio, Google AI Studio from here. Then in this
-
01:08:55 screen, select the Gemini 2.5. Hopefully Gemini 3 is coming. Then in our example prompts, you
-
01:09:03 will see that there is Gemini generate realistic character. Open it, modify this with your needs,
-
01:09:11 then copy and paste it into Gemini. Then I make the temperature lower so it will obey my command
-
01:09:20 prompt more and generate. This way, I have generated the realistic prompts. So read this,
-
01:09:27 modify it as you wish, and you can generate random prompts with this preset way. You can
-
01:09:35 test them and pick the good prompts. Then you can pick the good image and upscale it. This is the
-
01:09:41 way of generating amazing quality images. I have prepared Gemini prompts for stylized character or
-
01:09:48 for trained product item or for trained style. All of them exist to generate random prompts.
-
01:09:54 Okay, as a next question, you may be asking what is the difference between tier 1 LoRA and tier 2
-
01:10:04 LoRA? So you may be wondering what is the actual difference between tier 1 and tier 2. As I have
-
01:10:10 explained, tier 2 uses FP8 scaled, tier 1 uses BF16, not FP8 scaled. And these other tiers uses
-
01:10:20 lower network rank or lower resolution to reduce the VRAM usage. So in my test, let me open it,
-
01:10:28 I also have tested the quality difference. You see there is FP8 scaled version BF16 quality
-
01:10:34 difference. Let's open the grid and let's make it as prompt. Okay, here. So the first one is FP8
-
01:10:44 scaled, the second one is the BF16. And the third one is a LoRA trained on the Qwen image edit plus
-
01:10:53 model. I need to apply it to the Qwen image edit as a base model. So this is its actual output. You
-
01:11:00 can use the Qwen image trained model on Qwen image edit plus model or vice versa. However,
-
01:11:07 the max quality obtained when you use it on the same trained model. And the quality difference
-
01:11:13 is minimal. I think these are just the seed differences. However, the actual change appears
-
01:11:21 when you apply the Qwen image trained LoRA on Qwen image edit model like this, but all of
-
01:11:27 them is working. So we lose or we don't even lose much quality between the FP8 and the BF16, between
-
01:11:36 the tier 2 and tier 1. You see this is tier 2, this is tier 1, or this is tier 2, this is tier
-
01:11:42 1. Almost same quality. These are just the random noise differences, tier 2, tier 1. So you can use
-
01:11:50 either of them, tier 2, tier 1. Almost same, you see. There is no big quality difference. Moreover,
-
01:11:57 you can train on Qwen image edit model as well. It works as you can see, and there is an advantage of
-
01:12:04 Qwen image edit model which I will show you in a moment as we progress in the tutorial.
-
01:12:10 So now, as a next step, how you do fine tuning? Are there any difference? The only difference of
-
01:12:18 fine tuning is that you select fine tuning configuration. The rest is exactly same as
-
01:12:26 the LoRA training. So from the training configs, select the fine tuning. Again,
-
01:12:32 select the number of epochs. By the way, the fine tuning is slower than LoRA right now on Windows
-
01:12:38 especially. On Linux, they are almost same speed. And select the tier. If you have paid attention,
-
01:12:44 all are tier 1 in fine tuning. Because fine tuning is more optimized, therefore we don't
-
01:12:51 sacrifice any quality. But the speed gets slower, especially on Windows, it is really slow compared
-
01:12:58 to the Linux. So select the VRAM according to your GPU and load with this icon, and that's
-
01:13:05 it. The rest is exactly same, absolutely nothing different. It just sets accurate
-
01:13:12 training parameters according to the DreamBooth. However, there is one important thing that these
-
01:13:20 model checkpoints will be 40 GB. Therefore, by default, I am only generating once every
-
01:13:29 40 epochs. Therefore, it will get five checkpoints, 200 GB. And after training,
-
01:13:36 what you need to do is you should convert them into FP8 scaled. How it works? Let me demonstrate
-
01:13:43 you. So let's say I have a full checkpoint in this folder. Copy this folder path, enter as an input
-
01:13:51 folder. You can set output folder, not mandatory. We are going to use tensor-wise. This is scaled.
-
01:13:58 This is not default FP8 generation. This is tensor-wise made by the ComfyUI and the Musubi.
-
01:14:07 The Musubi has also block-wise, this is higher quality, but ComfyUI is not supporting it yet.
-
01:14:13 I made an issue thread and the ComfyUI developer replied me with Torch version 2.10, he said that
-
01:14:21 it is coming hopefully. Currently, we are going to use tensor-wise. You can also delete the original
-
01:14:27 files after conversation, but don't do it at the first time. So click start conversation. It will
-
01:14:34 convert it into FP8 scaled with tensor-wise. This is really high quality and it is almost
-
01:14:42 same quality. After you did this, you will see that. So you see it is saving the converted
-
01:14:49 model. Yes. And it is going to take half space, 20 GB, and it will work on your GPU much easier.
-
01:14:58 This is almost same quality as BF16. I have tested it because this is scaled conversation.
-
01:15:06 So what is different when you are testing the grid of the fine-tuned models? This time, we don't need
-
01:15:15 to select LoRA. So reset params to default and let's refresh the models here, and let's go to
-
01:15:22 preset, apply our preset, direct apply, go to tools, grid, let's select the prompt. This is
-
01:15:30 for finding the best checkpoint. Tutorial prompts are here. So the grid test prompt is here. So copy
-
01:15:39 them, paste them into prompt. As a next parameter, we select model and same strategy. Let's refresh
-
01:15:45 models, go back to tools and type your epoch like 100, 125, 150, 175. Okay, it is not the accurate
-
01:15:56 one. 175 and the last checkpoint. So that's it. So it will generate the grid and exactly same
-
01:16:04 as LoRA, you will compare it and then all you need to do is select your best checkpoint. For example,
-
01:16:12 it is 200, but make sure that you have converted them into FP8 scaled. Otherwise, it will use
-
01:16:20 a lot of RAM memory, it will do a lot of block swapping, so it will be slower on consumer GPUs.
-
01:16:27 Okay, as a next step, Qwen image edit model. This is also exactly same as
-
01:16:34 LoRA and fine-tuning. First of all, decide whether you want to do LoRA or fine-tuning,
-
01:16:40 doesn't matter. Let's give an example with the LoRA since it is lighter weight. So let's load our
-
01:16:46 config. Then what is different? The difference comes from the training dataset. Currently,
-
01:16:53 we can generate images with Qwen image edit model with just text. Therefore, you don't need to use
-
01:17:00 edit images. You can use just your base images to train and it will train and it will use same
-
01:17:07 amount of VRAM, same amount of RAM memory, it will be same speed. So what is different? This time,
-
01:17:14 you enable this Qwen image edit model checkbox and you select the different checkpoint. Which
-
01:17:23 checkpoint? You select the Qwen image edit plus checkpoint and that's it. Now you will be training
-
01:17:31 on the Qwen image edit plus model. What advantage it has? It supports command-based actions. For
-
01:17:39 example, let me demonstrate you with this one. So I can upload an image here. Let's upload a
-
01:17:47 prompt image. I am going to use this image as an upload. Then to get accurate size, I have shown
-
01:17:54 all of these in the other tutorials. Let's upload it here and let's say use closest aspect ratio. So
-
01:18:01 it will set accordingly to your input image, then uncheck this. I also recommend to still upscale,
-
01:18:09 and type your command prompt. This is what the Qwen image edit plus model for. So you see this
-
01:18:16 command is replace his face with ohwx man, and hit generate. By the way, you see that this base model
-
01:18:25 is BF16, not FP8 scaled. Therefore, it will be slower than FP8 scaled. However, it will
-
01:18:33 still work. Why? Because since this is using the ComfyUI as a backend, it will do automatic block
-
01:18:40 swapping and it will work, but it will just work slower. The model loading, the inference because
-
01:18:46 of the block swapping. And one more thing is that, okay, I just noticed that I don't have
-
01:18:52 the accurate model right now. Okay, the model is here. Qwen image edit model trained without
-
01:18:58 control images. So same as training the Qwen base model. I will first convert it into FP8 so it will
-
01:19:07 be faster. Copy the folder and batch process. This convert tool also skips already FP8 models.
-
01:19:16 So it is converting the new model. It is also properly applying metadata as well. Currently,
-
01:19:24 it supports Qwen base and Qwen image edit models. Okay, you see it is converted. Let's put it into
-
01:19:31 diffusion models. This is a full fine-tune. Then let's go back to our model list. Okay, here. Now
-
01:19:36 the accurate is selected and hit generate. So now we are going to, by the way, ignore this
-
01:19:42 image. This is from the previous generation. It is going to apply this input image and convert
-
01:19:49 it into new image with this prompt. Actually, let me make another one so you will see. For example,
-
01:19:57 this one, and this has a different aspect ratio. So to get the accurate aspect ratio, I will use
-
01:20:04 the same strategy. Closest aspect ratio. Okay. So let's cancel the current one. Let's generate a few
-
01:20:10 images and pick the best one. Then we can upscale. Okay, image prompting is automatically selected.
-
01:20:16 Let's generate four images. Okay. The upscale helps here as well. And you can of course do the
-
01:20:25 face inpainting as well. This is a Qwen image edit model trained without control images. Don't worry,
-
01:20:32 I am also going to show you how to train Qwen image edit model with control images
-
01:20:40 and prompts like this, like replace his face. So you will be able to teach the model new prompts,
-
01:20:48 new instructions. It is actually so easy. Okay, we are getting some results. For example, this one,
-
01:20:55 this one, this one. Based on whichever the one you like, then we are going to upscale it. The
-
01:21:02 upscaling will improve the quality significantly. And remember, this model was trained without the
-
01:21:10 control images. Okay, for example, let's say this one. So I will say reuse parameters,
-
01:21:17 so it will set the seed accurately. Then I will enable the upscale. So I will do 60%,
-
01:21:25 2x. We are using the 4x Real Web Photo, and I will make the step count 7. Okay, and generate.
-
01:21:34 Let's see after upscaling what we will get. By the way, some of the images are horrible,
-
01:21:39 but after upscale, we should, but after upscaling, we should get a pretty good quality. And remember,
-
01:21:48 this is a prompt that it knows. Furthermore, you may need to generate more seed to get a
-
01:21:54 more accurate one. For example, in the history, I can show you that this was another generation
-
01:22:01 that I have made, and you see it worked perfect. Moreover, since we upscale, we add more details
-
01:22:08 compared to the original image. Let me show you the original image. So this is the original image.
-
01:22:13 You can see the original image details, and this is the regenerated image. We added more details
-
01:22:21 to the original image as well. When we compare it, you can see that our generated image has
-
01:22:27 some more details. And yes, this is the result. I mean, not the every upscale will be perfect or
-
01:22:34 the seed will be perfect. You just need to, oh, oh, I just noticed something. Currently, we are
-
01:22:40 not using the accurate LoRA. That is why we got these results. So, always, always apply the preset
-
01:22:48 to not make mistake like me. So I will just say direct apply, and let's turn off the refine, and
-
01:22:54 let's generate five images. Okay. Now I will pick a better one. So lightning LoRA is super important
-
01:23:02 because we are doing just four steps and without lightning LoRA, it will not work. Oh, by the way,
-
01:23:08 base model changed when I applied the preset. So you can also edit the preset and set your
-
01:23:14 base image. You can duplicate it. I will also show you the duplicate. So I will say duplicate preset.
-
01:23:21 I will edit the preset. Then in the bottom, display advanced and display normally hidden,
-
01:23:28 and I will change the base model into my model, my trained model, which is here. Then save. Then
-
01:23:36 when I apply the preset, it will accurately select my model. This is the way of duplicating presets,
-
01:23:42 editing them. Then let's generate five images. And let's remove this from batch view. Okay,
-
01:23:48 let's delete. You will see that how better it works now. I'm not going to delete this part of
-
01:23:54 the video so that you can learn why it happened. These are some errors I had. Yes, you see much
-
01:24:02 better. Now that we apply the accurate LoRA, it works much better. And this is the logic. Now when
-
01:24:09 I upscale it, it will become perfect. Okay, every image is accurate. So without LoRA, you get noise,
-
01:24:15 you get you get horrible images, but with accurate preset, you get the accurate images.
-
01:24:22 So how you can train a real control having training, like teaching a new command action
-
01:24:33 result to the Qwen image edit model. It is so so easy. Let's open our last configuration, this one.
-
01:24:42 Let's open all panels. Then let's go to Qwen image training dataset section. So this was my dataset.
-
01:24:51 Now I am going to also auto-generate black control images, set your control image and height like
-
01:24:59 this with your resolution, and generate dataset. Then what you need to do is properly replace the
-
01:25:09 control images. So let's go back to our training images dataset folder. This was our folder. Okay.
-
01:25:16 So these images wouldn't work for this task. What kind of images you need? I will show you. When you
-
01:25:23 extracted the zip file, when you enter inside the Qwen training configs, you will see that we
-
01:25:30 have Qwen image edit model example dataset. And this is the example dataset. Let's copy paste
-
01:25:38 it into here and analyze it. So now edit images are provided like this. You see dataset_image_0,
-
01:25:46 dataset_image_1. Why I have named them like this? Because my input image, actually the final image
-
01:25:54 that I expect is named as dataset_image. And this is the caption. So in this caption, you
-
01:26:02 give the command, make him wear the headphones. So this way, you have to prepare your final image,
-
01:26:09 input images, and the prompt. Let's say this is final_image_A. Okay. Then you need to make
-
01:26:16 the prompt final_image_A. Then you need to rename them like final_image_A0, final_image_A1. You can
-
01:26:25 provide up to three images as a control image. So you can have another image named it as like
-
01:26:31 two. So you can provide up to three images. Then you can train it. When you train this way, it will
-
01:26:38 learn this command to generate this final image when you provide these input images. However,
-
01:26:47 there is one tricky issue. When you train Qwen image edit model with control images like this,
-
01:26:54 what happens is that it will become slower and it will use more VRAM. Therefore, this is
-
01:27:01 super important to keep in your mind. You need to increase the block swap count. For example, let's
-
01:27:10 make a demonstration. I will close my SwarmUI and let's save. Then what I need to do is I need
-
01:27:18 to enable Qwen image edit model. Then I need to increase the block swap. Let's make it like 35.
-
01:27:27 I'm not sure how much will be sufficient because I have two control images and they are not even
-
01:27:33 the accurate sizes. They are not all 1328. We can see the generated dataset toml file which it is
-
01:27:41 going to use. So you see it says that it is going to use Qwen image edit control resolution 1328,
-
01:27:48 1328, and the general resolution, the directory of the edit images. So it is all automatically set
-
01:27:56 for you. What I need to do is I need to make these images all 1328, 1328. Actually, let's make it as
-
01:28:02 a demo. So I will resize these to 1328. Okay. Then I will resize this to 1328 as well. How am I going
-
01:28:11 to do that? So first resize this to 1328, then 1328 and we can add a padding like this. And then,
-
01:28:21 yes, that's it. So all my control images and my output image is now accurate resolution.
-
01:28:27 Then when I click start training, let's watch what happens. Okay, it says that you don't have
-
01:28:35 the okay, I got an error. Why? Because I didn't click load. So I need to click load. Then okay, I
-
01:28:43 have overwritten the previous files because I had forgotten to click load and I hit save. Therefore,
-
01:28:51 I need to reset the parameters. Okay, this one is true. This one is also true. Okay, now I need to
-
01:28:59 select the model file from here. Okay, edit plus, select it. I will enable this. Okay, these are all
-
01:29:08 true. Let's also verify this toml is valid one. Yes. Okay, now I need to click save. I also need
-
01:29:16 to set the swap count to like 35. I'm not sure which one is best because depending on your number
-
01:29:24 of control images, this changes. Now it will recache because I changed the dataset. Therefore,
-
01:29:31 I need a recache. So it is doing the recaching like this. When it caches, it combines all these
-
01:29:39 two and one image into single cache safe tensor file. So it still generates one image, but this
-
01:29:48 one contains all those three images. And you see it is doing the text encoder caching as well. Now
-
01:29:55 we will start the training. However, how much VRAM it will use, I'm not sure. Okay, you see it has
-
01:30:01 filled my VRAM. So let's stop. Let's go to swap and let's make this 40 and click start training
-
01:30:09 again. You should also save your configuration like this to be sure. Okay, let's see what
-
01:30:16 happens now. You can also read the logs on the CMD. It shows found one matching control images
-
01:30:23 for arbitrary images, one images have two control images. You should verify your logs from here too.
-
01:30:30 Okay, this time it is not using the full VRAM. Therefore, these many block swap was sufficient.
-
01:30:37 Now I can reduce block swap count, see the speed. However, as you use more control images, it will
-
01:30:45 become slower. But this is a professional thing mostly. So you can rent a cloud machine and do the
-
01:30:51 training there with a more powerful GPU like RTX 6000 Pro. Hopefully, I will make a cloud tutorial
-
01:30:59 as well after this, so you will see how easy it is to train there. Still, this tutorial is mandatory.
-
01:31:06 Okay, you see the first step has been passed. It is really, really slow. And I need to wait more to
-
01:31:14 see its actual speed, but currently I'm not at my max performance. I am recording video. I need to
-
01:31:20 restart, close all the running applications and such. But this is the way of training an actual
-
01:31:28 Qwen image edit model with a specific task, with a specific command you want, like replace clothings,
-
01:31:35 change hair, or whatever you want to do as a command, you can teach it to the model.
-
01:31:41 So how you can resume your fine-tuning tutorial? Let's refresh our configuration. Normally,
-
01:31:47 we give the base model, either it is Qwen image base model, Qwen image edit plus base model. So
-
01:31:54 to continue your fine-tuning training, we are going to give our checkpoint. For example,
-
01:32:00 you see my checkpoints. This is 125 epoch, this is 175 epoch. Let's say my
-
01:32:08 last checkpoint was 100 epoch. So I select that model, and when I start training now,
-
01:32:15 it will be continuing from this checkpoint. My configuration, my workflow is made in a such way
-
01:32:23 that this is equal to training from start to 200 or doing 100 more steps to reach the 200 epochs.
-
01:32:32 So it will be totally same whether you continue from your last checkpoint or you do from 0 to 200
-
01:32:39 epochs at once. This is the logic of continuing the fine-tuning. Now I need to reduce my training
-
01:32:47 epoch count from 200 to 100 because when you use either it's a LoRA or fine-tune checkpoint,
-
01:32:55 it will not know where the training was left off. So you need to calculate the difference
-
01:33:02 and do more epochs like this way. This is the way of continuing your fine-tuning training.
-
01:33:08 Before I show you the style training and also the product training, let's make a recap of how to
-
01:33:15 use our trained LoRAs and fine-tuned models. So for LoRAs, you put your LoRAs into SwarmUI into
-
01:33:23 models into LoRA folder like this. For fine-tuned models, first convert them into FP8 scaled. I
-
01:33:31 recommend that. It is not mandatory, but make sure to convert so they will work faster. Then put them
-
01:33:38 into SwarmUI/models/diffusion_models folder like this. You see my files are here. Then let's start
-
01:33:45 our SwarmUI as usual, windows_start_swarmui. Then Quick Tools, reset params to default,
-
01:33:52 presets, apply our preset. This is the preset that we use. You see, Qwen-Image-UHD-Tier-2,
-
01:34:00 direct apply. If you are going to use a LoRA, you just need to go to your LoRA tab, select
-
01:34:07 your LoRA, whichever the one you want to use. For example, this LoRA, make sure that no unnecessary
-
01:34:13 LoRAs are selected, and this Lightning 4-step LoRA is selected. The preset may get updated,
-
01:34:19 so this selected LoRA may get changed when you are watching this tutorial because there are
-
01:34:24 always some newer LoRAs, some newer ways that gets faster. So just additionally select your
-
01:34:31 LoRA. Then type your prompt. For example, let's use this prompt and hit generate. You see that the
-
01:34:38 preset selecting the Qwen image FP8 scaled model as a base model because when you are using LoRA,
-
01:34:45 you need to use the base model that you trained it on. You can use with other base models as well,
-
01:34:50 as long as they are Qwen models. However, it will work best with the base model that it was
-
01:34:56 trained on. This is the logic of LoRAs. And we are getting our image generated. To test faster,
-
01:35:02 I recommend to turn off upscale, generate images, then on the ones that you like, you can apply the
-
01:35:10 upscale as well so that you won't be waiting unnecessarily for upscale part to be finished.
-
01:35:17 If you don't like the preview image, you can always cancel and try with a new different
-
01:35:23 seed. As long as the seed is -1, it will generate a different image. And we got our image generated.
-
01:35:31 So how do I use my fine-tuned model? And you may be wondering why you should train
-
01:35:36 fine-tune because fine-tuned models are higher quality than LoRAs. That is the reason. They
-
01:35:42 are able to generalize better, they can do more poses, more emotions better, not much different,
-
01:35:49 very close to the LoRA, but still better. So let's refresh this page, reset params to default,
-
01:35:56 presets, let's apply our preset, direct apply, type our prompt. And now you need to select
-
01:36:02 your fine-tuned model instead of the base selected model. So I'm going to select my fine-tuned model,
-
01:36:09 which is here. You see my Qwen fine-tuned model FP8 converted by me. And that's it. Then you need
-
01:36:16 to select your aspect ratio, the resolution whichever you want. For example, this one and
-
01:36:21 generate. We also already have seen how to do face inpainting, how to fix face. The logic is
-
01:36:27 same. You can also fix other parts, either with inpainting or with segmentation. It should work,
-
01:36:34 the logic never changes, but how you apply it changes, and it comes with experience and using
-
01:36:40 the program, doing more generations. And this is the generation of fine-tuned model. If you ask my
-
01:36:46 opinion, of course fine-tuned model is better, but with LoRA you can generate more images and
-
01:36:51 get the perfect image or you can do inpainting, face inpainting, and fix manually. It depends your
-
01:36:59 case. If you are using this professionally, then I recommend to either wait for fine-tuning to be
-
01:37:05 finished or use cloud services like MassedCompute or RunPod. We already have the installer scripts,
-
01:37:11 and hopefully I will make another tutorial to show that, but you can already train on them as well.
-
01:37:16 So now let's talk about style training. What changes? With style training, everything is
-
01:37:23 exactly same. So what is changing? What changes is the dataset. So I already have attached the GTA 5
-
01:37:31 style dataset in our post. You see, remember, Qwen image tutorial video instructions. Let's download
-
01:37:37 the style dataset and I also shared the result model in this CivitAI link, so you can download
-
01:37:44 and use it already. The FP8 scaled version is shared. You see it is 19 GB of file. So far,
-
01:37:53 the comments are good, and you can use this model and generate yourself. Okay, let's look at the
-
01:37:59 used style dataset. So let's move this into our folder. You can move anywhere. Let's extract it,
-
01:38:06 and let's make the analysis of it. So the style dataset, again, only trained with a trigger word,
-
01:38:13 not a detailed captions, just ohwx. I didn't use anything else. And this was the dataset.
-
01:38:20 When you analyze this dataset, you will see some of the key things. The first thing is that it is
-
01:38:26 extremely consistent. This is mandatory for training a style. Consistency of the style.
-
01:38:32 The second thing is that no character repeats or no scene repeats or no object item repeats. This
-
01:38:41 is super important. So you should try to avoid repeating. For example, repeating a person that
-
01:38:48 will cause model to memorize, or repeating an item like this helicopter, you shouldn't repeat items,
-
01:38:55 you shouldn't repeat objects, you shouldn't repeat persons, places, buildings, nothing should repeat.
-
01:39:01 But you may be saying that, okay, these two scenes are very similar. It is true because there weren't
-
01:39:08 enough, there weren't sufficient amount of dataset to train. Therefore, I cropped some
-
01:39:15 of the images and made them multiple images. So this image is actually, let me open it,
-
01:39:21 so this image is actually cropped from this big image. But you see, I tried to not repeat the same
-
01:39:29 objects as much as possible. I tried to avoid it. So this is the way of preparing a style dataset,
-
01:39:36 consistency, not repeating objects, items, persons, characters, whatever you can think
-
01:39:43 of. Only style should repeat. Only style should consistent. Everything else should be different
-
01:39:51 in every image. With style training, as more as images you have, you will get better results. This
-
01:39:58 is really, really important. Try to collect more images for style training. And when you train,
-
01:40:05 you will see how high quality you get. I don't recommend to have detailed captions. Just use
-
01:40:11 ohwx. This is working best for the Qwen and also recently for Flux, I am using the same strategy,
-
01:40:18 and also for one which is coming, probably will be same. I haven't tested yet, but probably. So
-
01:40:25 how I am able to generate amazing quality images with just using ohwx during the training? I mean,
-
01:40:34 let's look at some of the images again, like this one or like this one. The logic is the detailed
-
01:40:41 prompting. So for very detailed prompting, I am using this strategy. Let's open the Google AI
-
01:40:48 Studio. As usual, Google AI Studio from here, and then upload your style images. This is the
-
01:40:57 lazy way of doing that. You can of course manually also test it, but I prefer this lazy way because
-
01:41:03 it makes it easier. So the dataset images are here. So just select all of them or like 20 of
-
01:41:10 them. It is up to you. And drag and drop into the this section. Then, this is super important, make
-
01:41:18 the media resolution highest possible. Currently medium is highest possible. This will make the
-
01:41:24 model process these images with higher quality and higher accuracy. Then set the temperature like
-
01:41:31 50%, and what prompt, what command you need to use to get proper captions, proper prompts? It is all
-
01:41:40 shared inside the Qwen training tutorial prompts. So to generate example prompts, I'm going to use
-
01:41:48 Gemini generate trained style prompts. You can read this and change it according to your needs,
-
01:41:55 then copy paste it here. So with this prompt, it is going to give me 100 unique prompts to generate
-
01:42:03 in SwarmUI or in ComfyUI, whichever the one you are using. This will ensure that the generated
-
01:42:10 prompts includes elements that will make the model generate images according to my trained
-
01:42:17 style. It will improve its consistency, its accuracy. Even though I trained with just ohwx,
-
01:42:24 this will work. Why? Because these models, Flux or the Qwen, encode your training images. So whether
-
01:42:31 you caption them or doesn't caption them, they are still internally captioned during the training. It
-
01:42:38 is a very technical thing, but you can still say that the model knows your image content.
-
01:42:44 So it still flows information into those captions, whether you use detailed captions or not. Then hit
-
01:42:52 generate icon. So now it will generate me example prompts. Analyze the generated prompts and you
-
01:42:58 will understand the logic. It will give you idea how you should prompt your style after training.
-
01:43:05 This will significantly improve the accuracy of your generated images with your style. And this
-
01:43:13 applies to all style trainings. Believe me, you will be able to generate amazing stylized images,
-
01:43:20 amazing images in your style after you do this. Another use case of style training could be that
-
01:43:26 you might have line art image, then you can say turn it into my style and final image. So you can
-
01:43:33 train Qwen edit model with this strategy and you can have a model that can convert your line art
-
01:43:40 images into your style painted, into your style colored images. We have already seen the logic
-
01:43:48 of the Qwen image edit model training, so check that part again if you don't know, but this is
-
01:43:54 the way of training a style, the logic of training a style. You can see that these are all amazing,
-
01:44:00 these are all extremely consistent with the dataset, and it is extremely versatile model,
-
01:44:06 not overfit. It can still generate pretty much everything or anything, and this is the exactly
-
01:44:13 way that I have trained. I am still using the same configuration. The configuration doesn't change
-
01:44:18 for style or for product or for person, it doesn't change. What changes is the dataset, how dataset
-
01:44:25 is prepared and the how many epochs you do. If you have more images, you can do lesser epochs,
-
01:44:32 but with style, I recommend to do more epochs because it learns it matter. And you can just
-
01:44:38 download this model from CivitAI and generate images right away yourself if you wish as well.
-
01:44:45 So how are you going to generate images with your trained style? Let's refresh.
-
01:44:49 Let's make reset params to default. Go to presets and for style generation,
-
01:44:55 we have two presets. Qwen-Images-Stylized-UHD or Qwen-Images-Stylized-UHD-Tier-1. The tier
-
01:45:02 1 is better, but it takes more time, it takes more steps. So let's make an example with the
-
01:45:09 tier 2. This will be a quick example. I have selected it. Then I need to select my trained
-
01:45:14 model. Currently I have full trained model, not a LoRA for style. It is here. I have selected
-
01:45:20 it. Let's change the aspect ratio. Then let's use one of the generated prompt. For example,
-
01:45:27 let's use this one and turn off refine upscale. Let's generate eight images. Then we can pick
-
01:45:33 the best one and upscale it. Okay, I have got two images generated. For example, let's upscale this
-
01:45:39 particular one. The seed is here. I will set the seed and I will just enable refine upscale
-
01:45:46 and generate. So this was the base generated image without any upscale and let's see the result after
-
01:45:52 upscaling. So it is upscaling right now. If you instead use tier 1, it will do more steps during
-
01:46:00 the upscale and it improves the quality. So if you are looking for maximum quality, you can use
-
01:46:06 Qwen-Image-Stylized-UHD-Tier-1 configuration. These configs may get updated over time,
-
01:46:13 so make sure to read Patreon post changes and the newest presets descriptions. Okay,
-
01:46:18 the upscale completed. I have forgotten images eight, so it was generating another one. So yes,
-
01:46:24 this is the upscaled version. Let's compare it with the base version. So this was the
-
01:46:28 base version and this is the upscaled version. And this upscale was very, very fast because
-
01:46:34 it was only four steps. However, you can do more steps to get even better, higher quality details.
-
01:46:41 Okay, what about product training? The product training dataset preparation is different than
-
01:46:48 both style and character. And let me explain you the logic of product training. So I have
-
01:46:55 prepared a product dataset like this one. Probably I have used this one, not the very accurate one.
-
01:47:02 And because I used this dataset, what happened is that its sizes in some cases, the perfume
-
01:47:10 size is not very accurate because you see all of these images are extremely close shot. So the
-
01:47:17 AI didn't learn its proportions properly. I also had another dataset which I was planning to use,
-
01:47:26 this one, were including shots that a person was holding it like this. So you should have mixed of
-
01:47:34 product images. Some of them should be very close, so it learns details. Some of them should be far
-
01:47:41 distant, so it will learn its proportions. This is important. Imagine with the which way you want
-
01:47:47 to generate the product images after training, so that you should have such images so that it can
-
01:47:54 learn its proportions. You see there is a glass behind of the perfume bottle. So the model will
-
01:48:01 understand that this is the proportion of the product image according to a glass. Moreover,
-
01:48:08 you can see how powerful this training is. You see this icon was perfectly learned by the AI,
-
01:48:17 like this one. So Qwen is extremely powerful when it comes to learning details or learning the
-
01:48:24 detailed small text, unlike Flux, this model is much more powerful for text learning, for learning
-
01:48:32 the text on small products, and it can generate amazing quality images like this one. It is up
-
01:48:40 to your imagination after training. And again, I just used the ohwx as a caption. I didn't use
-
01:48:48 detailed captions, and there is another strategy to generate the product prompts for inference.
-
01:48:56 So again, we upload our product images into the Gemini. So select a few of them, like these ones.
-
01:49:03 You can select more, of course. Selecting more will help the Gemini to understand better. Then
-
01:49:09 in the Qwen training tutorial prompts, you will see Gemini generate trained product item prompts.
-
01:49:15 So you can modify this as the way you want and then paste it here and hit enter. So this way,
-
01:49:23 it will generate me example prompts and it will also describe the text on the product. So you see,
-
01:49:31 during the inference, we describe whatever we want with details to improve its accuracy, to improve
-
01:49:38 its consistency. During training, we just used a single activation token, a rare word, a rare token
-
01:49:46 like ohwx, but during the inference, we give a very detailed description, a very detailed prompt
-
01:49:54 to match perfectly with whatever we have trained, especially if the product is a very rare product,
-
01:50:01 this will help more significant. When you train a character, this is not that mandatory because
-
01:50:07 character knowledge, the person knowledge of the models are massive compared to the your
-
01:50:13 specific products or your specific styles. And you will see that it has generated some example
-
01:50:20 prompts. You see it defines double C logo and the text on the product. These two will
-
01:50:26 help significantly to generate product images accurately after training. And then you will
-
01:50:32 be able to generate amazing quality images like these ones that you can use for advertisement,
-
01:50:38 for demo. I mean, you can even see that it has this pipe accurately as well. This is a very,
-
01:50:46 very small detail. However, it is able to do that. So this is the way of training a product.
-
01:50:52 Thank you so much for watching. I recommend you to join our Discord channel. You can always message
-
01:50:58 me from there. You will see the Discord channel link at the top. I recommend you to go to our
-
01:51:03 GitHub. You will see a lot of information here, fork it, star it, watch it. You can
-
01:51:09 also sponsor me from here. When you go to our wiki, you will see all of our tutorials. You
-
01:51:15 see we have hundreds of tutorials. You can search the tutorials from here with control F. Also on
-
01:51:20 the main page, you will see some sorted way of tutorials. Let me show you. As you scroll down,
-
01:51:27 you will see starting from one to the latest ones going this way. Moreover,
-
01:51:32 we have Reddit. I recommend to join our Reddit. We are getting bigger and bigger, more visitors,
-
01:51:39 more people. Let's see some of the stats. You see 300k visits we have. We have members,
-
01:51:45 they are increasing. And you can follow me on my LinkedIn. This is my real LinkedIn profile. You
-
01:51:52 can follow me here. Furthermore, don't forget to subscribe our channel, also open bell,
-
01:51:57 the notifications. You can see our videos from here. You can search our videos. We are getting
-
01:52:03 hopefully bigger and bigger. I am also giving private lectures. Let's say you want to learn
-
01:52:09 one to one, you can message me. I am giving private lectures to both individuals or the
-
01:52:14 companies. Moreover, I am giving consultation to companies as well. So you can always message
-
01:52:20 me with replying to the video or from Discord or from LinkedIn, all of them should work. So
-
01:52:26 thank you so much for watching. Hopefully, see you in another amazing tutorial video.