SOTA Image PreProcessing Scripts For Stable Diffusion Training Auto Subject Crop and Face Focus
Full tutorial link > https://www.youtube.com/watch?v=Fbuyu35TkE4


One of the most important aspect of Stable Diffusion training is the preparation of training images. In this tutorial video I will show you how to fully automatically preprocess training images with perfect zoom, crop and resize. These scripts will hugely improve your training success and accuracy.
Scripts Download Link
https://www.patreon.com/posts/120352012
Massive and excellent quality classification / regularization preprocessed and raw images datasets for both man and woman
https://www.patreon.com/posts/massive-4k-woman-87700469
The scripts are utilizing Yolo V7 and Retina Face AI models. These are the very best state of the art AI models. Moreover they are very well coded. They will work super optimized and accurate.
With these scripts with 1 click you will preprocess all of your training images into the desired target resolution with very possible way and quality.
SECourses Discord To Get Full Support
https://discord.com/servers/software-engineering-courses-secourses-772774097734074388
My LinkedIn
https://www.linkedin.com/in/furkangozukara/
My Instagram
https://www.instagram.com/gozukarafurkan/
My Medium
Furkan Gözükarahttps://medium.com/@furkangozukara
My CivitAI
https://civitai.com/user/SECourses
00:00:00 Introduction to the very best training images preprocessing scripts for Stable Diffusion training
00:05:48 How to install and use auto cropper / zoom-in script - first stage
00:07:25 Which file to edit and set processing folder path for cropper script
00:07:52 How to add or remove new aspect ratios
00:10:18 Full cropping supported classes of Yolo V7
00:11:42 How to install and run image resizer / downscaler with face focus with Retina Face
00:12:51 How to edit and run resizer script for perfect downscale and preparation of training images
00:14:37 Comparison of raw images vs final processed images
-
00:00:00 So let's say you are going to do Stable Diffusion training.
-
00:00:03 You have images like this.
-
00:00:04 It is over 45 megapixels.
-
00:00:07 If you depend on the training scripts to pre-process your images, you will end up using this image
-
00:00:13 during the training.
-
00:00:14 However, if you use my 2 state-of-the-art (SOTA) scripts that I am going to share and
-
00:00:20 explain in this tutorial video, you will be using this image fully automatically.
-
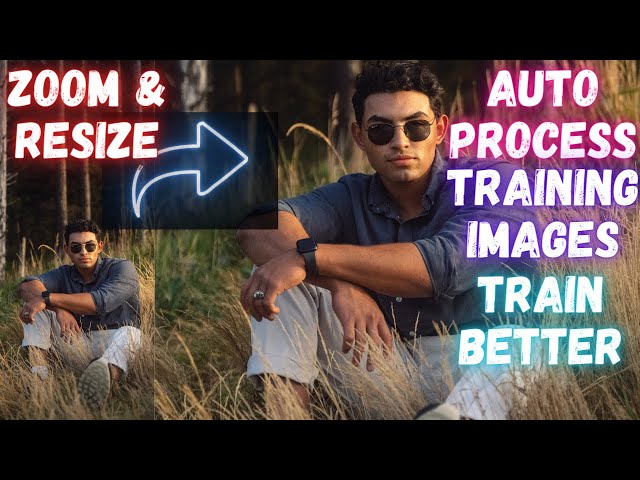
00:00:25 So this raw image, you see this huge raw image will be turned into this 1024 to 1024 image
-
00:00:33 from this 45 megapixels image instead of this very, very bad aspect ratio having image.
-
00:00:42 So you shouldn't depend on the training scripts.
-
00:00:45 You should pre-process images yourself.
-
00:00:47 And in this tutorial video with the provided scripts, you will be able to generate any
-
00:00:53 aspect ratio, any resolution fully automatically with the best, very best possible resolution
-
00:01:00 as you are seeing right now.
-
00:01:01 Greetings everyone.
-
00:01:02 In this video, I am going to show you the very best subject cropper and face-focused
-
00:01:08 image resizer scripts.
-
00:01:09 You may wonder what are these for?
-
00:01:12 If you are doing Stable Diffusion training, these 2 scripts will make your life much easier.
-
00:01:17 They will make your job much easier.
-
00:01:20 Because when we are doing training, we should focus on the person, on the subject.
-
00:01:25 If your image is like this, let me show you.
-
00:01:28 You really need to focus this person, not the environment.
-
00:01:32 And instead of doing this manually, I have prepared the very amazing scripts for that.
-
00:01:38 What I mean by that, let me show you.
-
00:01:40 For example, let's say you want to focus this person with 1 to 1 aspect ratio.
-
00:01:46 So let's enter inside our desired aspect ratio.
-
00:01:50 And this is the focused image.
-
00:01:52 As you are seeing right now we focused this person as much as possible with 1 to 1 ratio.
-
00:01:58 And it is exactly 1 to 1 ratio.
-
00:02:01 Or let's say you want to focus this person face with 1 to 1 ratio.
-
00:02:05 And let's look at it.
-
00:02:07 This is the focused image.
-
00:02:09 Unfortunately, this image can't be focused 1 to 1 because the script will not crop the
-
00:02:15 body parts of the person.
-
00:02:17 So what we are going to do is: we are going to use Retina Face using very best quality
-
00:02:23 image resizer script.
-
00:02:25 So after we focus on face and resize this script, let's see the final output.
-
00:02:30 This is the final output.
-
00:02:32 You see the script cropped it properly and resized it to 512 to 512.
-
00:02:38 Or let's look at this image.
-
00:02:40 These images are huge images from my classification, regularization images data set that I have
-
00:02:45 shared on the Patreon.
-
00:02:47 For example, this image is 45 megapixels, 5000 to 9000 pixels.
-
00:02:53 And my script will crop this image for any aspect ratio you want fully automatically.
-
00:02:57 For example, let's look at this aspect ratio.
-
00:02:59 These are aspect ratios, not the resolutions, but to make it easier, I am writing like this.
-
00:03:04 Let's look at this aspect ratio.
-
00:03:06 You see, the image is fully cropped like this, and then we use the resizer script and let's
-
00:03:11 see the final image.
-
00:03:13 You see, it is perfectly resized to 1280 to 1536, the desired resolution we wanted.
-
00:03:21 And the best part of these scripts are they are generating their own virtual environment.
-
00:03:27 So they will not conflict with your other installations.
-
00:03:32 They are going to have their own virtual environment, both the auto cropper and the resizer script.
-
00:03:38 Now I will show you how to download and use them.
-
00:03:41 But before that, let's say you have thousands of images.
-
00:03:45 So this script will help you significantly.
-
00:03:48 For example, let me show you I have processed thousands of images as you are seeing right
-
00:03:54 now.
-
00:03:55 This is how I am preparing my classification, regularization images that I have shared on
-
00:04:00 the Patreon post.
-
00:04:01 These scripts will make your life much easier.
-
00:04:04 And before I show you how to install and use these scripts, there is one more thing.
-
00:04:08 I have added a new feature to this script with today's update.
-
00:04:12 You see now it will also save images like this if you wish.
-
00:04:17 So it will save with the items it classified.
-
00:04:20 For example, it classified this as a baseball bat, this is not accurate.
-
00:04:24 But you see, this is the person it classified.
-
00:04:27 Let's open another one here.
-
00:04:29 Person is classified.
-
00:04:30 OK, let's open another one here.
-
00:04:32 The person is classified like this with 97 confidence.
-
00:04:36 And there is also truck and car.
-
00:04:39 The truck is not much having the confidence, but it says that this is 80 percent car.
-
00:04:44 And yes, it is accurate.
-
00:04:45 You see, it also classified this as a car.
-
00:04:48 So with the new advanced version of the script, now you can also see which items are being
-
00:04:54 classified in each image.
-
00:04:56 For example, potted plants with 27 confidence.
-
00:05:00 It is classified potted plant here also.
-
00:05:03 Here a vase, you see, and here a TV.
-
00:05:06 It is classified as a TV.
-
00:05:08 Here a person, a potted plant.
-
00:05:10 So this is the power of YOLO.
-
00:05:12 With YOLO version 7, we are able to very accurately classify persons.
-
00:05:18 You see, the person is classified like this and it is fully accurate.
-
00:05:22 This is how we are zooming in person with the desired aspect ratio.
-
00:05:26 Then with using the Retina Face using resizer script, we focus on face and then we resize
-
00:05:34 it to the exact resolution that we want.
-
00:05:37 Everything is fully automatically working.
-
00:05:38 They are all saved in the folders that you will define.
-
00:05:42 And they are just one click to do.
-
00:05:44 For example, these are all the resized images.
-
00:05:47 So how are you going to use these scripts?
-
00:05:50 First of all, you should run the cropper script, which will focus on the person with the maximum
-
00:05:57 resolution and the desired aspect ratio.
-
00:05:59 Then you should use the resizer script.
-
00:06:02 So click here to download most up to date cropper script.
-
00:06:05 You should download updated version because I just updated it today.
-
00:06:09 Then move into the folder where you want to install.
-
00:06:12 Let's install it inside my G drive and let's say video example, right click and extract
-
00:06:18 it.
-
00:06:19 This is a zip file so you can directly extract it on Windows.
-
00:06:22 Then just double click install.bat file.
-
00:06:25 It will generate a virtual environment and install everything automatically for you.
-
00:06:29 For this script to work, you need to have git installed.
-
00:06:33 You see when I type git, I have git and you need to have Python installed.
-
00:06:36 And when I type Python, you see my Python version is 3.10.11.
-
00:06:41 I also suggest you to use this version.
-
00:06:44 This is working perfectly fine with Large Language Models (LLMs) with Stable Diffusion,
-
00:06:49 Automatic1111 Web UI, with ComfyUI or whatever the AI application that may come to your mind.
-
00:06:56 This is the most supported version right now.
-
00:06:59 So I suggest you to also use this Python version.
-
00:07:02 The installation is a fully automated process.
-
00:07:05 You don't need to do anything.
-
00:07:06 Just patiently wait.
-
00:07:07 So the installation has been completed.
-
00:07:09 You see it shows this message.
-
00:07:11 Press any key to continue.
-
00:07:13 Then let me show you how this is working.
-
00:07:15 So I'm going to delete these 2 folders.
-
00:07:17 Test2 will be my main folder from here.
-
00:07:21 Let's go back to our installation, which is video example.
-
00:07:25 All you need to do is edit this cropper_v7.py file.
-
00:07:29 I will use Notepad++.
-
00:07:31 So this is the file.
-
00:07:32 You need to set input folder.
-
00:07:34 This is the folder where your images are located that you want to auto zoom, auto crop.
-
00:07:39 So this is test2.
-
00:07:41 Output folder.
-
00:07:42 Lets output into the new_cropped and Yolo detected folder.
-
00:07:45 I will make it like this Yolo detected.
-
00:07:48 And do you want to save Yolo detected folder?
-
00:07:50 Let's make it true.
-
00:07:52 One another thing is that this is the array where you define your aspect ratios.
-
00:07:57 Let's add a new aspect ratio.
-
00:07:59 So put a comma.
-
00:08:01 Enter brackets like this.
-
00:08:03 So let's make 768 to 1368.
-
00:08:07 And let's add another one like this, 1368 to 768.
-
00:08:12 So we added a new aspect ratio.
-
00:08:15 You can also delete other ones.
-
00:08:18 These are aspect ratios, not resolutions.
-
00:08:20 So it will try to zoom in, cropping your images with obeying this aspect ratio with maximum
-
00:08:27 resolution.
-
00:08:28 Then we will use the downscaler resizer for this.
-
00:08:32 Then all you need to do is just double click run.bat file.
-
00:08:35 It will activate the virtual environment and it will start auto cropping them.
-
00:08:40 This is a hugely, hugely optimized script.
-
00:08:44 It is working very, very fast.
-
00:08:46 It is using also your GPU.
-
00:08:48 So it is starting to cropping.
-
00:08:51 By the way you can also define number of threads in the script.
-
00:08:54 It is there, but I don't suggest.
-
00:08:56 The 1 thread is already working very good.
-
00:08:59 So we can see the Yolo detected images.
-
00:09:03 When we open this image, we will see that it detected donut.
-
00:09:07 It is not very accurate, but it detected person with this confidence as you are seeing right
-
00:09:12 now.
-
00:09:13 It is extremely well detection.
-
00:09:15 It also detected bench and it detected bench.
-
00:09:19 Yes.
-
00:09:20 So these are the detections.
-
00:09:21 So these are the cropped images.
-
00:09:24 Let's look at the 768 to 1368.
-
00:09:27 This aspect ratio is a very rare aspect ratio.
-
00:09:30 For example, let's look at this image and let's resize the 768 and you see it was perfectly
-
00:09:36 cropped.
-
00:09:37 Why?
-
00:09:38 Because this was the raw image and the cropper script were able to perfectly zoom the person
-
00:09:44 in with full resolution.
-
00:09:46 So the original resolution is right now 2886 to 5142.
-
00:09:53 With the resizer script, we will be perfectly able to get 768 to 1368.
-
00:09:59 However, this will not work with all of the images.
-
00:10:02 For example, let's look at this image.
-
00:10:05 This image is not perfectly cropped.
-
00:10:07 Why?
-
00:10:08 Because the script will not crop to human body parts.
-
00:10:11 It will only crop image without cropping the body parts the human in this case.
-
00:10:16 It also supports other classes.
-
00:10:18 You can see the full supported classes here as you are seeing right now.
-
00:10:21 So the original image of this one, let's open it too was this.
-
00:10:26 From this image, it tried to obey our desired aspect ratio without cropping the body part
-
00:10:32 and it turned out to be this image.
-
00:10:34 When we look at the opposite aspect ratio, 1368 to 768, let's look how it was cropped.
-
00:10:42 Let's open this so it was 1368 to 971.
-
00:10:47 This is still not perfectly croppable, but when we apply the resizer, we will see that
-
00:10:52 it will also crop the body parts and will make the perfect sized image for us.
-
00:10:58 In most cases it will work.
-
00:11:00 For example, let's look at the 1 to 1 aspect ratio.
-
00:11:04 Let's open, for example, this image.
-
00:11:05 And for example, let's make it 1024.
-
00:11:07 It is almost perfect, not perfect.
-
00:11:10 Or let's look at this image 1024.
-
00:11:12 It is perfectly cropped 1 to 1.
-
00:11:15 Let's look at this image.
-
00:11:16 It is also perfectly cropped 1 to 1.
-
00:11:19 Let's also open the original image of this image.
-
00:11:21 So you will see how much time it is saving.
-
00:11:24 So you see this person was fully zoomed in as much as possible with the best aspect ratio.
-
00:11:31 Let's look at the another aspect ratio of this image, for example, 768 to 1024.
-
00:11:38 You see, it is perfectly cropped.
-
00:11:40 OK, so how are we going to use the resizer to make them perfect sizes?
-
00:11:46 Most of the training scripts are already downscaling them, but they will not be perfect as this
-
00:11:52 script.
-
00:11:53 Because this script is using Retina Face to focus on faces.
-
00:11:57 It is many, many times better than, for example, the integrated downscaler resizer script of
-
00:12:02 the Automatic1111 Web UI.
-
00:12:04 So click here to download it.
-
00:12:06 By the way you can also see them in the attachments.
-
00:12:09 So downloading from here is actually better.
-
00:12:13 Then move into another folder where we want to install.
-
00:12:16 Let's install it inside resize video.
-
00:12:19 OK, here extracted as usual.
-
00:12:22 This will also make its own virtual environment.
-
00:12:25 Double click install.bat file and it will install everything automatically for us.
-
00:12:29 The installation has been completed.
-
00:12:31 You see it says press any key to continue.
-
00:12:33 Then we will give the new cropped folder because these are the cropped folders.
-
00:12:39 So copy the path of it.
-
00:12:41 So you see for copying the path, I just move my mouse here and control C. Then let's enter
-
00:12:46 inside the script we installed.
-
00:12:49 All you need to do is edit resizer_v3.py file.
-
00:12:53 I am using Notepad++.
-
00:12:55 Here we are giving each folder and the desired resolution.
-
00:13:00 So since these are aspect ratios, you can give any resolution that is matching with
-
00:13:05 that aspect ratio.
-
00:13:06 So let's change all these folders.
-
00:13:09 I will do replace and I will replace them like this.
-
00:13:13 Replace all.
-
00:13:14 All the folder paths are changed to my new folder path.
-
00:13:17 The resolutions are staying.
-
00:13:19 Let's also add the new resolutions.
-
00:13:21 So let's copy paste this and paste this and the new resolutions are 768 to 1368.
-
00:13:28 1368 to 768 like this.
-
00:13:32 We also need to change this part to that like this.
-
00:13:36 This can be made automated possibly, but you know, this way it is better.
-
00:13:40 OK, we added the new aspect ratio, new resolution as well.
-
00:13:44 And where you want output folder, you can define any output folder.
-
00:13:48 Let's define the output folder like this test2 fixed faces.
-
00:13:53 This will use Retina Face.
-
00:13:54 You can also define number of threads.
-
00:13:56 If you have a lot cores you can increase number of threads.
-
00:14:00 Let's make this 4 for example.
-
00:14:02 It is fully supporting multithreading and this is working on CPU right now.
-
00:14:07 It is using Retina Face, the very best face recognizing library.
-
00:14:12 So then all you need to do is just run.bat file.
-
00:14:16 It will start the resize process.
-
00:14:18 The resize process may be a slow if you run it with only single thread.
-
00:14:22 But as I said, it is fully supporting multithreading.
-
00:14:25 So you see, it is starting to process.
-
00:14:28 Currently it will first process all of the images with 512 to 512.
-
00:14:34 Let's look at the fixed faces and see.
-
00:14:37 You see, all of the images are now resized to 512 to 512.
-
00:14:42 Let's open this and this is the image.
-
00:14:44 So from which raw image we got this.
-
00:14:47 Let's open the raw version of this image to compare.
-
00:14:50 Actually, I will make a new canva to show you.
-
00:14:53 OK, so this is our 512 and this was the original image.
-
00:14:58 Let's open it.
-
00:14:59 The original image was so big.
-
00:15:01 Yes, still so big.
-
00:15:02 So let's make this like also, 512.
-
00:15:04 Actually, this is a better way to compare.
-
00:15:07 So you see, if you had used it as it is, you will be doing training on this image.
-
00:15:12 However, with my auto cropping and auto resizer script, you will do the training on this image.
-
00:15:17 You see the huge difference.
-
00:15:19 Instead of training on this image, we are training on this image with fully automatically
-
00:15:24 2 step processing and the difference will be huge.
-
00:15:28 Difference will be huge.
-
00:15:29 Let's also make comparison for also this image.
-
00:15:32 So this image would become like this 512.
-
00:15:35 OK, let's open a bigger canva, for example.
-
00:15:39 OK, like this.
-
00:15:40 And let's also open the 512 version.
-
00:15:43 So this is the 512 version and here the difference.
-
00:15:47 So you see, instead of training with this version of the image, if you had depended
-
00:15:52 on the training script that you use, you will be training with this image.
-
00:15:58 Can you see the difference?
-
00:15:59 The difference is just humongous for 512.
-
00:16:03 Let's also compare for 1024.
-
00:16:05 So we got the 1024 faces.
-
00:16:08 OK, let's do the comparison for 1024.
-
00:16:11 So this is the 1024.
-
00:16:13 With 1024 it is looking better.
-
00:16:16 So this will be the 1024 image.
-
00:16:18 And let's look at the 1024 here.
-
00:16:21 And this will be the raw image if you had just used the raw image.
-
00:16:25 You see the humongous difference.
-
00:16:27 This is why my scripts are extremely important.
-
00:16:33 Instead of training with this image, we will do the training with this image.
-
00:16:36 And this is how you use it.
-
00:16:38 Message me on Patreon.
-
00:16:40 Message me from Discord.
-
00:16:41 Hopefully I will help you.
-
00:16:42 If the scripts get broken, I will update them, fix them.
-
00:16:45 And I am constantly working on scripts to upgrade them.
-
00:16:49 The links will be in the description of the video and also in the comment section of the
-
00:16:53 video.
-
00:16:54 Hopefully see you later in another amazing tutorial and script video.