Qwen Image Models Realism is Now Next Level and Tutorial for Object Removal Inpainting and Outpainting
Full tutorial link > https://www.youtube.com/watch?v=XWzZ2wnzNuQ


In this tutorial, I’ll show you how to take your Qwen image generations to the next level of realism using our one‑click installers and presets. I’ll also walk you through simple, effective inpainting and outpainting with the popular SwarmUI, which uses ComfyUI as its backend and supports nearly all major generative AI image and video models. Finally, I’ll demonstrate how to remove unwanted objects or image elements using the FLUX Fill Dev model in SwarmUI, so you can fix flawed images quickly and effortlessly.
My Custom SwarmUI Installer, Model Auto Downloader & Presets Pack
[➡️ https://www.patreon.com/posts/SwarmUI-Installer-Presets-Model-Downloader-114517862 ]
SwarmUI Install & How To Use Tutorial
[➡️ https://youtu.be/c3gEoAyL2IE ]
Qwen Image Models Full Training Tutorial
[➡️ https://youtu.be/DPX3eBTuO_Y ]
Levo Song Generator Premium App
[➡️ https://www.patreon.com/posts/secourses-levo-i-135592123 ]
Video Chapters
00:00:00 Introduction to Three New Presets
00:00:18 'High Realism' Preset: First Before & After Comparison
00:00:31 Adjusting LoRA Weight for More Realism
00:01:04 Applying Realism to Complex & 'Hard' Prompts
00:01:54 How the Realism Workflow Was Developed
00:02:10 Important Note: Images are from Grids, Not Cherry-Picked
00:02:37 Using the 'High Realism' Preset on the Base Qwen Model
00:03:22 Preview: Fast & High-Quality Inpainting Demonstration
00:03:48 Preview: Massive Image Outpainting Workflow
00:04:24 Preview: Using Inpainting to Remove Unwanted Text
00:04:49 Introducing the 'Ultra Realism' Preset for Realistic Prompts
00:05:02 'Ultra Realism' Trade-off: Losing Fantasy Prompt Capability
00:05:30 Best Use Case for the 'Ultra Realism' Preset
00:06:06 How to Update SwarmUI with the Latest Files
00:06:24 Links to Previous Installation & Training Tutorials
00:07:08 Running the Model Downloader Script
00:07:20 Locating the New Realism LoRAs & FLUX Fill Model
00:08:18 How to Import New Presets (Automatic & Manual Methods)
00:09:04 Practical Demo: Applying the 'High Realism' Preset
00:10:02 Pro Tip: Generate Multiple Images Before Upscaling
00:10:23 Adjusting LoRA Strength & Comparing with 'Ultra Realism'
00:11:42 Inpainting Setup: Loading an Image & Applying a Preset
00:12:18 Adjusting the Canvas & Resolution for Inpainting
00:12:58 Masking the Face for Inpainting
00:13:13 Applying the Inpainting Preset & Adjusting Step Count
00:14:32 Generating Multiple Inpainted Versions to Find the Best
00:15:04 How to Merge the Inpainted Result into the Full Image
00:16:05 Troubleshooting: Inpainting Without 'Mask Shrink Grow'
00:17:03 Fine-Tuning Inpainting with Mask Blur & Creativity
00:18:13 Advanced: Inpainting with the FLUX Model
00:19:55 Pro Tip: Use Precise Masking to Avoid Color Issues
00:21:48 Outpainting Setup: Using the FLUX Fill Model Preset
00:22:34 Outpainting Strategy: Using Smaller Steps for Better Results
00:23:44 Merging the Outpainted Area & Continuing the Expansion
00:24:31 Outpainting on Larger Resolution Images
00:25:31 Advanced: Expanding the Image from Both Sides
00:26:19 Expanding the Image from All Four Sides at Once
00:27:15 Inpainting Use Case: Setting Up to Remove Text
00:28:00 Masking the Text & Configuring Inpainting Settings
00:29:22 Applying the Fix & Merging the Final Image
00:30:25 Bonus Teaser: New Levo Song Generation Model v7
00:31:02 Live Demo: Generating a Full Song Locally
00:32:15 Listening to the AI-Generated Song
00:33:11 Final Words & Future Tutorials
Unlock INSANE Realism in AI Images! (New SwarmUI Presets & Inpainting Workflow)
Tired of your AI images looking fake? This tutorial will completely transform your Qwen model results and give you god-tier control over your creations. I'm revealing three game-changing presets for SwarmUI that will unlock a new level of photorealism and give you powerful editing tools you've been waiting for.
In this in-depth guide, you'll learn how to take your AI art from "good" to "unbelievably real" with my brand new workflows. We'll cover everything from subtle realism enhancements to jaw-dropping image repairs and expansions.
WHAT YOU WILL MASTER IN THIS VIDEO:
Hyper Realism Presets: Learn to use my new 'High Realism' and 'Ultra Realism' LoRA presets to make your images stunningly lifelike without losing prompt complexity.
Flawless Inpainting: Fix faces, correct errors, and seamlessly remove any unwanted objects (like annoying text!) from your images with incredible speed and precision using the FLUX model.
Massive Outpainting: I'll show you my updated workflow to expand your images in any direction, turning a simple portrait into a massive, breathtaking scene.
Step-by-Step Workflow: No steps are skipped! I'll guide you through updating SwarmUI, downloading the new models, and applying each preset for perfect results.
This isn't just about making pretty pictures; it's about giving you the professional tools to perfect every single pixel. Stop settling for mediocre AI art and start creating masterpieces.
-
00:00:00 Greetings everyone. Today I am going to show you three new presets that I have prepared. The first
-
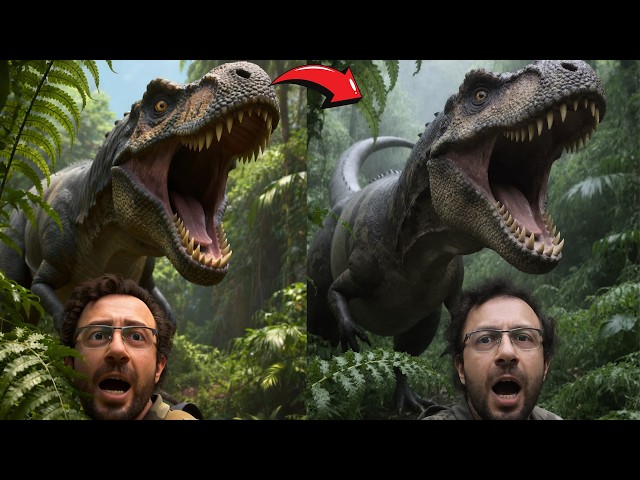
00:00:05 one is increasing the realism of Qwen image models. If you remember, this was the result
-
00:00:12 that we were getting after training our model. Now with this preset, we are going to get this result.
-
00:00:18 When you look at the images, you can see how much it is increasing the realism without losing the
-
00:00:26 complexity and features of the prompt. You see, this is a very hard prompt, and if you need more
-
00:00:31 realism, you can even increase the new LoRA weight that we are going to use, a realism LoRA, and get
-
00:00:38 a more realistic image like this one. For example, this was the base image we were getting. Now with
-
00:00:43 the new LoRA, we are going to get this image. Here another case, base image, and with the new preset,
-
00:00:48 we get this. Another example, base image, with the new preset we are going to get this, and if we
-
00:00:54 increase further, we are going to get this. This is a good example, base image, with the new preset
-
00:00:59 we are going to get this image, and we can even further increase the realism like this. Remember,
-
00:01:04 these are all hard prompts, not a prompt that you generate a close shot of a face. From this base
-
00:01:10 image into this realistic image, or even further into this image. Another case, from this image
-
00:01:16 into this image or this image. Another case, from this image into this image or this image. You will
-
00:01:24 see that it is hugely improving the realism of the images. From this base image into this image or
-
00:01:31 this image, it will look much better. For example, from this image into this one. For example,
-
00:01:37 from this base image into this image. I mean, look at the realism that we are getting. From this into
-
00:01:42 this, this is a very, very realistic image. Or you can even further increase the realism like
-
00:01:48 this one. And pay attention, we are still keeping the image as it is. We are just increasing the
-
00:01:54 realism. This is really, really good. I did a huge amount of tests and experimentation
-
00:02:00 to come up with this workflow. With just the addition of a LoRA with the proper settings,
-
00:02:05 you are going to increase the realism. By the way, these are just grid images. These are not
-
00:02:10 cherry-picks. Therefore, these are not perfect, but understand that you are going to get a huge
-
00:02:14 realism boost with this workflow. Or from this image into this one, I mean look at the realism
-
00:02:20 that we are going to get or this one. Here another case from this one into this one or into this one.
-
00:02:26 Here another case from this image into this one or into this one. Or another case from this image
-
00:02:32 into this one or into this one. So you can get a huge amount of realism with our new preset.
-
00:02:37 This preset will not only work on trained models. This was the base generation of the Qwen model,
-
00:02:43 and with using this new preset, you can get up to this realism. I mean,
-
00:02:48 from this base image into this image, this is a huge boost of realism for this model. It is
-
00:02:55 not perfect, but Qwen can do very hard prompts very beautifully. So therefore,
-
00:03:00 this model has huge amount of potential with this realism LoRA that we are going to have. And this
-
00:03:05 LoRA doesn't only increase the realism of the fantastic prompts. This is like a studio shot,
-
00:03:12 and you can increase your studio shot realism like this case as well. Here another case,
-
00:03:17 this is a base image, and this is with the realism LoRA. And even further, you can get to this.
-
00:03:22 Another thing that I'm going to show you is how to do inpainting on massive images really
-
00:03:29 fast and really quickly. So we will just inpaint the head like, mask it like this,
-
00:03:35 and only that area will be generated by the model so easily, so well. You will see it. You see,
-
00:03:41 we will be improving our images significantly from this face to this face. I will show everything.
-
00:03:48 Furthermore, I am also going to show you how to outpaint images with an updated workflow that
-
00:03:55 works amazing. You see, this is a massive outpaint from this input image into this output image. It
-
00:04:03 is almost perfect. I will show even outpainting the entire image from all sides. You see from
-
00:04:10 1328 into 1536. We will be able to outpaint massively even big images at once like this.
-
00:04:18 So keep watching to learn all. Moreover, you will be able to fix only certain parts of the images,
-
00:04:24 like removing this annoying text. You see the text is gone fully. It is looking perfect. With
-
00:04:31 just inpainting this area of the image, it will be super fast, super accurate.
-
00:04:36 It is not going to change any other area of the image, just the masked area of the image
-
00:04:42 will be changed. So today, I will show both realism and inpainting in SwarmUI very easily.
-
00:04:49 And we have another preset, ultra realism. This preset will work only on realistic prompts. From
-
00:04:56 this image into this image. This preset will make the model to lose its fantastic prompt
-
00:05:02 capability. You see this is the base generation and this is the ultra-realistic generation. So
-
00:05:08 this will work good with realistic prompts. I mean, from this image into this image,
-
00:05:14 this is much more realistic, but it loses its fantastic prompt capability. For example,
-
00:05:18 from this image into this one, this is very, very realistic or this one. For example,
-
00:05:23 from this image into this one. So this ultra-realistic preset will work best
-
00:05:30 in case of when you want to generate something that exists in real life, something that you can
-
00:05:35 get in your real life. It will make it much more realistic. So if you are looking that,
-
00:05:41 losing the fantastic prompt capability but have very realistic images, you will like this. I mean
-
00:05:47 from this image into this one. This turns images into like real photos because this another LoRA
-
00:05:54 is trained for only real images. However, this is a choice. I mean from this to this, you see,
-
00:06:00 it will get a huge amount of realism from this into this. I will explain all these presets.
-
00:06:06 So first of all, download our latest SwarmUI model downloader and installer. The link
-
00:06:12 will be in the description of the video. Move the file into your existing SwarmUI,
-
00:06:17 extract files, and overwrite previous files like this. If you don't know how to install SwarmUI,
-
00:06:24 ComfyUI, how to train, all of them are explained in these tutorials video. You see this is the main
-
00:06:29 install tutorial video. This is install tutorial on cloud like MassedCompute or RunPod, and this is
-
00:06:35 our training tutorial. Let me show you each one of them. When you go to videos on our channel,
-
00:06:40 this is our Qwen image models training video. If you want to do train yourself or your product or
-
00:06:47 your style, this is the video that you need to watch. And this is the video that you need
-
00:06:51 to follow to learn how to install SwarmUI and ComfyUI and use SwarmUI with ComfyUI backend.
-
00:06:58 And this is the tutorial that explains how to install SwarmUI and ComfyUI on cloud machines
-
00:07:03 like RunPod or MassedCompute. Okay, now we have the newest files. First of all, start the Windows
-
00:07:08 start download models App.bat file. Run. First of all, if you want to have all the image models,
-
00:07:15 you can download the image generation and editing bundle. This will only download the new LoRAs.
-
00:07:20 Which one of them? The new LoRAs that we are going to use are these two LoRAs for realism. Moreover,
-
00:07:28 I have included the FLUX Dev Fill model which I'm going to show you how to use to edit existing
-
00:07:35 images very fast and very accurately. If you want to individually download them, go to image
-
00:07:40 generation models, go to Qwen image models, and you will see the Qwen LoRA amateur photo. This
-
00:07:46 makes huge changes, not the one that I prefer. And you will see Qwen LoRA skin fix version 2.
-
00:07:54 This is the one that I prefer. I will show that. And for the Flux fill model, it is inside Flux
-
00:07:59 models and you will see FLUX Dev Fill model. This is for fixing images like removing text from the
-
00:08:05 certain part of the image. Once you downloaded the models by clicking on them, update your SwarmUI.
-
00:08:12 For updating SwarmUI, I will run this, Windows update SwarmUI. Always have updated SwarmUI.
-
00:08:18 Once the SwarmUI started, we need to get the new presets. So there are two ways of getting
-
00:08:24 new presets. You can use the Windows preset delete import. This is automatic way. For this to work,
-
00:08:31 you need to have SwarmUI running. So click yes, it will back up your existing presets and it will
-
00:08:37 import new presets. The manual way of importing new presets is import presets, choose file, select
-
00:08:44 the latest preset file version 31, overwrite existing presets and import, and this will update
-
00:08:50 your presets. Then click refresh, sort by name, and you are ready to use our newest presets. So
-
00:08:58 for example, let's make an example of this image, how to make it more realistic. First of all,
-
00:09:04 as I have shown in previous videos, reset params to default. Then go to presets, refresh, sort by
-
00:09:11 name, and select this preset, Qwen Image UHD High Realism. This is the preset that I prefer. Direct
-
00:09:18 apply. You will see that it has selected Qwen LoRA skin fix version 2. Now this is set as 0.6
-
00:09:26 for your self-trained models, but if you want to use the base Qwen image FP8 scaled, increase this
-
00:09:33 up to 1.2, 1.1, 1.2, it really works well. But for my own trained models, I prefer 0.6. Then
-
00:09:43 type your prompt, select your trained model if you are using it on a trained model. For example,
-
00:09:49 I'm going to use my Qwen fine-tuned base model FP8 scaled. All of these explained in the training
-
00:09:55 tutorial. I will select my aspect ratio. Then I am ready. I will just hit generate. As I have shown
-
00:10:02 in previous tutorial, it is recommended to disable upscale, generate multiple images, pick the best
-
00:10:09 one you like, then enable upscale with that seed, but I'm not going to show it again. So let's see
-
00:10:15 our result with this realism LoRA. And we got our image ready. Let's say this is too much changes,
-
00:10:23 you can reduce this or this is not real enough, you can increase this. So if you want to test
-
00:10:28 with other presets as well, you can copy this seed into here, just close these two LoRAs,
-
00:10:35 go back to presets, and apply this one. Direct apply. It will select the accurate LoRAs,
-
00:10:41 but you will see that it has changed the base model. Therefore, I'm going to switch back to
-
00:10:47 my used base model like this and generate and let's see the difference. So this LoRA is very
-
00:10:53 powerful. Therefore, you can reduce this to 0.4. It really works better that case. However, if you
-
00:11:00 are generating a very realistic image, then 0.6 is working very good. So this LoRA is very overfit,
-
00:11:09 overtrained for amateur photographs, for making them more realistic. It's a choice whichever you
-
00:11:16 want, you can use, but this is how you change the LoRA strength, the LoRA weight from here.
-
00:11:22 So try different strengths, different weights, and see which one is working best for you. And
-
00:11:27 this is the ultra realism preset result. So this was my favorite preset for realism with keeping
-
00:11:34 the fantastic prompt capability of the model, and this is the ultra realism result. It is up to you.
-
00:11:42 So how you can inpaint an existing image with your trained model? The logic is same for non-trained
-
00:11:50 model as well. So first of all, load your image and click edit image. Then apply the
-
00:11:56 preset that you have used or you have. I'm going to use this realism preset that we just made,
-
00:12:01 and I'm going to select my trained base model, Qwen image base model. Then you see currently
-
00:12:08 this image is massive, 3488 to 1984. The model is not able to inpaint or generate this image
-
00:12:18 directly. This was an upscaled image. Therefore, I'm going to change this to one-to-one square.
-
00:12:23 Now you will see that my working canvas is only this yellow area. So I am able to
-
00:12:30 only make changes on this area. So the first thing that I need to do is select my image,
-
00:12:36 click this move like this, and make sure that the area that I want to make changes is inside
-
00:12:43 this yellow part and there are no transparent pixels. This is important. Make sure that there
-
00:12:49 are no transparent pixels. And I recommend you to delete this empty layer. Okay, like this. Now
-
00:12:58 select mask and select paint brush and increase radius. You can also use control. So I'm going
-
00:13:05 to inpaint the entire face like this. And turn off the refine upscale. Okay, are we ready? Not
-
00:13:13 yet. So you will see that currently these are my init image settings. I'm going to go presets and
-
00:13:19 I am going to apply the inpainting preset. Direct apply, and it will set the accurate settings. It
-
00:13:26 is going to use mask shrink grow. What this does is it is going to use this full resolution 1328 to
-
00:13:33 1328 only on this masked area, not this entire yellow canvas. So it is only going to use this
-
00:13:41 part. And then there is one more thing. So with Qwen, we are doing four steps by using the Qwen
-
00:13:48 image edit lightning LoRA. Therefore, if I run my generation right now, it will only do two steps.
-
00:13:56 Why? Because my step count is 4 and my init image creativity is 0.6. So when you multiply 0.6 with
-
00:14:03 4, it is going to do 2.4 steps, which is ceiled to two. Therefore, I need to set this into 7. With
-
00:14:12 Flux, you need to make recalculations. This is how the number of steps works, but usually Flux preset
-
00:14:18 is working, I will show. So the prompt will be ohwx man and generate. Now this generation will be
-
00:14:25 ultra fast. Why? Because it is only 1328 to 1328 with only four steps. So one advantage is that I
-
00:14:32 can generate multiple images like this, and I can pick the best one. So you see this is the preview.
-
00:14:38 Okay, this is the first generation. If I like this, I can use this. You can generate multiple
-
00:14:43 ones because this will be so fast. It is taking like 15 seconds. Okay, this is another one. Okay,
-
00:14:50 here. So generate as many as you want with seed -1. Each generation will be different. Then look
-
00:14:57 at the results. Okay, let's see. Let's say I liked this one and I want to use this one. So,
-
00:15:04 are we done? No, we need to merge this generated image into our image. So drag and drop it into
-
00:15:10 here. You will see that there is now another image in our working space. And before saving
-
00:15:17 this image, delete this layer as well. So there should be only two images like this. Go to this
-
00:15:24 three dots icon and store full canvas to history. And then you will see that you got the new image.
-
00:15:31 So let's compare these two images. Okay, now we have a comparison. So this was our base image and
-
00:15:38 this is our inpainted image. From this image into this image. This image into this image. We have
-
00:15:46 significantly improved the quality of the face like this as you are seeing. From this to this,
-
00:15:53 this to this. So there is another thing that you can do. If you find that this has changed
-
00:15:58 the color or other thing, even though you have made a lot of generations, what you can do is you
-
00:16:05 can disable the mask shrink grow. So let's reverse our changes. Okay, the reverse is not working, so
-
00:16:13 therefore we need to start from beginning. So drag and drop our image, edit image, and again, we will
-
00:16:20 select the one-to-one square, select this base image, move it like this, select the mask. Make
-
00:16:27 sure to select mask, paint brush, select wherever the area you want. Then okay, it is set. I am
-
00:16:34 going to disable this mask shrink grow to show you its effect. So now instead of only focusing on the
-
00:16:42 face part, it will draw the entire image but only change the face part. This is another option that
-
00:16:48 you can do. Whichever works better for you, you can use it. So make a comparison and see which
-
00:16:55 one is you are liking more. Furthermore, what you can do is you can change this mask blur. Sometimes
-
00:17:03 more blur can help or sometimes lesser can help like this. So these are the options that you can
-
00:17:10 do. Of course, you can change image creativity as well. So if I make this 50%, like this, then to
-
00:17:18 do four steps, I need to make step count 8 because 8 multiplied with 0.5 is four steps and generate.
-
00:17:26 So this way, I can make multiple generations, multiple fixes and pick the best one that I like.
-
00:17:34 For example, this one, another generation. By the way, when you look at it from far away like this,
-
00:17:40 you won't notice the color difference. It will look pretty, pretty good, like this one. Okay,
-
00:17:46 so which one of them I like most? Let's say I like this one most. This is looking pretty good
-
00:17:52 one. Again, I will drag and drop it here. Then I will delete this layer and I will
-
00:17:56 delete this layer. Then I will go three dots, store full canvas to history. Alternatively,
-
00:18:02 you can download full canvas and both of them will work. So you can either download full canvas or
-
00:18:09 just store it. And you don't need a trained model to do this. You can do this with other models as
-
00:18:13 well. Let me demonstrate you. So let's refresh. Quick tools, reset params to default. Let's go to
-
00:18:19 presets and Flux dev models. Direct apply. Move my image, edit image. First, change the resolution,
-
00:18:27 one-to-one square. Then move the image, select the image, move it like this one. Then mask the area
-
00:18:35 that you want. So select mask, paint brush. I'm using control button. Okay, I masked it. And this
-
00:18:42 time, it is a Flux preset, so I will just say that photo of a man and I'm going to increase the image
-
00:18:48 creativity because I want to change it into a different man like this and generate. So this way,
-
00:18:54 I'm going to use Flux base model to change it. Actually, let's use the Flux SRPO model. This
-
00:19:01 is much more realistic. So I'm going to change it into Flux SRPO. Or I can even use my Flux
-
00:19:09 SRPO DreamBooth trained model. Let's see that too as well. I'm not sure what we are going to get.
-
00:19:16 And this is going to make 40 multiplied with 0.95 times steps. Always calculate the number
-
00:19:24 of steps if you are using lightning LoRAs that requires certain number of steps, you have to pay
-
00:19:29 attention to that. Okay, it is changed into this. We can make this even 100% like this one. Let's
-
00:19:38 see what we are going to get. Okay. Yeah, when we make it 100%, it is losing its initial capability,
-
00:19:47 so we should make this like maybe 99%. Probably it wouldn't make a difference. So 95% is what we get
-
00:19:55 best. Therefore, we should try multiple times and I can notice that there is some color difference.
-
00:20:02 To make this color difference, we should make this zero. Okay, let's try again. We didn't apply
-
00:20:08 our preset. We have forgotten that. Let's apply our preset. Let's make this 95%. Okay. So with
-
00:20:16 inpainting, you have to make some tests. Sometimes this color difference can't be fully prevented,
-
00:20:22 unfortunately. This is what you need to test and this is how you inpaint. In most cases,
-
00:20:28 it won't be very noticeable, especially if it is not like this one. Okay, I can even make this
-
00:20:35 90%. So try mask blur 8. So keep trying until you get a good result. I am also going to use
-
00:20:43 my Flux DreamBooth model, Flux SRPO DreamBooth model, and let's see what we get. Maybe I will
-
00:20:49 try this 60%. The lesser init image creativity, it should make a lesser color difference. This has a
-
00:20:57 huge difference. So let's try 16 mask blur. I'm not sure you need to test. This is a bigger mask
-
00:21:03 blur. It also has some hard difference. This was very close. Okay, for example, this is inpainted
-
00:21:10 with Flux SRPO. It is not yet great. So if you don't want to get that annoying color difference,
-
00:21:18 what you can do is delete the mask, add a mask layer, and make a much more precise masking. So
-
00:21:25 if you make a much more precise masking and avoid masking unwanted areas, you will minimize your
-
00:21:34 color differences. This is probably more accurate way of inpainting, rather than masking the
-
00:21:41 entire thing, just mask the area that you want to inpaint, and you will get lesser color like this.
-
00:21:48 So for outpainting, let's refresh our page, reset params to default. We are going to use
-
00:21:54 outpainting preset. This preset is going to use Flux fill dev model. Outpainting is very
-
00:22:00 similar to inpainting. There are few tricks that you have to follow. So I will click edit image
-
00:22:06 after I loaded my image. So you see, this is my resolution. One of the most important thing is
-
00:22:12 the resolution. As close as it is 1 megapixel, it will work better. So for outpainting this image,
-
00:22:19 I am going to change my resolution to 1024 pixel. This is the best resolution. However,
-
00:22:26 it can do bigger outpaintings as well. Normally, you should do slower outpaintings. What I mean
-
00:22:34 by that, for example, you should first outpaint into this one, then increase it further. However,
-
00:22:41 let's try this one. This is a big one. So I will delete this mask and I will add another mask
-
00:22:46 layer and just paint brush like this. Then let's generate eight images with different seeds to pick
-
00:22:55 the best one. This is pretty fast depending on your resolution. Since this is 1 megapixel, it is
-
00:23:01 going to be fairly fast. You see the first image didn't work very well. Let's look at the newer
-
00:23:08 ones. If you also see a preview like this, you can just cancel that and move to the next one. That is
-
00:23:15 another alternative. Okay, you see the third one is going to work. If it doesn't work, then you
-
00:23:21 need to reduce your resolution and do smaller steps outpainting. This is the logic. Okay,
-
00:23:27 this one worked. So this is the image. So what is the smaller step? Let's outpaint into 1024 to 896
-
00:23:38 first. So if you do smaller steps, it will work much better. So you see, the first image is almost
-
00:23:44 perfect. And yes, it is done like this. Then what I need to do is I will select this image, drag and
-
00:23:51 drop it into here, and then delete this mask and this image layer and click this three dots icon,
-
00:23:57 store current image to history. Then I can click edit image and I can begin again. So I will
-
00:24:04 now expand it like this, and then just delete this mask, make a new mask and like this. You
-
00:24:12 don't need to fill it entirely and generate. Pay attention that I am not typing anything because it
-
00:24:17 is seeing this entire image and based on that, Flux fill dev model is outpainting it. This is
-
00:24:24 the logic of Flux fill dev model. And you see, now it will work much better. How about bigger images?
-
00:24:31 Can it do outpainting them as well? Let's try one of them. Okay, I will cancel this, remove this
-
00:24:37 image. Okay, for example, this is 1328 to 1328. This is bigger than the native resolution of the
-
00:24:46 Flux fill dev model. So first, try outpaint like this. Okay, first, let's delete the mask layer,
-
00:24:53 add a new mask so it will fit into here. Select mask, select paint brush, type like this and
-
00:24:59 generate. Since this is a bigger image, it is going to take longer to generate, but let's see
-
00:25:05 what can it do. Can it do this resolution? This is a pretty big resolution, almost 2 megapixel.
-
00:25:10 So far, it looks like it is handling it good. So this is the logic of outpainting. This way, I
-
00:25:16 can outpaint multiple times. Okay, it is done and looking perfect. Yes, no issues. So first, let's
-
00:25:24 apply this. Okay, let's delete this layer, delete this image layer, and store current image to
-
00:25:31 history. Then edit image. Now I will outpaint to the this part like this. Or you can outpaint even
-
00:25:39 further like this. How? Select image from here. While hitting shift key, move it to the right like
-
00:25:47 this. Okay. Then delete this mask layer, add a new mask layer, select paint brush, add mask like this
-
00:25:56 and hit generate. Now we will be expanding from both sides. We can even expand from all sides. It
-
00:26:04 is totally possible. I will show that too. And we are expanding it into a massive resolution. Okay,
-
00:26:11 let's cancel. Wow, looking pretty good, pretty good. So let's do another example. This time I am
-
00:26:19 going to expand from all sides. So let's make this bigger like this. You see? Then select the image,
-
00:26:28 move it with shift key like this so it will be more proportional. Then delete this mask layer,
-
00:26:35 add a mask layer, paint brush, just this. This is sufficient and hit generate. So now we will
-
00:26:42 be expanding from all sides. This way, you can outpaint your images with a really, really good
-
00:26:49 quality with our prepared outpainting preset. And as you do bigger resolution, it will take more
-
00:26:55 time, as you can assume, but it is working great. So far, the preview is looking good. This way,
-
00:27:02 I can outpaint entire image at once. And it is done. You see, even at the first try, I got a
-
00:27:09 very, very good result. This is the amazing result. So this is how you outpaint images.
-
00:27:15 Okay, last thing is removing something that we want to have in images. So let's refresh the
-
00:27:22 page. Quick tools, reset params to default. Go to presets, Flux dev models, direct apply. Then from
-
00:27:29 the models, select the Flux dev fill model. Load the image that you want to fix, make changes, edit
-
00:27:37 image. The first thing is setting the accurate resolution. So our working canvas is now this
-
00:27:43 yellow area. Select image, move. So move it into the position which one you want to fix. I am going
-
00:27:51 to remove this text. This is a noise in my image. Then I am going to select mask, paint brush,
-
00:28:00 select the area like this. Now, for this one, I am going to use init image creativity 1, and I am not
-
00:28:07 going to enable mask shrink grow because this way it works better. I'm not going to type any
-
00:28:14 prompt. Therefore, it will analyze entire image and it is going to only change this part. And
-
00:28:19 you can make the mask blur 1 or 4. You should try multiple. I think some cases 4 is working better,
-
00:28:27 some cases 1 is working better. As you reduce it, it is making more changes. This is what I
-
00:28:33 understand. For example, currently it is going to remove it. Yes. You see, it has removed the text.
-
00:28:40 This is not perfect, so I can try multiple times or I can play with the mask blur and see which
-
00:28:46 one will be perfect. Okay, second case doesn't look like it has removed. Yeah, the third case,
-
00:28:52 it looks like it is going to remove. So with each seed, it will make a different and when you don't
-
00:28:59 provide any prompt, it is supposed to make the changes according to the environment. Yes, this
-
00:29:06 is looking much better. And here another one we are going to get. You can also increase the mask
-
00:29:13 size like this and try because we want it to have more information. Okay, so currently these are my
-
00:29:22 init image settings, creativity 1 and mask blur 8, mask grow 0. I don't need mask grow. Okay, this is
-
00:29:31 looking much better for example. So I'm going to apply this. Drag and drop this image into here.
-
00:29:36 Delete the mask layer, delete this image. Why I am deleting that image? Because currently you see
-
00:29:42 this image has a canvas like this. So if I store full canvas to history, you will get an empty
-
00:29:50 space like this. You see? Because it is applying this canvas too. So either I have to move them
-
00:29:57 into the same place or I have to delete this, then I will store full canvas to history. And yes. So I
-
00:30:05 have only modified this part of the image, removed that noise text by using the Flux fill model.
-
00:30:12 This is the logic of working with inpainting in SwarmUI. As you do more practice, as you use it
-
00:30:19 more, you will get used to it. And hopefully, more tutorials are coming soon. For example, now we
-
00:30:25 have Levo song generation model version 7. Now we are supporting the newest full model. It is very,
-
00:30:34 very capable. It is able to generate up to 4.5 minute songs. I am still working it. It is not
-
00:30:42 fully done yet. So let me turn off my SwarmUI to make an example for you. This is another tutorials
-
00:30:49 topic, but why not seeing now? Okay. This is our interface. You see now we are supporting song
-
00:30:55 generation large, best quality. So let's generate a song live and let's see. This is the default
-
00:31:02 song that we have. This is running locally, so you are not bound to any other services,
-
00:31:07 online services. And recently, one of the famous AI music generation service stopped its working.
-
00:31:15 So this is the way of future, I say. And it is getting pretty good VRAM optimized. Hopefully,
-
00:31:22 I am going to also add FP8 scaled model loading and perhaps block swapping as well to this model,
-
00:31:30 but currently it is working really, really good. Okay, it is doing the diffusion
-
00:31:34 steps. You see it is only using 6 GB of VRAM while doing the diffusion steps. Then it is doing the
-
00:31:41 VAE decoding and first it has generated the audio tokens. It is super optimized,
-
00:31:47 but hopefully it will get even further optimized, and it is using minimal amount of VRAM right now.
-
00:31:53 The speed is very decent. For like a three minutes of song, it takes like three to four
-
00:31:58 minutes to generate. Maybe we will optimize this further. Okay, all segments generated.
-
00:32:04 File saved. Now let's listen our generated song. So you see it is 2 minutes 53 seconds.
-
00:32:19 I've been walking through the shadows of my mind. Searching for the words I couldn't find.
-
00:32:35 Every heartbeat echoes in the dark, waiting for a flame to light the spark. But I'm still breathing,
-
00:32:51 still believing that tomorrow brings a brand new start. I'm still fighting,
-
00:33:01 still surviving with the fire burning in my heart.
-
00:33:11 Yes, as you are seeing, it is pretty good. This is locally running on my computer. I
-
00:33:15 am still working it and hopefully it will become even better. But you can
-
00:33:19 already download it from our Patreon post and install and use it on your computer,
-
00:33:25 on RunPod, or on MassedCompute. Hopefully see you in another amazing tutorial video.