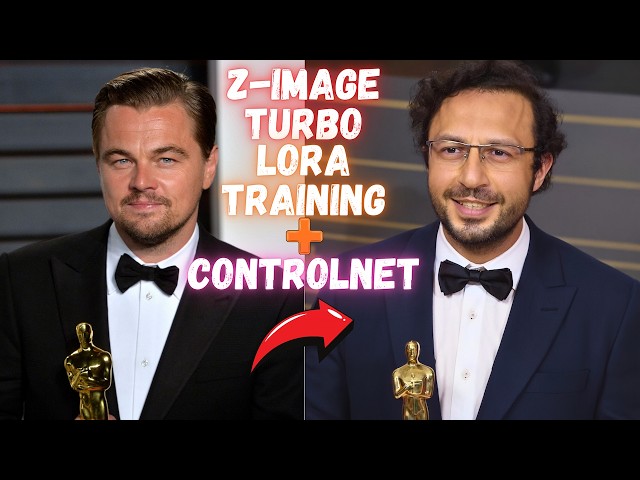
Z Image Turbo LoRA training with AI Toolkit and Z Image ControlNet Full Tutorial for Highest Quality
Z-Image Turbo LoRA training with AI Toolkit and Z-Image ControlNet Full Tutorial for Highest Quality
Full tutorial link > https://www.youtube.com/watch?v=ezD6QO14kRc


Z-Image Turbo LoRA training with Ostris AI Toolkit + Z-Image Turbo Fun Controlnet Union + 1-click to download and install the very best Z-Image Turbo presets. In this tutorial, I will explain how to setup Z-Image Turbo model properly in your local PC with SwarmUI and download models and use them with highest quality via ready presets. Moreover, I will show to install Z-Image Turbo Fun Controlnet Union to generate amazing quality images with ControlNet preprocessors. Furthermore, I will show how to 1-click install AI Toolkit from Ostris and train Z-Image Turbo model LoRAs with highest quality configs made for every GPU like 8 GB GPUs, 12 GB GPUs, 24 GB GPUs and so on. I did a massive research to prepare these Z-Image Turbo model training configurations.
👇 Links & Resources Mentioned:
Download SwarmUI & Models: [ https://www.patreon.com/posts/Download-SwarmUI-Models-114517862 ]
Ostris AI Toolkit (SECourses Version): [ https://www.patreon.com/posts/Ostris-AI-Toolkit-140089077 ]
Ultimate Batch Image Processing App: [ https://www.patreon.com/posts/Ultimate-Batch-Image-Processing-App-120352012 ]
SwarmUI with ComfyUI Backend Windows Tutorial: [ https://youtu.be/c3gEoAyL2IE ]
SwarmUI with ComfyUI Backend RunPod and Massed Compute Cloud Tutorial: [ https://youtu.be/bBxgtVD3ek4 ]
⏱️ Video Chapters:
00:00:00 Introduction to Z-Image Turbo Model
00:00:54 FP8 Scaled Version 5.7GB for Low VRAM
00:01:10 ControlNet Union with Z-Image Turbo
00:01:30 LoRA Training with Ostris AI Toolkit
00:02:00 Default vs Custom Training Preset Quality Comparison
00:03:00 RunPod Cloud Training Preview
00:03:40 MassedCompute Cloud Training Preview
00:04:16 Downloading Z-Image Models via SwarmUI
00:05:00 Z-Image Turbo Core Bundle & ControlNet Files
00:05:58 FP8 Scaled Model & Musubi Tuner Converter
00:07:13 Updating ComfyUI for Sage & Flash Attention
00:08:13 Updating SwarmUI & ControlNet Preprocessors
00:08:52 Updating & Importing Latest SwarmUI Presets
00:09:20 Generating with Quality 2 Fast Preset
00:10:48 Generating with Quality 1 Upscale Preset
00:11:35 Quality 1 vs Quality 2 Visual Comparison
00:12:13 Setting up ControlNet Input & Aspect Ratio
00:13:41 ControlNet Strength Settings & Canny Test
00:15:26 Using Depth Preprocessor with Z-Image
00:15:58 Coloring Lineart Drawings with ControlNet
00:16:58 Lineart Preprocessing Comparison
00:17:50 Ostris AI Toolkit Installation Prerequisites
00:19:12 Installing Ostris AI Toolkit on Windows
00:20:02 First Time UI Setup & Launching Interface
00:21:04 Loading Custom Training Configs
00:21:38 Creating a New Dataset Structure
00:22:24 Ultimate Batch Image Processing App Install
00:23:17 Dataset Prep Stage 1: Auto-Zooming with SAM2
00:26:08 Dataset Prep Stage 2: Resizing to Exact Resolution
00:28:12 How to Select Best Training Images
00:30:24 Importance of Emotions & Angles in Datasets
00:31:44 Z-Image Resolution & Aspect Ratio Rules
00:33:21 Configuring Training Parameters & Epochs
00:36:52 Resolution Impact on Training Speed
00:37:46 Starting the Training Job on Windows
00:38:39 Monitoring Training Progress & VRAM
00:39:43 Checkpoint Generation Settings
00:40:40 Resuming Training from Last Checkpoint
00:42:09 Training Speeds on RTX 5090 vs 4090 vs 3060
00:43:01 Training Quality: Default vs Custom Preset Comparison
00:44:21 Testing LoRAs with SwarmUI Grid Generator
00:46:04 Fixing ControlNet Error in Grid Generation
00:47:09 Comparing Generated LoRA Checkpoints
00:47:38 Using Trained LoRA with ControlNet Union
00:48:10 RunPod: GPU Selection & Template Setup
00:50:32 RunPod: Port 8675 Config & Initialization
00:51:36 RunPod: Uploading Installation Files
00:52:01 RunPod: One-Click Installation Command
00:54:07 RunPod: Starting AI Toolkit & Proxy Connection
00:54:38 RunPod: Uploading Dataset via Interface
00:55:32 RunPod: Starting the Training Job
00:56:24 RunPod: Speed & Cost Analysis
00:57:28 RunPod: Auto-Stop Command Setup
00:58:24 MassedCompute: GPU Selection & Coupon Code
01:00:16 MassedCompute: ThinLinc Client Setup
01:01:21 MassedCompute: Transferring Files to Shared Folder
01:02:55 MassedCompute: Installation Command
01:05:49 MassedCompute: Connecting via Public URL
01:06:54 MassedCompute: Starting Training Job
01:08:43 Downloading Checkpoints & Stopping Instance
🚀 Master Z-Image Turbo & LoRA Training: The Ultimate Guide!
In this comprehensive tutorial, I show you how to generate ultra-realistic images in seconds using the lightweight Z-Image Turbo model. We cover everything from 1-click installation on SwarmUI (ComfyUI backend) to mastering ControlNet Union for precise image control.
But that’s not all! I also reveal how to train your own high-quality Z-Image Turbo LoRAs using the Ostris AI Toolkit. I have developed a custom training preset that significantly outperforms the default settings—you have to see the comparison to believe it! Whether you are on a local PC, RunPod, or MassedCompute, this guide has you covered.
🔥 What You Will Learn:
Z-Image Turbo Setup: How to run this fast, 6GB model (FP8 included) on almost any GPU.
ControlNet Mastery: Use Canny, Depth, and Lineart to control your generations perfectly.
LoRA Training: Step-by-step guide
-
00:00:00 Greetings everyone. In this tutorial video, I will show you how to use Z-Image Turbo version.
-
00:00:06 It is a very fast, very lightweight model that you can generate amazing high-quality,
-
00:00:13 extremely realistic, or stylized images on your local PC. The model is as small as 6 GB with
-
00:00:22 maximum quality. And it will run on literally every GPU, and since it is a turbo model,
-
00:00:29 it only requires 9 steps. All these images were locally generated ultra-fast,
-
00:00:36 like 10 seconds generation time, and they are very high resolution as you are seeing right
-
00:00:41 now. I will explain all of these. And all of these images were generated in SwarmUI with
-
00:00:47 using the ComfyUI backend with our presets. 1 click to install, download, and use right away.
-
00:00:54 You probably didn't see before, but I have Z-Image Turbo FP8 scaled. This is 5.7 GB in size,
-
00:01:04 so it fits into all GPUs. But this is not all. Furthermore, I will show you how to
-
00:01:10 use ControlNet with Z-Image Turbo model. So you see, based on this input image,
-
00:01:21 these images were generated. I will show you how to use ControlNet with Z-Image Turbo model.
-
00:01:28 But we are not done yet. I will also show you how to train your Z-Image Turbo model LoRAs as
-
00:01:36 you are seeing right now. By using the AI Toolkit from Ostris, you will be able to
-
00:01:42 train amazing LoRAs even on a very low VRAM having very weak GPU fully locally. I have
-
00:01:50 researched it extensively and prepared amazing presets for all GPUs with the highest quality.
-
00:01:57 We have presets for 8 GB GPUs to 24 GB GPUs, and each one of them has a very high quality.
-
00:02:05 For example, let me show you the default preset of the Ostris AI Toolkit versus our preset. So this
-
00:02:14 left image was trained with the default preset of the AI Toolkit that he shows in his tutorial,
-
00:02:21 and this is our preset. This is default preset; this is our preset. This is default preset;
-
00:02:28 this is our preset. There is a massive quality difference between default versus ours. And
-
00:02:34 these are not cherry-picked images; these are grid generations. Another case: this is default preset,
-
00:02:39 and this is my preset. This is default preset, and this is my preset. This is default preset,
-
00:02:45 and this is my preset. There is a massive difference. So I will show
-
00:02:49 how to train with our preset on your PC. This is default preset, and this is our
-
00:02:55 preset. Default preset, our preset. You will get amazing quality training images.
-
00:03:00 But we are not done yet. I will also show you how to train on RunPod extremely efficiently. With RTX
-
00:03:07 4090, for example, you will be able to train with amazing speed. I will also show how you can turn
-
00:03:15 off your pod automatically after training. All of the installation is literally 1 click, and
-
00:03:21 my installers install the latest version of the application. I am not using any template, so it
-
00:03:28 is not static. We are using the official PyTorch template. Therefore, with any GPU, you will be
-
00:03:34 able to 1 click to install and use this amazing trainer on RunPod. But we are not done yet. I will
-
00:03:40 also show how to install and use on MassedCompute, our favorite GPU provider, which is very fast. So
-
00:03:48 you will be able to install it on MassedCompute and access it from a public URL like this and
-
00:03:55 train it like it is in your PC. So easy, so fast, and it will run on cloud, not on your computer.
-
00:04:03 And with our SwarmUI presets, you will be able to use this model with highest quality. And with our
-
00:04:10 model downloader, you will be able to download the necessary files with just 1 click. So let's begin.
-
00:04:16 As a first step, we need to download Z-Image models. For that, we are going to use our SwarmUI
-
00:04:22 auto-installer and model downloader. Download the latest zip file as usual as in previous tutorials.
-
00:04:28 If you don't know how to install and use SwarmUI, follow this video; it will explain you everything.
-
00:04:33 The links will be in the description of the video. Then move and copy the zip file into your SwarmUI
-
00:04:39 installation, WinRAR extract here. Overwrite all of the files; this is very important. You
-
00:04:45 need to overwrite all the files. Then double click Windows start download models app .bat file run.
-
00:04:51 This will start the model downloader. First of all, we need to download Z-Image models.
-
00:04:56 We have significantly upgraded our application. We have moved to Gradio version 6. The initial
-
00:05:03 loading will take a little bit longer than before, as you are seeing right now,
-
00:05:08 but the application will work much better after loaded. Okay, we are loaded right
-
00:05:13 now. You see we have significantly improved our interface. We have updated our bundles,
-
00:05:19 and you see there is Z-Image Turbo core bundle. This bundle will download Z-Image Turbo BF16,
-
00:05:26 Qwen 3 4 billion parameters text encoder. This is necessary for the Z-Image. Z-Image
-
00:05:32 Turbo full ControlNet Union. We are going to use this ControlNet Union model to be able to
-
00:05:38 generate images with references to images we want with using ControlNet preprocessors. And
-
00:05:44 this is the VAE that it uses. So you can click download all models from here, or you can click
-
00:05:49 individually these buttons to download. Download all models is the best approach.
-
00:05:54 Alternatively, if you have a very low VRAM GPU, in the image generation models,
-
00:05:59 you will see Z-Image Turbo models, and you will see we have Z-Image Turbo FP8 scaled.
-
00:06:06 This is a model that I have made myself. With our SECourses Musubi Tuner premium application,
-
00:06:13 now we can convert Z-Image models into FP8 scaled as well. So let me start the application to show
-
00:06:20 you. This is 5.73 gigabytes in size, so it fits into 6 GB GPUs as well. However, don't
-
00:06:28 get confused even if you don't have powerful GPU. With SwarmUI that is using ComfyUI backend, you
-
00:06:33 can run any model on any GPU, literally. Because it will use your RAM memory to hold some part of
-
00:06:39 the model, and it will work. Don't worry about that. But to get maximum speed, if you want, you
-
00:06:45 can use FP8 scaled if you have like 6 gigabytes of GPU or 8 gigabyte or 10 gigabytes of GPU.
-
00:06:52 So in our SECourses Musubi Tuner, we have FP8 model converter, and you can convert
-
00:06:59 Qwen image and Z-Image models. This is how I converted. Follow the model downloads on the
-
00:07:04 CMD window. Also on the very top, you will see that they have been downloaded. Then you
-
00:07:09 are ready. So we can move to next step. As a next step, you need to update your
-
00:07:13 ComfyUI installation. Get the latest zip file from here. Go to your ComfyUI installation,
-
00:07:19 again extract and overwrite all the files. Then double click and run the Windows install
-
00:07:25 or update ComfyUI .bat file. This is important. So it will update ComfyUI to the latest version,
-
00:07:31 which supports Z-Image models with ControlNet. So my ComfyUI installation were already up to date,
-
00:07:38 but still it is updating everything. This ComfyUI installation is perfect. It supports
-
00:07:42 Sage Attention, Flash Attention, xFormers, Triton, everything that you need with RTX 5000
-
00:07:49 series GPUs support. So this is a very, very good installation. Okay, it has been done. Moreover,
-
00:07:55 this ComfyUI installation supporting special samplers and schedulers like bon_tangent,
-
00:08:00 Beta 57. You need to use our ComfyUI installation to have these extra samplers and schedulers.
-
00:08:07 As a final step, we need to update our SwarmUI. So we have SwarmUI update .bat
-
00:08:13 file. This will also install ControlNet preprocessors automatically for you,
-
00:08:18 so you won't be needed to install. The update and installation both of them will do. You can
-
00:08:23 read the announcements. You should always read the announcements that I have make. You see 3
-
00:08:29 December 2025 version 108 announcement. If you don't have it or if you are using somewhere else,
-
00:08:36 you can also manually install. You will have a button here that will tell you to install
-
00:08:41 ControlNet. But since our installation is doing that automatically, you don't need
-
00:08:45 it. Now we have everything ready. Now we need to update our presets. To get the latest presets,
-
00:08:52 you can use the import feature as usual. You see there is import, choose file, select the
-
00:08:58 latest preset from here and overwrite everything. However, if you want a clean installation that
-
00:09:03 will delete all the existing presets and update them to the latest version, which I recommend,
-
00:09:08 we have Windows preset delete import file. And click yes, it will backup your preset and update
-
00:09:14 the presets like this. Everything is ready. Then refresh your presets and sort by name.
-
00:09:20 Okay, so how we are going to use Z-Image Turbo model? First of all,
-
00:09:24 quick tools, reset params to default. This is important. Then we have 2 separate presets for
-
00:09:31 Z-Image. You see Quality 1 and Quality 2. Quality 2 is faster. It is only 1 process;
-
00:09:38 it doesn't upscale. So let me demonstrate both of them. Direct apply. And for example,
-
00:09:43 let's use this prompt. Okay. Copy paste your prompt here. It is all set. You also need to
-
00:09:50 set your aspect ratio. I did set base resolution of this model when you download the model that I
-
00:09:56 have as a 1536 to 1536. By default, it was 1024. However, I think this model works better with this
-
00:10:06 resolution. Sometimes you may get some mistakes, but generate more images. Because it is too fast.
-
00:10:11 Let me show you real time. So let's generate 8 images. Generate. After the model loaded,
-
00:10:16 let's see the speed. Moreover, you see the models that I upload for you have images,
-
00:10:22 have description, so you can read these descriptions, and they are easier to use.
-
00:10:27 Okay, the first generation started. The first one will be slower than the other ones. Okay, first
-
00:10:32 one is done. So you see it was done in, let's see, 12 seconds. The next one is done in 7.84
-
00:10:42 seconds. What about using the more higher quality preset? So let me demonstrate that. I will reuse
-
00:10:48 parameters of this one so it will set the seed. Then go back to preset and I will direct apply.
-
00:10:55 So this will activate the special refine upscale. Moreover, this is important, you need to download
-
00:11:01 the upscale models from here. So we have other models and image upscaling models. So download
-
00:11:09 these 3 models to have accurate upscaling. Okay, then generate. Now this will upscale this image,
-
00:11:17 but we cannot upscale a lot because this model has limitations. Also sometimes you can see
-
00:11:23 some hallucinations at the right or left side of the image because of the high resolution that we
-
00:11:29 generate. Sometimes you won't see, sometimes you will see. It depends. So let's have a comparison.
-
00:11:35 The left one is the Quality 2, which is way faster to generate. And the right one is the
-
00:11:41 Quality 1 preset that we have. So you see how much realism and details we add this way. It changes
-
00:11:48 the image because this model is very sensitive to the resolution and upscale. However, it improves
-
00:11:56 the quality significantly. So you can test both of the presets and decide which one is working better
-
00:12:01 for you, which one is generating better images for your use case, and decide and use that way.
-
00:12:08 So how we are going to use the ControlNet? The ControlNet logic is same. So let's reload this
-
00:12:14 page, reset params to default. And you can use either of the presets; both of them is working.
-
00:12:20 Let's use the direct apply and Quality 2. Now what is the difference? You need to provide a
-
00:12:26 ControlNet input image, which will be the base of your image. For example, let's try this pose. Then
-
00:12:33 you need to select your ControlNet preprocessor. This is not mandatory. If you are using already
-
00:12:38 a Canny image, you don't need to select this. But if you are not using a preprocessed image,
-
00:12:43 you need to select it. Then click this preview to see the preset output. If you have different
-
00:12:49 aspect ratio, it will show you mangled preview. So let's click preview. You see this is not
-
00:12:56 accurate. So how to make it accurate? You need to have accurate aspect ratio with
-
00:13:01 your according to your input image, according to your ControlNet input. How you can set the
-
00:13:07 aspect ratio accurately? I have been telling the SwarmUI developer to add this feature,
-
00:13:11 but he still didn't add. So you need to choose file, upload your reference image, click res,
-
00:13:18 and use the exact aspect ratio or the closest. Let's use the exact aspect ratio. Then disable
-
00:13:24 this init image. So we use this init image to set our aspect ratio accordingly. Now
-
00:13:31 when I click the preview, it will show me the accurate preview like this. I am ready.
-
00:13:35 You don't set ControlNet union type for Z-Image Turbo model. This is a little bit different
-
00:13:41 ControlNet than the previous ones that we know. But you can enable and test it; it won't make
-
00:13:46 difference. So we don't set it. So the ControlNet strength matters. Let me show you what I mean by
-
00:13:52 that. So let's write our prompt and let's set a seed like this and generate. Now the ControlNet
-
00:14:00 strength will impact your output. I tested it and I find that between 0.6, 60 percentage, to 1,
-
00:14:09 100 percentage, works. So this is 100 percentage result. Let's see the 60 percentage result. Okay,
-
00:14:15 like this. By the way, you see this prompt and this ControlNet is not very related, but it is
-
00:14:21 still following it pretty accurately. Okay, this time 60 percentage didn't work well. So let's
-
00:14:28 make it 70 percentage. However, image quality increased, so you need to find a balance between
-
00:14:33 both of them. We can change the prompt. Let me demonstrate. So let's make this 60 percentage. A
-
00:14:39 man wearing an amazing suit. Because this prompt is much more matching to the our ControlNet image.
-
00:14:48 You see this one. Okay, now 60 percentage will generate a very accurate image as you are seeing
-
00:14:54 right now. Yes. And I can choose the Tier 1 like this, direct apply and generate. Then it
-
00:14:59 will generate higher quality, higher resolution. So what does this do is that it first render,
-
00:15:06 then it does another render over it with upscaling to improve the quality. And yes. You see the same
-
00:15:13 pose, different person definitely. However, it is working really good as you are seeing right now.
-
00:15:19 So this was the Canny Edge preprocessor. You can use the Depth. Let's see the Depth preprocessing
-
00:15:26 from here. When you first time click preview, it will download the necessary model if you
-
00:15:31 don't have it. So from the debug menu, you can see whether it is downloading or not. And let's see,
-
00:15:37 preview is not done yet. We are still waiting. Probably it is trying to download. Yes,
-
00:15:42 you see it has downloaded it here. I can see it. And yes, the Depth has been generated.
-
00:15:47 Now generate again. So you can use either way. You can use Canny, you can use Depth,
-
00:15:53 whichever is working best for your case. You can use Lineart. If you have a Lineart drawing,
-
00:15:58 you can color it. Let me demonstrate you. Then I will choose that image from here. X,
-
00:16:04 choose file. I also need accurate aspect ratio. So let's choose the file from here. Resolution,
-
00:16:10 use the closest aspect ratio. And this is it. Then disable init image. And I am not going to
-
00:16:17 use any ControlNet preprocessing. And let's try an amazing cell shaded render of a dragon. Okay,
-
00:16:25 let's see what we get. Since this is ControlNet Union, it should be able to understand it. By
-
00:16:31 the way, this time we can also increase the ControlNet strength if we want. Okay,
-
00:16:35 we are getting something. This was a very simple prompt, but I think we will get a good image.
-
00:16:41 Yeah, pretty amazing. Pretty amazing result. If I want more matching, more exact matching,
-
00:16:47 I can increase this strength. So this is another generation. So as you increase the strength, it
-
00:16:52 will more match to the original image. This one is looking like this. So this is the way. We can also
-
00:16:58 set the preprocessing to like, let's see what we have, Lineart standard preprocessing. So let's see
-
00:17:05 the preview. When you first time click preview, it will download the model. And I am first time
-
00:17:10 clicking it, so it is taking time for preview to appear. It is downloading the model. Okay,
-
00:17:16 this is another generation. Pretty good. So you see from this simple Lineart, I can generate very,
-
00:17:22 very good images like these ones. Okay, it is here. And this is the preview. So I can use
-
00:17:27 this preprocessing as well and compare the result. And this is the result with Lineart
-
00:17:33 preprocessing. So you see this is entirely different than this version. So you can use
-
00:17:37 either way. It is working really good, really amazing. So I recommend you to test your case.
-
00:17:43 Okay, now the part that you have been waiting for. How to use Ostris AI Toolkit to train your
-
00:17:50 Z-Image Turbo LoRA models. First of all, we need to download and install Ostris AI
-
00:17:56 Toolkit. Currently, Ostris AI Toolkit has a bug. Therefore, you need to download this zip file:
-
00:18:04 AI Toolkit SECourses Version 2. Until he fixes that bug, I made a pull request which fixes the
-
00:18:12 bug of the CPU offloading. So I will update this post. So when you are watching this tutorial, if
-
00:18:18 you don't see this AI Toolkit SECourses Version 2, then you need to download this official version,
-
00:18:23 which installs from the official repository. This will install from my forked repository. Then move
-
00:18:29 the zip file into the drive where you want to install and extract all. Enter inside the folder.
-
00:18:36 So you see we have Windows Install, Windows First Time UI Setup, Windows Start, and Windows Update
-
00:18:42 .bat files. But before starting installation, you need to read the Windows requirements. We
-
00:18:48 have the classical requirements, but additionally, you need to download Node.js. I am using Node.js
-
00:18:54 version 22.20.0. The direct link is here. You just need to download it, start it, next. So
-
00:19:02 you see I already have. You just need to click next, next, next, next. That is it. Nothing else.
-
00:19:07 So after you have followed both of the requirements, click Windows install .bat file
-
00:19:12 run. This will install the Ostris AI Toolkit with Flash Attention, Sage Attention, xFormers with
-
00:19:19 Torch 2.8, CUDA 12.9. And my installation supports all of the GPUs starting from RTX 1000 series to
-
00:19:28 5000 series. Or on cloud GPUs, it supports A100, H100, B200, whatever the GPU that you
-
00:19:36 use on cloud. So wait for initial installation to be completed. Okay, so the installation has been
-
00:19:42 completed. You can scroll up and see if there are any errors. There shouldn't be. This is important:
-
00:19:48 you need to have Python 3.10.11 installed. Then press any key to continue. Second thing
-
00:19:55 is Windows First Time UI Setup. This is 1 time, and you need to run this. Do not run this again
-
00:20:02 after you have made the initial installation. For this to work, as I said, you need to have Node.js
-
00:20:09 installed. Otherwise, it will not work. Node.js is a system-wide installation. It is not like a
-
00:20:14 virtual environment, so you need to install it as I have shown you. You may get some warnings like
-
00:20:19 this. These are all unimportant. You see there are warnings. You can just ignore all of them, and it
-
00:20:26 is done. You see setup completed successfully. Now we are ready to use. Next time for updating, you
-
00:20:31 can use Windows update app .bat file. But since we just installed, let's start the application. So it
-
00:20:38 will give us public URL and localhost URL. Public URL is useful in MassedCompute. It doesn't work in
-
00:20:45 RunPod, but in MassedCompute it works. I will show both of them hopefully. This is our interface.
-
00:20:51 Go to New Job and Show Advanced. There is no preset saving and loading in the AI Toolkit yet.
-
00:20:59 So how you are going to use my presets? Enter inside the Z-Image Turbo LoRA
-
00:21:04 configs. According to your GPU, select the configuration. Since I have RTX 5090,
-
00:21:10 I am going to use 24 GB. You see there is no higher configuration because this
-
00:21:15 model fits into 24 GB. Quality 1 is better than Quality 2. Quality 2 is better than Quality 3,
-
00:21:22 4, and it goes on. So let's open this Quality 1 config. Copy it. Paste it here. And Show Simple.
-
00:21:29 It will update everything except the dataset. So you need to have your dataset from Datasets, New
-
00:21:38 Dataset. Give a name like My Dataset. Then upload your images with drag and drop here. They will be
-
00:21:44 uploaded. Then you can type any caption: Caption 1, Caption 2, anything. I will explain everything,
-
00:21:51 don't worry. This is just explaining you how it works. The dataset will be saved inside the
-
00:21:56 AI Toolkit, inside datasets here. You see My Dataset. And the captions are image file names
-
00:22:03 with txt. So image file name and txt. This is the format of the dataset system of the
-
00:22:10 AI Toolkit. I already have my dataset here. So you see this is my dataset. I will copy this, paste it
-
00:22:17 into datasets folder. And when I go to datasets and refresh this page, you see it will appear.
-
00:22:24 So how to prepare your training images dataset? Now I will explain this part extremely carefully,
-
00:22:31 so watch all of it. To automatically prepare your images, I recommend to use Ultimate Batch Image
-
00:22:38 Processing App. You see it is under Auxiliary Tools section. So let's go to this link. I
-
00:22:44 recommend you to check out these screenshots, read this post. Let's scroll down and let's
-
00:22:50 download the latest version. Then let's move it into our Q drive, right click, extract here,
-
00:22:56 enter inside it. First of all, we need to install. This is a pretty fast installation.
-
00:23:01 This application is very lightweight, but it has so many features. Okay,
-
00:23:05 the installation has been completed. Scroll up to see if there are any errors or not. Then close
-
00:23:11 this. Then let's start the application. Windows Start application run. Why is this application
-
00:23:17 important? Because this will allow you to batch preprocess your training images. You
-
00:23:23 can of course manually preprocess your images, but this makes it much easier and accurate.
-
00:23:30 So I have some sample images to demonstrate you the power of this tool. I will copy this path
-
00:23:37 and enter as an input folder. Then as an output folder, let's output them into my other folder as
-
00:23:45 Preprocess Stage 1. Then the aspect ratio. If you are going to generate images with 16 by 9 always,
-
00:23:55 you can make your aspect ratio accordingly. However, if you are not sure which aspect
-
00:24:00 ratio you are going to use, I recommend you to use square aspect ratio with 1328 to 1328
-
00:24:08 pixels. This is the base resolution of the Qwen image model or Qwen image edit model. This works
-
00:24:14 best. And with this aspect ratio and resolution, you can still generate any aspect ratio. All the
-
00:24:20 images I have shown you in the beginning of the tutorial were trained with 1328 to 1328.
-
00:24:27 Then there are several options. You can select the classes from here to zoom them in. This is
-
00:24:33 extremely useful when you are training a person. Because you want to zoom in the person. What I
-
00:24:39 mean by that? You see in these images, there are a lot of extra spaces that can be zoomed
-
00:24:46 in. For example, in this image, I can zoom in myself a lot. So you can choose this,
-
00:24:52 or there is a better one which is based on SAM2. This takes anything as a prompt. Let's
-
00:25:00 say "person". You can set your batch size, GPU IDs. These are all advanced stuff if you are
-
00:25:05 going to process a lot of images. So default is good. Let's start processing. What this is going
-
00:25:12 to do is it is going to zoom in the class I have given without cropping any part of the
-
00:25:18 class. So this will not make these images exactly as this resolution or this aspect
-
00:25:24 ratio. It will try to match this aspect ratio without cropping the any part of the subject.
-
00:25:30 So let's see what kind of images we are getting. We are saving them inside here.
-
00:25:34 You see it has generated this subfolder. This is important because in the second stage,
-
00:25:40 we are going to use this to make them exactly same resolution. When I enter inside this folder, you
-
00:25:48 can see that it has zoomed in the person. So this is how it works. And when zooming in, it will not
-
00:25:55 crop any parts of the image. And also when zooming in, it will try to match the aspect ratio that you
-
00:26:02 have given like this. Okay, the first stage has been completed. Now the second stage is resizing
-
00:26:08 them into the exact resolution. This will crop the subject if it is necessary. Like cropping the
-
00:26:14 body parts to match the exact resolution. So this takes the parent folder, not this folder. This is
-
00:26:21 not the folder, but this is the folder that I need to give. And I need to change the resolution that
-
00:26:26 I want. So this will look a subfolder named as exactly like this. You can have multiple
-
00:26:32 resolutions actually. For example, in the image cropper, I can add here another resolution. Let's
-
00:26:38 say 16:9. So this is the resolution of 16:9 for Qwen image model. Let's add it like 1744 to 992.
-
00:26:48 Let's start processing. It will process this new resolution as well. And I am going to see a folder
-
00:26:54 generated here in a minute when it is processed. Okay, it is started processing. Now it will try
-
00:27:00 to match this aspect ratio. It may not match it exactly. Why? Because it is not going to crop any
-
00:27:07 body parts. So you see this image cannot match that aspect ratio. This is not a suitable image
-
00:27:13 for that. This is almost still square. However, in the second tab, when I go to image resizer,
-
00:27:18 when I type it, you see I have given the parent folder. Let's wait for this one to finish. Okay,
-
00:27:25 it is almost finished. By the way, if you use this YOLO, it is faster than SAM2. So just delete this
-
00:27:32 and select your class from here. It supports so many classes to focus on them. Okay, it is done.
-
00:27:38 Now I am going to make the output folder as Final Images like this. And I will click Resize Images.
-
00:27:45 You can also make resize without cropping, so it will make padding expansion. So let's resize
-
00:27:52 images. I recommend cropping; it is better. Then let's go back to our folder Final Images. Okay,
-
00:27:59 in here you will see that it has cropped the body parts, resized it into the exact resolution like
-
00:28:06 this. And these are the square images. They are much more accurate than the other ones.
-
00:28:12 Now I have my images ready. However, this is not a very good collection of images. It is another
-
00:28:20 thing that you need to be careful of. I have used these images to train the models that I have shown
-
00:28:26 you in the beginning of the tutorial. So when we analyze these images, what do you see? I have full
-
00:28:32 body pose like this. I have half body pose. I have very close shot. And when you have images,
-
00:28:39 what matters is that it should have good lighting, good focus. These two are extremely
-
00:28:46 important. It should be very clear. All of these images are captured with my cheap phone,
-
00:28:52 so they are not taken with a professional camera. For example, when we look at this image, you see
-
00:28:57 it is not even a very high quality. This is how it looks. And this is a real image. This is a raw
-
00:29:26 image. And when we look at the AI generated image, as you can see, it is even higher quality than my
-
00:29:33 raw image. And therefore, you should add highest possible quality images into your training dataset
-
00:29:41 to get the maximum quality images. What else is important? You should try to have different
-
00:29:48 clothings so it will not memorize your clothing. This is super important. Try to have different
-
00:29:53 clothings, different times, different backgrounds. All of these will help. Whatever you repeat in
-
00:29:59 your training dataset, the model will memorize them. You don't want that. You want only yourself
-
00:30:06 or the subject if you are training a style, the style, or an object, the object, to be repeated.
-
00:30:12 Nothing else. I will explain them in the style and the item training, the product training part.
-
00:30:17 And one another thing is that you should add the emotions that you want. If you want smiling, you
-
00:30:24 should add it. If you want laughing, you should add it. So whatever the emotion you have will make
-
00:30:31 100 percentage quality difference in your outputs. Try to have all the emotions you want. But that is
-
00:30:39 not all. Also try to have all the angles you want. If you want to generate images that looks down,
-
00:30:46 you should have an image that has a look down like this. Or from this angle, this angle.
-
00:30:51 Whatever angle. So do not add the angles and poses that you don't want after training. And
-
00:30:58 add the poses and the angles you want to generate after training. So if we summarize again: have the
-
00:31:07 emotions, have the poses, have the angles, have different backgrounds, have different clothings,
-
00:31:14 have highest possible quality lighting and focus. Do not have blurry backgrounds. Do not have
-
00:31:21 fuzzy backgrounds. They will impact your output quality. So in the AI world, whatever you give,
-
00:31:28 you get it. And with this medium quality dataset, I am able to generate amazing images.
-
00:31:33 If I increase the number of images, the variety in these images, I can get even better quality.
-
00:31:38 Okay, now you understand how to prepare your dataset. There are few tricky issues with the
-
00:31:44 Z-Image Turbo model training. The best quality for this model is 1536 pixels. So make your images
-
00:31:53 1536 pixels if they are bigger resolution. Not 1328 or not 1024. 1536 pixels. Another
-
00:32:02 thing is that this model is extremely aspect ratio dependent. So if you want to generate your images
-
00:32:10 with a certain aspect ratio, then you should prepare your images with that aspect ratio. What I
-
00:32:17 mean by that? For example, currently my images are all square like this. You see like this. However,
-
00:32:24 if I want 16:9 aspect ratio to generate images after training, then I should set my aspect ratio
-
00:32:32 according to like this. So if I use this image, this aspect ratio for training instead of square
-
00:32:38 aspect ratio, this model will able to generate images better in that aspect ratio. So therefore,
-
00:32:45 I recommend you to prepare your images with your desired aspect ratio after training. So
-
00:32:51 you see this generation was square; therefore, it is much more natural and accurate compared
-
00:32:56 to the 16:9 aspect ratio. I had to generate a lot of images to get accurately looking 16:9 aspect
-
00:33:04 ratio images. So decide your aspect ratio, whichever the aspect ratio that you want to
-
00:33:09 generate your images after training, and based on that aspect ratio, prepare your training images.
-
00:33:16 Okay, once the training images are ready, let's go back to New Job, Show Advanced,
-
00:33:21 copy the configuration, Show Simple. Now, training name is the final file names that you are going to
-
00:33:29 get after training. Since I have done previously a training, I will use this name so it will generate
-
00:33:34 names like this so that I can show you how to find the best checkpoint. And you will see that our
-
00:33:40 configuration is already using Version 2 adapter. This may get updated later because the Ostris is
-
00:33:48 working on adapter. And what is this? Because this model is turbo model, it is distilled model. Until
-
00:33:56 the Alibaba team publishes the main model, we are using distilled turbo model. So to not break the
-
00:34:04 distillation of the model, we are using a trick. This adapter model is merged with the turbo model
-
00:34:10 during training automatically. We don't do that. So that it behaves like a main model. So therefore
-
00:34:16 our trained LoRA is not breaking the turbo model. This is not the highest quality. This is not the
-
00:34:21 quality that we are going to get from the base model, but it is working. And we don't change
-
00:34:25 this. It will download it into Hugging Face cache. You don't change anything here. What
-
00:34:30 you can change here is that save every N steps. So this trainer doesn't work with epoch based;
-
00:34:37 it works with the steps based. Therefore, I recommend you to calculate your number of
-
00:34:43 steps based number of the training images. I have 28 images, so I recommend 200 epochs for
-
00:34:49 this number of images. That makes 5,600 steps. And if you want 10 checkpoints, make this 560. If you
-
00:34:56 want 8 checkpoints, make it 800 steps. So based on these steps, it will save those checkpoints.
-
00:35:03 And max steps saves to keep. So let's, if I make this 3, it will keep only 3, and it will delete
-
00:35:10 the previous ones. This is how it works. So I will keep all of them. And you don't change anything
-
00:35:15 here. They are all set. In the dataset, you select your training dataset. This is my dataset. And
-
00:35:21 you don't change anything else here from the configuration. And that's it. You can also have
-
00:35:27 samples during generation. Currently I did set it 250,000 steps, so they are never generated.
-
00:35:33 But if you want them to be generated like every 100 steps or maybe 200 steps, you can generate
-
00:35:39 them and you can see them if they are good or not. But I am not doing that. It is up to you.
-
00:35:46 Moreover, there is skip first sample, which generates the samples just when begin the
-
00:35:53 training. I'm not using that either, but you can disable this and it will generate samples. And
-
00:35:59 there is trigger word. I am only training with a trigger word right now. Since I don't provide any
-
00:36:05 caption in my dataset, it is trained entirely with this. But if you also provide captions
-
00:36:12 with your dataset like Test 1 caption, then it will append the trigger word. I think it
-
00:36:18 is appended into beginning. So it will become like "ohwx test 1" during the training. However,
-
00:36:23 I don't recommend the captions. And you see we are losing our configuration. This is annoying,
-
00:36:30 I know that. The AI Toolkit must get save and load configuration. Okay,
-
00:36:36 I need to make the file name again like this. Okay, and this was 700 steps. This was 5,600.
-
00:36:46 Okay. So I have compared all this. I have tested all of them for you. I have done so many grid
-
00:36:52 tests to find everything. I did so many trainings. For example, let me show you some of the trainings
-
00:36:59 that I have made. You see all these different parameters I have tested. I have tested 1024,
-
00:37:06 1280, combination of the different resolutions like these 3. And the best yielding resolution
-
00:37:14 for this model is 1536. However, if you want to speed up your training,
-
00:37:19 if this becomes too slow for you, then you need to disable this and use like 1280 or
-
00:37:25 just use 1024. Or you can enable all 3. Too much speed comes with 1024. But the
-
00:37:31 best quality is with 1536 for the Z-Image Turbo model. And let's select our training dataset. I
-
00:37:39 am also not using any caption dropout. So these are all my settings. And then click Create Job.
-
00:37:46 Now this training is queued. Not automatically started. So you can either click from here
-
00:37:52 to start or you can go to Training Queue and click the play icon from here. And you see it
-
00:37:58 shows Queued, then you click start. And it will start the queue processing. Let's see what is
-
00:38:04 happening in our VRAM. Currently I'm recording video with my second GPU, so my initial GPU is
-
00:38:11 empty. I just need to close the SwarmUI; it will become zero. Yes. So you can see the speed. I
-
00:38:16 have tested the speed. It is same on Windows and Linux. This is surprising, but maybe it is good,
-
00:38:23 I don't know. Because I am not sure whether it is fully utilizing the GPU or not. I don't see it is
-
00:38:28 fully utilizing on Windows. But it is fairly fast. And I can speed up the training significantly with
-
00:38:34 dropping the resolution. So when you click this icon, it will show you the training window like
-
00:38:39 this. You don't see the training on the started CMD window. You will see it from here. When you
-
00:38:44 refresh this page, let's go to Dashboard, you need to click this icon to see it. Don't forget
-
00:38:49 that. So it will show you some of the statistics, and it will show you what is happening. This is
-
00:38:54 actually what is happening on the training. This is the window that you are going to follow. It
-
00:38:59 will first cache then unload the text encoder. I did set everything for you. These parameters
-
00:39:05 are really optimal. Let's say you have 100 images as a training dataset. Then set it 10,000 steps.
-
00:39:11 I don't know how many steps you can do until the model breaks, but I can say that up to 10,000
-
00:39:18 steps you are safe. Maybe even 20,000 steps. You need to test. And since we are saving checkpoints,
-
00:39:23 we will compare. The checkpoints will appear here. This is very useful because on RunPod and
-
00:39:29 MassedCompute, you can directly download them from here. They will appear here. They will be
-
00:39:35 saved inside the folder. So it is started. But to get checkpoints quickly, let me show you how they
-
00:39:43 will appear. So I will pause this and you see it says that you can resume. But you can resume from
-
00:39:49 the last checkpoint. Therefore if there weren't any checkpoints, it will start from the beginning.
-
00:39:55 However, if you had checkpoints, it will resume from the last checkpoint. This is how it works.
-
00:40:00 So I will modify and I will save checkpoints every 5 steps. So let's make this every 5 steps. Update
-
00:40:08 Job. Then click Play. And it will start again. So I will start getting checkpoints here. Therefore
-
00:40:14 I can show you how they are appearing. When I start it again, it will not cache the images and
-
00:40:22 text captions again since they were already cached. So where they are stored? When you
-
00:40:27 go back into your AI Toolkit installation, in the output, your trainings will be saved here.
-
00:40:33 When I enter inside this training, you see they are named with the same name as the name that
-
00:40:39 I have set or the name I set here. So they will be saved with that name. It shows the log, PID,
-
00:40:46 and it will save the checkpoints here. We will see in a moment. You can also set the checkpoints from
-
00:40:52 the settings. You can set the training folder path. So you see, this is the path where it
-
00:40:57 will save the checkpoints. You can change this and it will save the checkpoints there. And you
-
00:41:03 see this is the datasets folder. So you can change both of these and save settings. Let's go back to
-
00:41:08 Dashboard. Let's see our training. So we see the steps. It will start from the first step. Okay,
-
00:41:14 it started. It is doing the steps. The speed is 6.67 seconds for RTX 5090 with the very
-
00:41:22 high quality, highest quality. Okay, we got the first checkpoint. So it is appeared here.
-
00:41:27 When I click this download, it will download. So you can use this in RunPod or MassedCompute. And
-
00:41:32 when I go back to outputs, I will see the checkpoint here. So it is saved like this.
-
00:41:37 Now I need to move this into my LoRA folder and test it. And you see it also saved an
-
00:41:44 optimizer PT file. So now that I can pause and continue. So let's get the next checkpoint. Yes,
-
00:41:51 it is saved here. Now I will pause it and I will resume it. Let's see how it continues. Okay,
-
00:41:57 click play again. Now it should resume from the last checkpoint which was 10 steps. Let's see what
-
00:42:03 happens. So the speed was 6.7 seconds. I also shown the speeds in experiment speeds folder.
-
00:42:09 You can see the speeds of different resolutions: 1024, 1280, combination mixed, 1536. These are all
-
00:42:18 speeds of the RTX 4090. Not 5090. This is 5090 speed. And this is RTX 3060 speed. So we have
-
00:42:26 the speeds. Okay, nice. So it is continuing from the last checkpoint which was 10 steps.
-
00:42:32 So this is how you can continue your training with AI Toolkit. These things are not specific
-
00:42:38 to the Z-Image Turbo model. With any model these are applying. But for each model,
-
00:42:45 you need to research a new configuration. That is important. If you use the default values,
-
00:42:50 you probably won't get the best results. Okay, so this is the speed. I can increase the speed
-
00:42:54 with reducing the resolution. And what are the differences between the default versus our best
-
00:43:01 training? I have it. So let me show you. This is default configuration, which the Ostris shown
-
00:43:09 in his tutorial, and this is our config. This is default; this is our config. Default, our config.
-
00:43:15 Default, our config. Our configuration yields much better results. Default, which the Ostris shown,
-
00:43:34 our config. You see there is a massive quality difference between default versus ours. And
-
00:43:38 these are not cherry-picked images; these are grid generations. Default, our config. Default,
-
00:43:44 our config. There is a huge difference between default and our config. Default, our config.
-
00:43:48 Default, our config. You see there is 2 persons because we are generating in high resolution. So
-
00:43:54 we need to generate just more images to get. Default, our config. Another prompt. Default,
-
00:43:59 our config. There is a massive difference. Default versus our config. Default,
-
00:44:04 our config. And these are grid images. And you see it even learned my broken teeth. I have a
-
00:44:10 broken teeth here. Maybe you noticed that. It learned it slightly. And this is a turbo model,
-
00:44:16 not like a base model. So this is pretty good, pretty accurate. So this is how we train.
-
00:44:21 After training, how you are going to test them? It is same as our other tests that
-
00:44:27 I have shown in other tutorials. So you will have checkpoints like this in the output folder
-
00:44:32 once the training finished. Move them into your LoRA folder. So I have them in my LoRA folder.
-
00:44:39 Then start your SwarmUI after put them in. Or if you are already running, it is fine. Go to LoRAs,
-
00:44:46 refresh. Then let's reset params to default. Let's go to presets. Select our preset again.
-
00:44:52 Direct apply. And go to Tools and select the Grid Generator. Let's say Test 1,
-
00:44:58 whatever the name you want. From here select LoRA. Type your LoRA name. My LoRA name is like this at
-
00:45:04 all. So it adds all the LoRAs. The last one goes here. So it is the last checkpoint. So they are
-
00:45:10 also sorted like this. Then the prompt. You can use any prompt you want like prompt like this.
-
00:45:15 To separate prompts use this character. So each prompt will be different. However, this is not a
-
00:45:21 proper prompt. So I am going to use the example prompt which I have provided in the zip file.
-
00:45:27 When you go here you will see Test Grid Prompts and Grid Format. Copy this. You can change this
-
00:45:32 according to your training. And generate grid. Now this will generate a grid for me based on these
-
00:45:39 LoRA checkpoints so I can see them. So let's go to here and see that in real time. Okay. So from
-
00:45:46 here. Okay, LoRA prompt. This is true. Sometimes you need to play with this to see. As the images
-
00:45:52 generated, they will appear. Do we have an error somewhere? Why did it? Okay, we have forgotten
-
00:45:58 reset params to default. Therefore the generation failed. You see because the ControlNet is open.
-
00:46:04 So always reset params to default. Don't forget that. Okay. Then let's select the preset one more
-
00:46:11 time. Direct apply. Let's go back to Tools and generate grid. Because otherwise you will get
-
00:46:16 error as I just had because the ControlNet was enabled. Now you just need to wait for
-
00:46:22 processing to be finished. And we will be able to compare the grid, the quality. So this is first.
-
00:46:28 As you can see on 5090 it is pretty fast. Every image taking like 8 seconds. I don't need to wait
-
00:46:34 more. But you can see that it is very undertrained in early steps. And it will get better trained up
-
00:46:40 to the last steps. We will see it. Even early steps there is some resemblance. I prefer this
-
00:46:46 over generating samples during the training. It's a choice. I find this better because I
-
00:46:52 don't lose time with the training process. And this is the most proper way of testing in my
-
00:46:58 opinion. Not using the samples generated during the training. Sometimes they may be inaccurate.
-
00:47:03 Okay, so the grid generation has been completed. Let's refresh. Now compare the checkpoints. 700
-
00:47:09 steps, 1400 steps, 2100 steps. So you see this way it goes. Decide which one is best for you. I can
-
00:47:18 say that the last one is the best. So you see this is very best. If you can't decide based on this,
-
00:47:24 what you can do is you can make this Test 2 and generate another grid. So this way compare until
-
00:47:31 you decide which one is working best. Moreover, trained LoRAs working with the ControlNet Union as
-
00:47:38 well. The only thing is that set your ControlNet strength to 0.6, so it is 60 percentage. And then
-
00:47:45 type your prompt. With just this simple prompt, "Photo of ohwx man wearing an amazing suit",
-
00:47:51 I am able to get amazing quality images with my trained LoRA by using this reference image as a
-
00:47:59 ControlNet. So it is fully working same way as using the base model with our trained LoRAs.
-
00:48:05 Now I will show you how to install and use Ostris AI Toolkit on RunPod. Then
-
00:48:10 on MassedCompute. To use on RunPod, always follow RunPod instructions txt file that I
-
00:48:17 have. Always. I have this file in all of my applications. For RunPod and MassedCompute,
-
00:48:23 always follow them. So let's open this. First of all, please register RunPod from this link.
-
00:48:28 I appreciate that. This enables me to do more research on RunPod. This helps me significantly
-
00:48:36 because these trainings are using huge amount of money. So you see I have spent 90 dollars on
-
00:48:42 a single day for Z-Image research. And then 10 dollars. Once you are here, go to Billing and set
-
00:48:50 some credits. Pay with your card, whatever. Then go to Pods. You can also use permanent storage,
-
00:48:57 which I use it. I also have a dedicated tutorial for that. So you see we have RunPod permanent
-
00:49:04 network storage tutorial. But I will show on a single pod this time. I recommend you to limit
-
00:49:10 your region to the US starting from bottom. These are the best GPUs. For this Ostris AI Toolkit,
-
00:49:18 you can use RTX 4090. This is most performant price option. If you want more speed, you can use
-
00:49:25 RTX 5090. The bigger ones are useless because it fits into VRAM. So let's see where we have. Okay,
-
00:49:31 we have it here. Moreover, from additional filters, select 100 RAM and NVME disk. Okay,
-
00:49:38 we don't have it. So we need to check again. US NC2, NC1, MO2, MO1, MD1, KS. Okay, here. We have
-
00:49:50 it. Then change this template to whatever template the instructions file tells you. The instructions
-
00:49:57 is telling this. Then you need to select this. If you get an error here, like when I select 5090,
-
00:50:03 it will tell me that you need to use this. This is wrong. Why? Because I am installing
-
00:50:09 applications into a virtual environment. I am not using the template environment. That is why. So
-
00:50:15 don't believe whatever the RunPod is telling you. Use the template that I write in my instructions.
-
00:50:24 So we are going to use this official PyTorch 2.2.0 template. This is super fast. Then click this edit
-
00:50:32 template and add an port here: 8675. This is super important. Otherwise you won't be able to connect
-
00:50:41 the Ostris AI Toolkit interface. And set your volume disk according to your, you know, needs.
-
00:50:48 If you are going to get too many checkpoints, if you are going to train bigger model,
-
00:50:51 you need bigger. But for Z-Image Turbo model, 200 is sufficient. And deploy on demand. Since this
-
00:50:58 is using official template, it will be super fast to initialize. Sometimes it doesn't show here, so
-
00:51:04 refresh to see the status. If it gets initialized or not. It should be very fast initialized. Okay,
-
00:51:11 details, telemetry, refresh. Okay, it is initialized. So it took like 20 or 30 seconds
-
00:51:18 because this template is very lightweight. Then click Jupyter Lab. Sometimes Jupyter Lab may also
-
00:51:23 not get loaded. You need to refresh. If it doesn't get loaded, delete the machine and get a new one.
-
00:51:28 First of all, verify that its GPU is working. pip install nvitop. Then type nvitop. And you need to
-
00:51:36 see your GPU like this. Otherwise just delete the pod and move to new one. Then upload the zip file
-
00:51:43 into here like this. This is important. Wait for upload to be completed. It is uploading in
-
00:51:48 the bottom as you see. Then right click and extract archive. Then click refresh. Okay,
-
00:51:53 it is extracted. Open the RunPod instructions read txt file. Copy this command. Open a new terminal.
-
00:52:01 Paste it and hit enter. This is it. This will install everything fully automatically. Including
-
00:52:06 the Node.js or whatever libraries. You don't need to do anything else. Once the installation has
-
00:52:12 been completed, we are going to use this to start the application. If you restart your pod again, if
-
00:52:19 you want to use again, you just need to run this command. But since this is first time, we just
-
00:52:24 need this to start once the installation has been completed. The installation speed totally depends
-
00:52:29 on the pod that you got. If it is a fast pod, if you are lucky enough, it will be fast. Otherwise
-
00:52:35 it will take time. But since we have made some filtering, we have selected from a certain region,
-
00:52:41 I can say that this pod is fast. There are major advantages of my installers on RunPod
-
00:52:47 instead of using a RunPod template. It always installs the latest version of the AI Toolkit.
-
00:52:55 It supports all of the GPUs that are available on RunPod. Not certain type of GPUs. So installation
-
00:53:02 of latest version and this GPU support makes it much more advantageous because you always use the
-
00:53:09 latest version of the application. Moreover the installation is fairly fast since it is
-
00:53:14 extremely optimized by myself. So the installation is getting completed. You can ignore these warning
-
00:53:21 messages as I have also explained in the Windows tutorial part. You need to watch Windows tutorial
-
00:53:27 part to learn it. Moreover if you don't know how to install and use SwarmUI and ComfyUI on RunPod I
-
00:53:34 have an excellent up to date tutorial. The link will be in the description of the video. This
-
00:53:39 tutorial. So watch it to learn how to use SwarmUI and ComfyUI on RunPod. I won't explain that part
-
00:53:43 in this video. I will only show Ostris AI Toolkit usage on RunPod in this tutorial. So watch this
-
00:53:50 tutorial to learn how to use SwarmUI and ComfyUI on RunPod. The link will be in the description
-
00:53:55 of the video. Okay installation almost completed. All right the installation has been completed. Now
-
00:54:01 we will run this starting command terminal. Copy paste the starting command. The starting should
-
00:54:07 be fairly fast. You see it also give us a network link like this but it is not working in RunPod. So
-
00:54:16 we need to connect from RunPod proxy. So go back to your My Pods click and click HTTP service 8675.
-
00:54:25 It will open the AI Toolkit. And we got the interface. The rest is exactly same. First
-
00:54:31 of all make your dataset. You can also upload your dataset into AI Toolkit Datasets folder
-
00:54:38 or you can click dataset my dataset like this create. Then click add images and you can drag
-
00:54:45 and drop the files as I have shown in the Windows tutorial part. It will upload them to the RunPod.
-
00:54:52 We will see the dataset here. Yes. You see the datasets. My dataset. Exactly same. The upload
-
00:54:59 will take some time because the RunPod is slow. They will appear here once processed. Okay. Let's
-
00:55:07 see what's happening. If it doesn't work you can also drag and drop them to here like this. It will
-
00:55:12 upload from the Jupyter Lab interface. Then you can refresh to get it. Yes it is uploading. So
-
00:55:19 let's use this way. Either way should work. We can just refresh. So you see the data set
-
00:55:25 images will appear here. Then click new job, show advanced. Again, same as in the Windows tutorial
-
00:55:32 part. Let's select our config, like this one, copy-paste, show simple, select your data set.
-
00:55:38 I'm not going to repeat the Windows tutorial part. Create job and click training. So that we can see
-
00:55:44 the training on RunPod. It should be fairly fast. First, it will download the necessary model,
-
00:55:50 then it will start the training. Let's just wait and see the logs. So you see, it is downloading
-
00:55:56 model into our workspace, fairly fast. We can see the speed. Okay, so the training has been started.
-
00:56:03 You can see the step speeds here. It will also show the step speed here after a while. Currently
-
00:56:09 like 8 seconds IT. You need to wait a little bit. It is using the GPU 100 percentage. The memory
-
00:56:14 usage is around 90 percentage. So RTX 4090 is very good on RunPod as a price performance. Therefore,
-
00:56:24 I recommend it. If you want faster, go with the RTX 5090. It's a little bit faster. Again,
-
00:56:30 as I have shown in the Windows tutorial part, you can look at the speeds. These four are for RTX
-
00:56:36 4090. This is RTX 5090, and this is RTX 3060. So the speed is decent. It will take like 13 hours.
-
00:56:42 Maybe it will take lesser, but let's say 13 hours. The cost would be like $10, maybe lesser than $10,
-
00:56:50 0.62 with 13, like $8. If you want faster, as I have shown in the tutorial, just change the
-
00:56:59 resolution. It will become four times faster. It will take four times lesser. That is the strategy,
-
00:57:05 but it will lower the quality. I don't recommend it. As I have shown in Windows tutorial part,
-
00:57:10 it will lower the quality significantly. Then you will get the checkpoints here, so you can download
-
00:57:15 them from here or from my pods, go back to AI toolkit outputs, they will appear inside here,
-
00:57:23 so you can download them from here too. That is it. Then you can terminate your pod,
-
00:57:28 stop your pod. These are the same. If you want to stop your pod after training has been finished,
-
00:57:35 we also have a command for it. So you see, this will stop your pod. How to do it? You need to get
-
00:57:41 your pod ID and paste it here. So this is seconds. Let's stop our pod in 20 seconds. So copy this,
-
00:57:49 open a new terminal, paste it. Now in 20 seconds, we will see that our pod has been stopped. Let's
-
00:57:57 see. Okay. Okay, it should be any second. I didn't count. We will see the command has been executed.
-
00:58:05 This way, you can sleep. Okay, it is stopped. So now when I refresh this page, I should see it is
-
00:58:11 stopped. Yes. So it won't spend my money. If you have any questions, you can ask me.
-
00:58:17 Now, the MassedCompute part will begin. Okay, now I will show the MassedCompute part. For
-
00:58:24 MassedCompute part, we are going to follow MassedCompute instructions. This is same
-
00:58:29 for all of my applications. Always follow the instructions.txt file. Please use this link
-
00:58:35 to register MassedCompute. I appreciate that. Login your account after registration, go back
-
00:58:40 to billing and add some credits. Once you have the credits, go to deploy. For Z Image Turbo version,
-
00:58:49 my recommended GPU is L40S. But you see, all of them is currently occupied, and they are hopefully
-
00:58:57 going to add new GPUs soon, they told me. So what can we use alternatively? We can use RTX 6000 ADA,
-
00:59:06 but they are also all full. Yes, there are no RTX 6000 ADA GPU. Therefore, to the cheapest one,
-
00:59:13 which would take time, we can use RTX A6000 premium. This is the cheapest one. If you want
-
00:59:19 speed, you can use A100 or H100. So let's go with the cheapest option, RTX A6000. So let's select
-
00:59:27 the category creator, select the image SE Courses. So you see, currently this is $0.56 per hour.
-
00:59:34 We are going to apply our coupon, SE Courses, verify, and it's only 42 cents. Deploy. You see,
-
00:59:41 I have selected premium version. This premium version is the best one. It has the most RAM
-
00:59:46 memory. Therefore, I recommend you to pick this one if you are going to use RTX A6000. However,
-
00:59:53 my recommended GPU, as I said, for Z Image Turbo version, L40S or RTX Pro 6000 if they
-
01:00:01 are available. If they are not available, RTX 6000 ADA, this GPU. If none of them is available,
-
01:00:08 you can use A100, H100, depending on your budget, or RTX A6000 and the premium version. Now we need
-
01:00:16 to wait for the initialization. When you click the running instance, when you refresh this page,
-
01:00:22 you will see it. Wait for initialization to be completed. Meanwhile waiting for initialization,
-
01:00:28 click details, and you see there is ThinLinc client. If you haven't installed it yet,
-
01:00:34 we are going to use it. Download according to your platform. I am on Windows, so let's download this.
-
01:00:40 Let's start it. Yes, next, accept, select the options, run ThinLinc client. Once the ThinLinc
-
01:00:47 client started, click options, go to local devices. Just have clipboard synchronization
-
01:00:52 and drivers enabled. Click drivers details and add a folder from your computer like this one.
-
01:00:59 You see there is add and remove, or you can copy-paste the path from here. Make sure that
-
01:01:03 it has read and write permission. Click okay and click okay. Then you just need to wait for
-
01:01:08 initialization to be completed. Sometimes refresh the page to be sure. Okay, the machine has been
-
01:01:14 initialized. Before connecting it, I recommend you to put your training images, let's copy it, into
-
01:01:21 your shared folder. So my shared folder is here. Copy-paste them there. Moreover, also copy the
-
01:01:29 downloaded installation zip file into your shared folder. Then you are ready. Then click this IP,
-
01:01:36 it is copied. Copy-paste it here. You see there is username. Copy the username, copy-paste here,
-
01:01:42 and user password. You cannot transfer big files with ThinLinc client. You need to use like Google
-
01:01:49 Drive, OneDrive, or Hugging Face. We have Hugging Face upload and download notebook as well. So
-
01:01:55 this is only for small files, like your training images or like installation zip files. Remember
-
01:02:01 this. The big files will be very slow or will not work. Once you are in this screen, go to home, go
-
01:02:08 to Thin Drives, MassedCompute shared folder, wait for synchronization to be completed. Sometimes it
-
01:02:15 can take time depending on your internet. Okay. Then select your installation zip file, drag and
-
01:02:22 drop it into downloads folder. Moreover, drag and drop your training images as well. This is
-
01:02:29 not mandatory. We will be able to upload from the interface as in the Windows tutorial part, but you
-
01:02:35 can have it. Then extract the installation in the downloads folder. Do not run anything in ThinLinc
-
01:02:42 client driver, in the shared folder. Always copy files into downloads. Enter inside the folder,
-
01:02:48 double-click MassedCompute instructions, copy this installation command, click these three dots icon,
-
01:02:55 open in terminal inside this extracted folder, right-click and paste. This will do the entire
-
01:03:02 installation of the AI toolkit on MassedCompute. Now just wait for installation. This will be
-
01:03:07 really fast compared to the RunPod. MassedCompute is super fast. Then meanwhile it is installing,
-
01:03:14 copy-pasting the training files during the installation will give you speed up, will reduce
-
01:03:20 your timing. So that's an advantage. But you see, this ThinLinc client for transferring files is
-
01:03:28 very slow. It is really, really slow. Therefore, for big files, you need to use like Google Drive,
-
01:03:34 OneDrive, big cloud services like Hugging Face. Okay, the training images have been copied.
-
01:03:40 So while installing the AI toolkit, I will copy this, enter inside the AI toolkit, enter inside AI
-
01:03:47 toolkit, and here, make a new folder named as data sets because it is not automatically generated.
-
01:03:55 Copy-paste it here. So when we start the application, our data set will be ready. Still,
-
01:04:00 as in the Windows tutorial part, you can use the interface to upload from these data sets,
-
01:04:06 new data set, type your data set like test, and you will be able to upload from this interface
-
01:04:12 as well. Okay, installation is continuing. When you get this window, just click cancel. Moreover,
-
01:04:19 when you start Google Chrome, it may ask you something as login or something. Okay, it didn't
-
01:04:25 ask. If you get that error, just click cancel. So you don't need to update software installed on
-
01:04:32 MassedCompute. Just click cancel to all of them. Moreover, I won't show you how to use SwarmUI on
-
01:04:38 MassedCompute because we have fully up-to-date tutorial for MassedCompute. You see this one,
-
01:04:44 ComfyUI and SwarmUI on cloud GPUs tutorial. The link will be in the description of the video.
-
01:04:48 So watch this to learn that part. I will just show how to use AI toolkit on MassedCompute,
-
01:04:55 not the how to use SwarmUI and ComfyUI and do the grid generation or other stuff as I
-
01:05:01 have shown in the Windows tutorial part. The biggest advantage of my installer is that it
-
01:05:06 always installs the latest version of the AI toolkit trainer. Moreover, it supports all of
-
01:05:12 the GPUs with the latest pre-compiled drivers with flash attention, xformers, sage attention,
-
01:05:18 Torch version, CUDA version. Therefore, my installers are really better than using the
-
01:05:24 templates. So during the Node.js installation, it is all automatic. You may get some warnings, just
-
01:05:30 ignore them because it will work. My installer is fully optimized and made it so easy that you
-
01:05:37 just run these two lines of command. It handles everything, all the setup for you. Okay, so the
-
01:05:43 installation has been completed. You can scroll up to see if there are any errors or not. Then
-
01:05:49 return back to your folder, open the MassedCompute instructions txt file again, and copy this part.
-
01:05:57 This is for starting. Then open three dots here, open in terminal, copy-paste it. We always run the
-
01:06:03 commands inside installed folder. This is super important. So it has been started. You can either
-
01:06:10 use the local link like this, or if you want to connect from your computer, which I recommend,
-
01:06:15 open link like this. So you see this is public link, and now I can connect from my computer. So
-
01:06:22 let's see. It says, yes, it says it is not secure. Continue site. This is totally fine. And now,
-
01:06:28 yes. So you see it is running in MassedCompute, but I am connected from my computer. The data
-
01:06:34 set will be here since I have copy-pasted it, or I can click copy data set. I can type GG,
-
01:06:40 create, then I can add images. I can drag and drop images from here to upload. However, copy-pasting
-
01:06:47 from the disk is better than here in my opinion. Okay, let's refresh. We don't need it. Then click
-
01:06:54 new job as in the Windows tutorial part, show advanced, select the configuration from the zip
-
01:06:59 file inside Z Image Turbo Lora configs. So since this GPU is 24 GB, copy-paste it, show simple,
-
01:07:06 give a name to your training, whatever you want, and then in the data set, select it.
-
01:07:12 As in the Windows tutorial part, you need to set your save every N steps and step count.
-
01:07:17 Watch the Windows tutorial part. Don't skip it. Then create job and then click play. So it will
-
01:07:22 first download the necessary models, then it will start training. Then the checkpoints will appear
-
01:07:28 here so that I will be able to download from here or in my machine in the AI toolkit installation,
-
01:07:37 they will be inside the output folder. So they will be inside here. To download from here,
-
01:07:42 I can use my notebook, my Jupyter Lab notebook, or you can use Google Drive, OneDrive, or you can
-
01:07:50 use the ThinLinc client. However, it would be very slow. So probably downloading from these
-
01:07:56 checkpoints from here will be the fastest way to download. Let's wait until the training begins so
-
01:08:02 we can see the speed. Okay, so the training has been started. It is like 18 seconds per IT. So
-
01:08:10 it will take 30 hours for 6,000 steps on this GPU. It is only 42 cents. Therefore, it would
-
01:08:17 take like $12. However, it is up to you. You can rent powerful GPU or you can use RunPod and 4090,
-
01:08:25 5090, or you can reduce the training resolution and speed up like four times, five times. It is
-
01:08:32 totally up to you what you want to do, but this is how you do it. And as the checkpoints generated,
-
01:08:38 they will appear here so that you can download and use on your local computer right away. This
-
01:08:43 is it. I hope you have enjoyed. Don't forget to delete your machine once you have saved
-
01:08:50 your generated checkpoints. Otherwise, if you use stop, it will not stop billing on MassedCompute.
-
01:08:56 And MassedCompute team told me that they will get a lot of new GPUs, hopefully very soon,
-
01:09:02 and maybe there will be permanent storage as well. We will see. Keep watching. Thank you so much.