New Qwen Image Edit Fusion Re Light and ReAngle Multiple Angles LoRAs Tutorial Easy and Fast
Full tutorial link > https://www.youtube.com/watch?v=MLNQkwW_Q8M
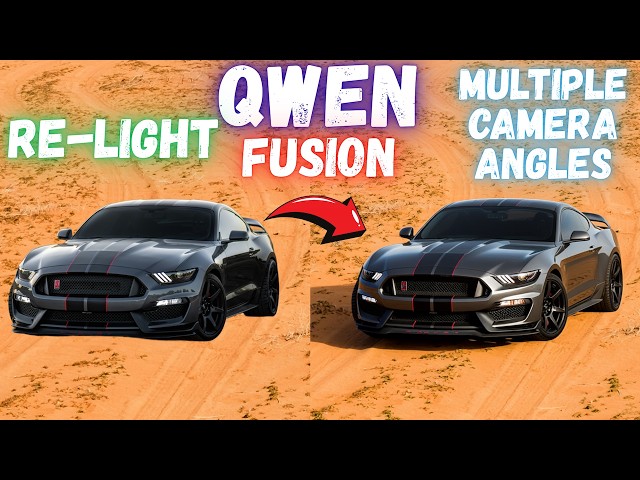


In this tutorial I am going to introduce you newest 3 Qwen Image Edit model LoRAs to fuse images (merge images naturally), relight images (change lighting of the scene) and also change camera angle (like from front view into top down view) of the images. With our 1-click to install and ready presets, you will get amazing quality images so easily without depending on OpenAI image model or Google's Gemini Nano Banana Pro model.
🔗 LINKS & RESOURCES MENTIONED
Step 1: SwarmUI Installer and Model Downloader
[➡️ https://www.patreon.com/posts/SwarmUI-Installer-Model-Downloader-114517862 ]
Step 2: BiRefNet HR (High Resolution) Background Remover
[➡️ https://www.patreon.com/posts/BiRefNet-HR-Installer-114517862 ]
Step 3: SwarmUI Windows Tutorial
[➡️ https://youtu.be/c3gEoAyL2IE ]
Step 4: SwarmUI Cloud Tutorial
[➡️ https://youtu.be/bBxgtVD3ek4 ]
Windows Requirements Tutorial (MANDATORY for first-time setup!)
[➡️https://youtu.be/DrhUHnYfwC0 ]
Video Chapters
00:00:00 Introduction to 3 Famous Qwen Image Edit LoRAs: Fusion, Relight, and Multiple Angles
00:00:41 Overview of Qwen Image Relight LoRA capabilities for changing natural lighting
00:00:59 Overview of Qwen Image Multiple Angles LoRA for changing camera perspectives
00:01:20 How to download and install the latest SwarmUI Model Downloader script
00:01:47 Verifying the new Qwen Image Edit LoRAs in SwarmUI Bundles list
00:02:19 Using the search feature to manually find and download specific Qwen LoRAs
00:02:48 How to update SwarmUI presets using the Windows Preset Delete & Import script
00:03:19 Setting up the Qwen Image Fusion LoRA workflow and selecting the correct preset
00:03:40 Extracting the required trigger word and prompt from LoRA metadata description
00:04:07 Introduction to BiRefNet HR High Resolution Background Remover tool
00:04:42 Reference to previous SwarmUI and ComfyUI backend installation tutorials
00:05:24 BiRefNet HR installation completion and GPU compatibility (RTX 5000/6000/Cloud)
00:05:45 How to use BiRefNet HR: Uploading images and understanding resolution settings
00:06:27 Comparing BiRefNet processing resolutions: Original Size vs 2048x2048
00:07:09 Handling VRAM errors in BiRefNet and viewing the high-quality background removal result
00:07:50 Preparing the composite image for Fusion using Paint.NET (Layers and Resizing)
00:08:35 Uploading the prepared image to SwarmUI and setting accurate aspect ratio
00:08:58 Explaining Smart Image Prompt Resizing and starting the Fusion generation
00:09:48 Reviewing the Qwen Image Fusion results and shadow generation quality
00:10:04 Comparing results with Smart Image Prompt Resizing enabled versus disabled
00:10:41 Setting up the Qwen Image Relight LoRA workflow and applying the preset
00:11:14 Uploading input image for Relight and configuring aspect ratio settings
00:11:50 Generating the Relight images and discussing VRAM usage on different GPUs
00:12:39 Setting up the Qwen Image Multiple Angles LoRA workflow and prompt selection
00:13:12 Uploading input image for Angle changing and adjusting resolution settings
00:13:33 Updates on Flux configurations, Torch Compile, and training speed improvements
00:14:56 Reviewing the Top-Down View results from the Multiple Angles LoRA generation
00:15:23 Conclusion and where to find support for Qwen Image Editing workflows
Master Qwen Image Edit LoRAs: Fusion, Relight & Multiple Angles in SwarmUI (Full Tutorial)
Greetings everyone! Today I am going to show you the 3 famous Qwen Image Edit LoRAs that you have been hearing so much about. In this tutorial, we dive deep into how to install, configure, and use these powerful tools in SwarmUI to achieve professional image editing results.
We will cover the Qwen Image Fusion LoRA for seamlessly blending objects into new scenes, the Qwen Image Relight LoRA to completely change the natural lighting of an image, and the Qwen Image Multiple Angles LoRA to generate different camera views (like top-down) from a single input.
I also demonstrate how to use the updated BiRefNet HR, the most powerful high-resolution background remover, to prepare your images for fusion. Everything is explained step-by-step, including how to use our custom SwarmUI presets for the easiest workflow.
🔥 Key Topics Covered:
Qwen Fusion: Copy-paste objects into scenes with realistic shadows and lighting.
Qwen Relight: Transform image lighting (e.g., create sunlight effects on any subject).
Qwen Multiple Angles: Rotate camera perspectives on people, products, or items.
BiRefNet HR: How to remove backgrounds with the highest quality and handle VRAM settings.
SwarmUI Setup: Installing the latest presets and downloading models via the search feature.
-
00:00:00 Greetings everyone. Today I am going to show you 3 famous Qwen image edit LoRAs that you have been
-
00:00:06 hearing of. For example, we have this image. First, I will show how to remove its background
-
00:00:12 with highest quality; we have a tool for that. Then you have this background, and you just copy
-
00:00:19 paste it like this with the size like this. It is just a copy paste. Then with this Qwen image
-
00:00:26 fusion LoRA, you will be able to fuse image into scene like this, any image. It can be a product,
-
00:00:33 it can be something else. The 2nd LoRA that I am going to show you is Qwen image relight. So
-
00:00:41 we have this base image, you see, this is its natural lighting, and you will be able
-
00:00:47 to relight it into any lighting as you wish. It can be product, it can be item, it can be person,
-
00:00:54 whatever you like. The 3rd famous LoRA is the angle changing, camera angle changing LoRA. So
-
00:01:00 we will give our input image like this, and we will be able to get different angle outputs like
-
00:01:08 this as we wish. You can do this for person, for items, for products, whichever you want.
-
00:01:14 I am going to show you all of them how to do in SwarmUI with the easiest way with our presets.
-
00:01:20 So as in our previous tutorials, download our latest SwarmUI model downloader zip
-
00:01:26 file. The link will be in the description of the video. Put it into your SwarmUI installation and
-
00:01:32 extract it and overwrite all the files like I am doing. Then start Windows start download models
-
00:01:39 app file like this, run. Then in the SwarmUI bundles, you will see there are 3 new LoRAs:
-
00:01:47 Qwen image edit multiple angles LoRA, Qwen image edit relight LoRA, and Qwen image edit fusion
-
00:01:54 LoRA. You can just download the image downloading bundle from here, or you can download Qwen image
-
00:02:00 core bundle from here, or you can manually download each 1 of them. They are positioned
-
00:02:06 under the image generation models, Qwen image editing models, and in here you will see we have
-
00:02:12 Qwen image relight LoRA, fusion LoRA, and multiple angles LoRA. Moreover, we have a search feature.
-
00:02:19 So let's collapse all SwarmUI bundles and copy the name like relight LoRA, paste it into search bar,
-
00:02:28 and you will get directly the LoRA link like this. So click download. Multiple angles LoRA,
-
00:02:35 search, you see here, click download. And fusion LoRA, search, and click download.
-
00:02:42 As a next step, you need to have new presets. So as usual, you can import presets from choose
-
00:02:48 file and overwrite, or you can use our Windows preset delete import. This will
-
00:02:55 backup your existing presets and delete all of them and import and add the new presets.
-
00:03:01 You need to have SwarmUI running for this to work. So it will ask you, click yes,
-
00:03:07 and it is done. Then refresh your presets, sort by name, and you will have the latest presets.
-
00:03:13 So let's begin with the 1st fusion LoRA. I will first refresh my page, reset params to default,
-
00:03:20 this is important. Then I am going to use this preset: Qwen image edit plus 12 steps. This is for
-
00:03:26 Qwen image editing models editing tasks. Direct apply. And in addition to this preset, I need to
-
00:03:34 select Qwen fusion LoRA. You see, this is the Qwen fusion LoRA. I select it like this. Now this LoRA
-
00:03:40 has a description that you need to follow. Click here, edit metadata, and in the bottom you will
-
00:03:46 see that there is description prompt. So copy this prompt. So you can copy this entirely,
-
00:03:53 paste it into any text file, and copy the prompt from here. This is the prompt they trained this
-
00:04:00 LoRA. Then for fusion, you need to have 2 images that you want to fuse, and you need to remove
-
00:04:07 background. For removing the background, we have BiRefNet HR high resolution background remover.
-
00:04:15 This application is the most powerful background removing application. I have recently updated it.
-
00:04:22 Download its latest zip file, paste it into any disk wherever you want, extract. Then Windows
-
00:04:30 install or update and run. This model is really, really powerful. This will automatically install.
-
00:04:36 It is same as in our other applications; we have RunPod and MassedCompute installers as well.
-
00:04:42 So if you didn't watch our previous SwarmUI and ComfyUI backend tutorials,
-
00:04:47 this is the tutorial that you need to watch. This will show you how to install SwarmUI and
-
00:04:52 ComfyUI as a backend and use it with our presets with image generation. And this
-
00:04:58 tutorial is for RunPod and MassedCompute if you don't have a powerful GPU. You can
-
00:05:02 watch this tutorial to learn how to install SwarmUI and ComfyUI and use. So this is for
-
00:05:07 Windows and this is for cloud. They are fully up to date, very recent videos.
-
00:05:12 For removing backgrounds, of course you can use other applications as well, but I am
-
00:05:18 preferring BiRefNet HR because this is the most powerful background remover I have seen. So the
-
00:05:24 installation has been completed. You can scroll up and quickly check the logs. Our installers,
-
00:05:31 all of them supports RTX 5000 series as well or the cloud GPUs like H100, B200,
-
00:05:38 RTX 6000 Pro on Windows and Linux, both of them. So after installation, start the application like
-
00:05:45 this. This application uses VRAM directly related to your input image resolution. So
-
00:05:52 as your input image resolution is bigger, it will use more VRAM. So to upload your image,
-
00:05:58 click here and select your image. Then there are resolution presets as you can
-
00:06:03 see. You may be wondering which 1 is best. So you can compare each case.
-
00:06:09 Default is 2048 to 2048. Depending on your input image resolution, it will use more VRAM or not,
-
00:06:18 and it will impact the output slightly. I have a comparison link here. You can see the comparison
-
00:06:27 of different input images. For example, this is input image, this is the original size remove.
-
00:06:33 So you can see like this, original size remove doesn't change the input image resolution when
-
00:06:39 processing. Or we have 2048 to 2048 resolution like this. So which 1 is better? I think the
-
00:06:48 original is a little bit better perhaps. I don't know, it depends on each image, so you can try.
-
00:06:55 Okay, I got error with 4000 pixels for this image. This image was really big. Let's see
-
00:07:02 if I am using a lot of VRAM right now. So let's try with 2048 pixels, process image. If you get
-
00:07:09 out of VRAM error like this, you should reduce the resolution of your input image
-
00:07:16 or the processing resolution and pay attention to your VRAM usage. If it uses the shared VRAM,
-
00:07:22 it will be really slow. By the way, since I have had out of VRAM error, I need to restart the
-
00:07:29 application so it will clear the VRAM. Yes, it is now cleared. Okay, I don't need to change... oh,
-
00:07:35 it already had worked actually. So you see this was our input image. You can see it perfectly
-
00:07:42 removes the background. Now I have my background removed image and I have another image where I
-
00:07:50 want to merge it. So let's copy this image and I am using Paint.net, this is a free tool. Add a new
-
00:07:59 layer like this and paste it. So then I will resize it like this based on the resolution that
-
00:08:06 I want to put it, based on the, you know, the related aspect ratio or the related resolution
-
00:08:14 like this or the size we can say. Then I am going to merge this. Then I will save as to use. Let's
-
00:08:22 save it into our downloads folder wherever you want and maximum quality. So this resolution is
-
00:08:28 really big. The Qwen image edit models doesn't support this big resolution, but you can try.
-
00:08:35 First of all, you need to use this plus icon to upload prompt image. This is how
-
00:08:40 Qwen image models works if you remember. Then to get the accurate aspect ratio,
-
00:08:45 I am going to use a simple trick. So choose image, download, resolution use closest aspect ratio,
-
00:08:52 and it is done. Then I will do something else as well. You see there is smart image prompt
-
00:08:58 resizing. You should compare results with this is on and off because this makes impact. So let's
-
00:09:04 generate 4 images because you should generate multiple images to see the actual quality. And
-
00:09:11 it is generating right now. This will be fairly fast because this preset is only 12 steps. Okay,
-
00:09:18 you see it is generating right now. It is fully utilizing my GPU, this is great. And if you don't
-
00:09:24 have a powerful GPU, it will automatically do block swapping and it will still work. This is
-
00:09:29 the beauty of SwarmUI which uses the ComfyUI as a backend. And you see we are fully supporting sage
-
00:09:35 attention as well on all GPUs. And we are also using the Qwen image edit plus FP8 scaled version.
-
00:09:42 I have prepared everything fully optimized for you guys. And we have our images. You see it has
-
00:09:48 fused image into it pretty accurately with shadows and everything. It is looking much more natural.
-
00:09:56 Then for example, let's reuse parameters of this image and I am going to upload prompt image again
-
00:10:04 because it is gone like this. And I am going to change this. Let's see what happens. As I said,
-
00:10:10 you should try and see if it makes difference, if it improves or not.
-
00:10:14 This smart image prompt resizing changes the scale of the input image according to
-
00:10:20 the Qwen image edit model. You see it says it is almost always best to leave this on,
-
00:10:25 but in some cases if you are setting your resolution accurately, you may turn it off. Okay,
-
00:10:30 so this is another image. Let's make a comparison. This to this. I don't know,
-
00:10:35 both is looking really good. So it is up to you, you can test it and see. So this was the 1st case.
-
00:10:41 Now the next case. Let's refresh this page, reset params to default to not make any mistakes.
-
00:10:47 Presets. Again I am going to use this Qwen image edit plus preset. Then the next LoRA that I am
-
00:10:54 going to show you is relight. So I am selecting this relight LoRA. And when I edit metadata and
-
00:11:02 copy its description and paste it here, you see this is the prompt. So we are going to use this
-
00:11:07 trigger word and paste it. Then we will select our relight LoRA image from here as usual. You
-
00:11:14 can also drag and drop, let me show you. For example this image. And you see now it is image
-
00:11:20 prompting. Then let's generate 4 images. This is going to relight it into sunlight. Again you
-
00:11:26 need to set resolution accordingly to keep the aspect ratio accurately. So I will init image
-
00:11:33 and I will select the image from here. I will say use closest aspect ratio. Then you turn
-
00:11:39 this off. If you don't turn this off, it will not work. So this is init image, this is image
-
00:11:45 prompting. They are totally different. And generate. Now let's see the results. Again
-
00:11:50 we are using 12 steps. This resolution is like 2 megapixels, so it is fairly fast. Okay it is
-
00:11:57 generating right now. This is the VRAM usage, but don't worry about VRAM usages. It works as
-
00:12:03 low as 6 gigabyte GPUs if you have sufficient amount of RAM memory. Even if you don't have,
-
00:12:09 it will work but it will be slow. And here it is relighted into sunlight. Very good. I mean
-
00:12:15 from this input image, you see, this was a very big image, to this image. So you can play with
-
00:12:22 it. You can even try higher resolution and see if it is working. If you use higher resolution,
-
00:12:27 of course it will use more VRAM, it will take more time. It is up to you, but try it.
-
00:12:33 The 3rd case is, let's refresh, reset params to default and select our preset
-
00:12:39 1 more time. We are all using this Qwen image edit preset and hopefully Qwen image 2511 is
-
00:12:47 coming which will be an upgrade and I will upgrade it as soon as arrived hopefully.
-
00:12:51 The next LoRA is multiple angles LoRA. And again edit metadata, copy the description to
-
00:12:59 have the prompt. So there are some example prompts like move the camera front, left,
-
00:13:04 right. Let's see the turn the camera to a top down view and copy paste it here. Again we are going to
-
00:13:12 use an prompt image. So let's use this 1. Again you need to have accurate aspect ratio. This is
-
00:13:18 very close to 16 by 9 so since I know its aspect ratio I can make it like this and 4. But you know
-
00:13:27 the strategy right now. And let's see the result. I have spent huge time to prepare these presets,
-
00:13:33 edit these LoRAs, add accurate information, add to our downloader. All of these are taking huge time.
-
00:13:40 And furthermore I am right now working on updated Flux configurations. You will love them. We have
-
00:13:48 got huge amount of improvements. Let me show you. So our new configurations will be shared and let
-
00:13:56 me show you the new speeds. We have got huge speed up. We have added torch compile. This was
-
00:14:03 not available in SD scripts. Now I am improving it. I have my own copy so we are now using both
-
00:14:10 SD scripts and Kohya GUI developed by me. So we have torch compile. It is working great. It is
-
00:14:17 working even great with multiple GPU now. So you can get up to 4x speed up with 4 GPUs if you use.
-
00:14:26 This is for Dreambooth fine tuning. And we have new LoRA configs and when you open that you will
-
00:14:32 see. And when we see its speeds it is like this. This is great speed. Again 4x GPU is working. So
-
00:14:40 hopefully I will make a quick tutorial for it as well. And you can watch our older tutorials,
-
00:14:45 so search in our channel like this and you see you can watch this tutorial to use our
-
00:14:50 newest presets. But I will show quickly as well in a newer tutorial. Still you should watch it.
-
00:14:56 Okay we got our new angle. So this is a top down view angle generations it has made based
-
00:15:03 on our input image. So this was our input image and based on this input image we have got top
-
00:15:10 down views. So you can again use this on humans, animals, items, products, whichever you want. It
-
00:15:17 should work fairly well. This was the LoRA that you have been seeing on the social media, Reddit,
-
00:15:24 about the multiple angles LoRA. So these 3 LoRAs are the newest Qwen image edit LoRAs that you have
-
00:15:32 been hearing on. I hope you have enjoyed. You can ask me any questions from Patreon,
-
00:15:38 from YouTube, from Discord. Hopefully see you in another amazing tutorial video.