Wan 21 AI Video Model Ultimate Step by Step Tutorial for Windows and Affordable Private Cloud Setup
Full tutorial link > https://www.youtube.com/watch?v=hnAhveNy-8s
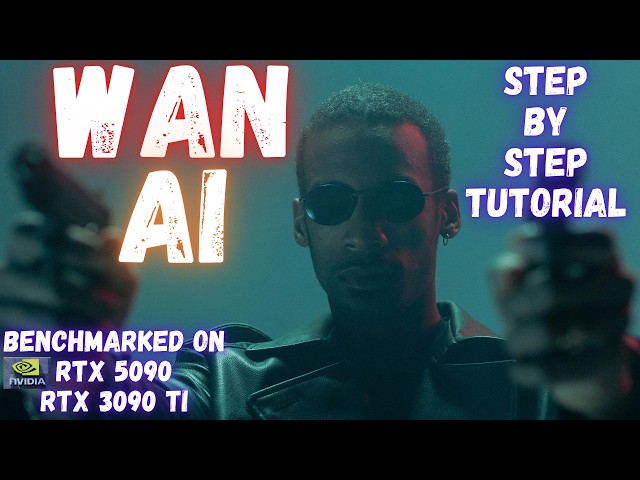


Alibaba’s new Wan 2.1 text-to-video, video-to-video and image-to-video Open Source AI is unbelievable. In this tutorial I will show how you can install Wan 2.1 all publicly published models into your Windows PC with 1-click installation and use them with the easiest possible way. With the Gradio APP I have developed, you will be able to use Wan AI with as low as 3.5GB VRAM having GPUs. Furthermore, for those who want to utilize powerful private cloud GPUs with cheapest possible prices, I will show how to 1-click and install Wan 2.1 on Massed Compute and on RunPod. Additionally, I will compare performance of RTX 3090 TI with RTX 5090 on all Wan 2.1 models. You will be shocked to see performance of RTX 5090. Also the APP I developed supports all RTX 5000 series on Windows with Python VENV natively. You don't need Linux or WSL.
🔗 Full Instructions, Configs, Installers, Information and Links Shared Post (the one used in the tutorial)
🔗 SECourses Official Discord 9500+ Members
🔗 Stable Diffusion, FLUX, Generative AI Tutorials and Resources GitHub
🔗 SECourses Official Reddit - Stay Subscribed To Learn All The News and More
🔗 MSI RTX 5090 TRIO FurMark Benchmarking + Overclocking + Noise Testing and Comparing with RTX 3090 TI
🔗 RTX 5090 Tested Against FLUX DEV, SD 3.5 Large, SD 3.5 Medium, SDXL, SD 1.5, AMD 9950X + RTX 3090 TI
00:00:00 Introduction to Wan AI Wan 2.1 Video Generation Model
00:02:12 Non-Cherry Pick Wan AI 2.1 Video Examples with Prompts
00:03:30 So good anime video generation example
00:03:48 Importance of Prompts and Negative Prompts
00:05:33 How to 1-Click install Wan 2.1 AI on Windows - Windows Tutorial Part - Main Part
00:08:07 How to download Wan 2.1 AI Video Models and detailed explanation of each model
00:10:12 Troubleshooting Model Download Failures - remove HF_HUB_ENABLE_HF_TRANSFER
00:10:55 How to move models of your previous installation into a new fresh installation
00:11:28 How to start Wan 2.1 AI APP after installation and model downloads have been completed
00:11:50 Wan AI APP Gradio Interface Overview and Model Selection
00:12:23 Prompt Enhancement Feature
00:13:17 Text-to-Video Generation Demo and Speed on RTX 5090 and check VRAM usage with nvitop
00:13:40 How much overclock I made on RTX 5090
00:13:55 How to get faster results with lower number of steps
00:14:13 How to start Gradio Wan AI APP on second GPU and Performance Comparison on RTX 3090 Ti
00:14:28 How to Set CUDA_VISIBLE_DEVICES
00:14:41 How to change seed, saved video FPS, number of frames (duration of video)
00:17:04 Output Folder and Multi-line Prompt Support
00:17:41 Generating Multiple Videos and Random Seeds
00:18:10 Using Video-to-Video Feature
00:18:45 Video-to-Video Demonstration and Denoising
00:19:38 Exploring 14 Billion Parameter Text-to-Video Model
00:21:30 Testing 14 Billion Parameter 480 Pixel Image-to-Video Model
00:22:15 Prompting with Claude AI for Image-to-Video
00:23:26 Image-to-Video Generation Demo and Speed on RTX 5090 and 3090 Ti
00:23:45 Crucial Tips: Aspect Ratio and Cropping for Image-to-Video
00:24:32 Step Speeds for 720 Pixel Image-to-Video Model on RTX 5090 and 3090 Ti
00:24:57 Using Wan AI on Massed Compute Cloud Service
00:25:31 Registering and Setting Up Massed Compute
00:26:37 Deploying a Machine and Connecting with Thinlinc Client
00:28:09 File Transfer to Massed Compute Shared Folder
00:29:32 Installing Wan AI on Massed Compute
00:30:13 Downloading Models on Massed Compute (Fast Download Speed)
00:31:00 Starting the Gradio Interface on Massed Compute
00:31:20 Accessing Gradio Interface from Local Computer
00:31:56 Generating Video on Massed Compute and Monitoring Progress
00:32:46 Downloading Generated Videos from Massed Compute
00:33:30 Terminating Massed Compute Machine (Caution)
00:34:04 Faster Generation Options on Massed Compute (H100, A100, L40S)
00:34:31 Running Multiple Applications in Parallel on Massed Compute
00:35:08 Using Wan AI on RunPod Cloud Service
00:35:41 Registering and Setting Up RunPod
00:35:58 Deploying a Pod and Connecting to Jupiter Lab
00:37:50 Uploading and Extracting Installer on RunPod
00:38:10 Installing Wan AI on RunPod
00:38:40 Downloading Models on RunPod (Fast Download Speed)
00:40:00 Starting Gradio Interface on RunPod and Accessing Live Share Link
00:40:37 Testing Generation Speed on RunPod (H100 GPU)
00:43:25 Downloading Generated Videos from RunPod
00:43:55 Stopping and Terminating Rampod Pod (Caution and Resume Option)
We have used the following songs in this video : https://gist.github.com/FurkanGozukara/93760132ddca2e849ecd7dab84130848
Example : Cartoon, Jéja - Why We Lose (feat. Coleman Trapp) [NCS Release]
Music provided by NoCopyrightSounds
Free Download/Stream: http://ncs.io/whywelose
Watch: http://youtu.be/zyXmsVwZqX4
-
00:00:00 Greetings everyone, the most powerful and most advanced open-source public locally available
-
00:00:07 to use video generation model Wan AI from Alibaba Group has been published. So in this tutorial you
-
00:00:14 are going to learn everything about this model and how to run it on your Windows computer. If
-
00:00:21 you want to run it on a cloud machine locally on RunPod on Massed Compute, this is the tutorial
-
00:00:27 that you have been waiting for. Wan AI is so powerful that it is able to compete against
-
00:00:34 the paid services such as Kling, Runway ML, or the other ones that you can imagine of. You can
-
00:00:41 run this model totally locally for free forever on your computer. And, imagine you are getting
-
00:00:48 the quality of the paid services such as Kling. It is even able to compete with the Open AI Sora
-
00:00:55 model. It is so good and so high quality. And, you can use this model on your computer. The model
-
00:01:01 weights are totally publicly published. In today's tutorial, I will show you how to 1-click install
-
00:01:08 and use it in a very advanced Gradio application that I have developed. The model is just amazing,
-
00:01:14 currently supports text to video, image to video, video to video. And we have been waiting for image
-
00:01:21 to video for a long time for public models with such quality and power and it is here. Not only
-
00:01:27 image to video, this model extra supports video to video as well. And they have published it,
-
00:01:33 open-source, it is truly SOTA, state-of-the-art. And today, we are going to learn everything about
-
00:01:40 this model. They have published 14 billion parameter and 1.3 billion parameter model.
-
00:01:46 And the Gradio application that I have developed is able to run this model as low as 3.5 GB VRAM
-
00:01:55 GPU. Therefore, even if you have a low VRAM GPU, you will be able to use this amazing model really
-
00:02:01 fast. The Gradio application I have developed is so easy to install and use, but it has all the
-
00:02:07 features that you need. And I have generated non cherry-picked videos for you to show you. Okay,
-
00:02:13 let's look at the some of the more generations I have made, there is nothing cherry-picked, they
-
00:02:18 are the first trials I have made. The prompt is here, the uploaded image is here and let's look at
-
00:02:26 the fidelity. This is 14 billion parameters image to video model, you see this is the fidelity of
-
00:02:33 the image. This is just perfect, no deformation, nothing. It is perfect. And here, another example
-
00:02:39 I have made, this is made with the 14 billion parameters text to video model. This is the
-
00:02:45 prompt, I made the Claude AI to write prompts, it is for free, I will show in the tutorial, and you
-
00:02:52 see this is the generation. This is next level, this is at the level of the paid services, that
-
00:02:58 you pay a lot of money and you wait a lot of time. And here, another image to video, so this is the
-
00:03:05 prompt, this is the generation as you are seeing it is just mind-blowingly good, it is amazing, and
-
00:03:11 you can see the input image is here, the fidelity of the model is just amazing. And here, another
-
00:03:16 image to video, you see, this is just amazingly animated, you can see the input image is here.
-
00:03:22 This is a text to prompt, this didn't work very well, I think, but it is how it is as you are
-
00:03:28 seeing right now. And I also generated an anime video like this from the 14 billion text to video
-
00:03:35 and the quality is just mind-blowingly good. This is literally a professional level anime. You are
-
00:03:43 seeing the quality, the animation, the smoothness, it is just perfect level. In one generation,
-
00:03:49 I have forgotten to write prompt. I've written it into negative prompt and this is the result
-
00:03:55 as you are seeing. So, do not forget to write your prompt, but you can also provide negative prompt,
-
00:04:00 of course. I didn't provide in the other examples. If you don't write the prompt,
-
00:04:04 it will generate something like this. So, the rest of the tutorial will be like this,
-
00:04:08 I will show you how to install and how to use the application on Windows in details. So, watch the
-
00:04:15 Windows tutorial part to learn the details of the application. I will make comparison with the RTX
-
00:04:21 5090 and RTX 3090 TI for all the models on this computer as you are seeing. So, I really recommend
-
00:04:29 to watch the entire tutorial to see the speed on the newest generation GPU, and also a very decent,
-
00:04:36 powerful GPU, RTX 3090 TI. RTX 5090 is performing amazing. I have made it available to install for
-
00:04:43 RTX 5000 series as well, whether it is RTX 5070, 5080, it will work on all of them. It is working
-
00:04:51 with Python virtual environment, so it will not affect, impact any other of your AI applications.
-
00:04:57 After the Windows tutorial part, I will move on to the cloud services. So, if you don't have a
-
00:05:02 powerful GPU, you will be able to install it on Massed Compute, this is my recommendation with
-
00:05:08 L40 GPU or a better GPU and you will be able to generate whatever video you want with extremely
-
00:05:15 cheap prices. Then, after the Massed Compute, I will show how to generate and use on RunPod. So, I
-
00:05:22 will cover everything that you need for this and I am updating this application. Just make a reply to
-
00:05:28 the post or the video and hopefully, I will try to implement the feature that you need. So, as usual,
-
00:05:34 I have prepared a very detailed post, where you will find all of the necessary instructions to
-
00:05:40 install Wan 2.1 application on your Windows or on Massed Compute or RunPod. I really recommend
-
00:05:48 to read this post extremely carefully from top to bottom. You will find the installer zip file at
-
00:05:55 the top of the post or at the bottom of the post, where you will find as an attachment like this.
-
00:06:00 So, let's download from the attachments. For this application to work on Windows, you need to have
-
00:06:06 installed requirements, to install requirements, I already have a requirements tutorial, for RTX 5000
-
00:06:13 series, I also recommend to install CUDA 12.8. You will learn how to install it once you follow
-
00:06:20 this tutorial video and its resource file. This is totally public video, so I really recommend
-
00:06:26 to watch it before starting installation. Move the installed file into one of your hard drives.
-
00:06:32 Do not use shared drives like OneDrive, Google Drive, or anything. Extract the archive. After
-
00:06:40 extracting the archive, you will see the files like this, the installer files. First of all,
-
00:06:46 you need to run installer. Do not forget that. So, there is Windows install.bat file, double click
-
00:06:52 it. It will ask you this, click More info run anyway. Do not run it as administrator because it
-
00:06:59 will break your installation. The installation is totally automatic, you don't need to do anything,
-
00:07:05 this will install everything for you. If you have 5000 series GPUs like RTX 5090, 5080,
-
00:07:12 5070, we have RTX 5000 series installation. This installation is also working with older GPUs, so
-
00:07:19 I am going to install that way because I can also use my RTX 3090 TI with that. So, double click it,
-
00:07:26 what is the difference of this one? This is using the latest nightly version Pytorch and also Torch
-
00:07:34 vision, and also precompiled Flash Attention for this version. This is working on RTX 5000 series
-
00:07:41 perfectly fine. Just wait for installation to be completed. If you encounter any errors,
-
00:07:47 you can select all of the installation logs, copy, paste into a text file and you can email me that
-
00:07:55 error logs, if anything happens, but it shouldn't happen if you follow the requirements tutorial.
-
00:07:59 Once you see that, this folder is generated, during the installation you can begin downloading
-
00:08:05 the model files. So for downloading model files, we have Windows download models files.bat file,
-
00:08:11 double click it. More info run anyway. It will ask you options to download the video models. So,
-
00:08:18 the very fast working model is the Wan 2.1 text to video 1.3 billion parameters models. This is
-
00:08:26 extremely lightweight, it is working as low as 3.5 GB of VRAM having GPUs. Its resolution is 640 to
-
00:08:36 640, the best working resolutions are 480 to 832 or 832 to 480. This model is also supporting video
-
00:08:46 to video, this is the only model that supports video to video. Unfortunately, this model is not
-
00:08:50 supporting image to video. The second model is Wan 2.1 720 pixels image to video model, this is
-
00:08:58 the most VRAM, most GPU power demanding model, but it is also the most powerful image to video model
-
00:09:06 available to use right now as an open-source, as a model that you can use locally. There is also
-
00:09:12 alternative 480 pixel image to video model. This is at least 3 times faster than the 720p model to
-
00:09:21 generate because it is lower resolution, you can also use this, and the fourth option is the 720
-
00:09:27 pixel resolution text to video model. This model is the most capable model to generate videos from
-
00:09:34 text prompts, this is way better than the 1.3 billion parameter model. So, you can download
-
00:09:39 them one by one by entering their number, or you can download all of them with option five. So,
-
00:09:45 I will use option five. The models are huge, however, I have optimized the downloader, so it
-
00:09:51 will download with the maximum possible speed. You can see that I am getting 50 megabytes per second,
-
00:09:57 I am going to get over 100 megabytes per second on my local computer. On cloud machines, I am able to
-
00:10:03 get over 1000 megabytes per second, you will see in the next chapter of the video when I
-
00:10:09 install on Massed Compute and also on RunPod. So, sometimes, some people reporting that their model
-
00:10:16 downloading fails, how you can fix the problem is, open this Windows download models .bat file,
-
00:10:22 you can open it with any text editor, I will open in Notepad, then, you need to remove this line.
-
00:10:30 You see? This is for speeding up the download, but if you are getting error, you need to delete this,
-
00:10:37 save and run the downloader again. I am still trying to figure out how this error occurs,
-
00:10:44 I reported this issue to the developers, but meanwhile, this is the solution that you can make.
-
00:10:49 Then follow the installation and model downloads. The installation already have been completed. So
-
00:10:55 I am going to move my already downloaded models to here to start using it, but you can see that it is
-
00:11:01 downloading the necessary models extremely fast as you can see right now. So let's just close this,
-
00:11:07 let's go back to my previous installation which is inside here, models. So, I will cut this and
-
00:11:14 I will go back to my new installed folder and I will delete the models like this and I will paste
-
00:11:22 the model and yes, I am ready. So after the models have been downloaded, the installation has been
-
00:11:28 completed, how I am going to start? You see there is start APP .bat file, double click it, more
-
00:11:34 info run anyway. Remember, do not run anything as administrator. Moreover, all of my AI applications
-
00:11:41 generates a virtual environment. Therefore they are all isolated and they will never break any
-
00:11:47 of your existing applications. So, this is our interface, it is extremely advanced and simple
-
00:11:53 to use. We have the model selections from here. As you change them, you will see that the parameters
-
00:11:59 are changing, the GPU presets are changing. What are the GPU presets are doing? It is deciding that
-
00:12:06 how much of the model will be kept in the GPU memory rather than your system memory. You can
-
00:12:12 see that the numbers are changing. If you get out of VRAM error, you can reduce this number and try
-
00:12:18 again. It will use lesser VRAM if you do that. So let's begin generation, we also have prompt
-
00:12:24 enhance option. So, you can type a simple prompt like a cat walking on a grass field and you can
-
00:12:33 use this prompt enhance. When you first time use it, it will download the necessary models. What
-
00:12:39 it is going to do that it is going to use a local LLM and it is going to enhance your prompt. This
-
00:12:47 is from the official repository implementation. And you see that it improved our prompt to a cat
-
00:12:54 strolls gracefully through a sunlight grass field, its tail swaying gently behind, close up, slow
-
00:13:00 motion shot. However, you can further improve this prompt if you want. You can use LLMs like
-
00:13:07 Chat GPT or Claude to improve it further. I will show the improvement for image to video
-
00:13:14 and video to video in the following chapter. So, let's generate a video with RTX 5090 and see the
-
00:13:20 speed. It will fit into VRAM entirely. We can see the how much VRAM it is being using. So, nvitop
-
00:13:30 and we can see that how much VRAM it will use like this. And also I am recording a video right
-
00:13:37 now. Therefore, I am using a lot of GPU power. I also made some slight over-clocking like 300
-
00:13:44 plus megahertz for core and 1500 megahertz for memory and we can see the speed, yes. It is 4.25
-
00:13:54 second IT. If you want faster results, you can reduce the number of inference steps here, but
-
00:14:00 50 steps is working really best. I really don't recommend unless you have to. It is also pretty
-
00:14:06 fast. You see it is already 11 steps, 12 steps, so it will take around three to four minutes on this
-
00:14:12 GPU. But, what about other GPUs? Let's also start another instance with the RTX 3090 TI that I have.
-
00:14:19 To start it, I will copy paste the start APP .bat file, edit its content and I am going to limit it
-
00:14:26 to CUDA visible devices one. So this application will only see my second GPU. Then double click it,
-
00:14:33 and now, this is running on my second GPU. So let's copy this prompt and hit here and we are
-
00:14:40 ready to generate. You can also change the seed. You see it is random seed by default.
-
00:14:46 You can change the video saving FPS and number of frames, but 81 frames is the best. You can
-
00:14:53 also reduce this or increase it, it works. And the quality of the video is five by default.
-
00:14:59 So let's make the aspect ratio different for this one. I will make it 9 to 16 and generate. Now we
-
00:15:08 will see the speed of the RTX 3090 TI as well. You see the 3090 TI were not using any VRAM. Therefore
-
00:15:15 we will see the exact VRAM usage and it is using 6 GB of VRAM memory. However, if you have lower GPU,
-
00:15:23 you can select the option 4 GB and it will make the number of persistent parameters to zero. In
-
00:15:30 that case, it will use only 3.5 GB of VRAM memory. I have tested all of the configurations and you
-
00:15:39 see 5090 almost completed. The 3090 TI is getting like 8.6 second IT and 5090 is like 4.18 seconds
-
00:15:49 IT. However, since I am recording video, it is slower. I will show you the actual speed with
-
00:15:55 stopping video and testing for you. Okay, so I have turned off recording and regenerated a
-
00:16:02 video on RTX 5090 to test its real speed and it is amazing. It took only two minutes, 59 seconds for
-
00:16:11 50 steps for the 1.3 billion parameters, 480 pixel resolution model. And RTX 3090 TI took 7 minute,
-
00:16:21 11 seconds for 50 steps for the same. So, here I am recording the durations and the tasks and
-
00:16:28 you can see the difference. You will notice that the VAE decoding took a lot of time, nine
-
00:16:33 seconds. And on powerful GPUs, you can disable tiled VAE decode for the 1.3 billion parameter
-
00:16:42 models and it will be almost instant. Currently FP8 version is not working. I have reported this
-
00:16:51 issue to the developers of the library for speed up optimization that we use and hopefully once
-
00:16:57 it is implemented, it will start working and it will be even faster and lower VRAM, hopefully. So,
-
00:17:04 what else you can make? Our application saves every prompt generated. When you open the outputs
-
00:17:10 folder from here, you will see that there is outputs folder and inside outputs folder,
-
00:17:15 you will see that every generated video is saved with the prompt used. We also support multi-line
-
00:17:23 prompt generation. So, you can type multiple prompts like a dog strolls gracefully, and let's
-
00:17:30 say a lion. And when you enable these multi-line prompts, it will generate all three videos and
-
00:17:38 save them in the outputs folder for you. Moreover, you can generate multiple videos as well. How? You
-
00:17:46 see there is number of generations, set this to 10 and it will generate 10 videos for each prompt
-
00:17:52 with a random seed each time. So, you can generate multiple videos and pick the very best one that
-
00:17:58 you like. Okay, let's see the generated videos, it is like this. The prompt is not very detailed.
-
00:18:03 Therefore, the video is not that great, but still it is a very decent quality and really fast. So,
-
00:18:10 how to use video to video? The video to video only works with this model. Therefore, select
-
00:18:15 it and for activating video to video, you need to upload an input video here. So, let's use one of
-
00:18:21 the generated videos, for example, this one. You see the video is here. The resolution of the video
-
00:18:27 is this one, so I will set it and I need to type a prompt. I will try something really, really hard,
-
00:18:33 a cat made of papers. And, you need to change the denoising. Let's apply a strong denoising
-
00:18:40 like 95 percentage. Then let's generate and see. All right, the video has been generated. However,
-
00:18:48 since I did set number of images to generate 10, it is continuing to generate, but we can see the
-
00:18:55 generation in the outputs folder. So, when I open the outputs folder, this is the output and yes,
-
00:19:02 this is really, really amazing. I mean, I told it to convert this video into a walking cat made of
-
00:19:11 papers and we can see that it did it. However, since we applied a huge amount of denoising,
-
00:19:19 it is a little bit changed as expected, I mean, the angle, the rotation, but it worked. So,
-
00:19:26 this is how you can use video to video, you need to experiment and find out what is working best
-
00:19:32 for you. So I am restarting my application. Okay, what about other models like 14 billion parameters
-
00:19:41 text to video model? The 14 billion parameters text to video model is way more powerful than
-
00:19:48 1.3 billion parameter model. However, it is also extremely VRAM demanding. We are only able to
-
00:19:54 keep low number of parameters in the VRAM. So I am changing my presets to 32 GB for the RTX
-
00:20:01 5090. However, how much VRAM I am using right now? I am using around 3 GB, so it may not be
-
00:20:08 sufficient. So, let's make this 5.5 instead of 6.5 and we can select any resolution from here. So,
-
00:20:16 the native resolution is 1280 to 720 pixels. So, let's generate a video on RTX 5090 and let's try
-
00:20:25 to generate one on RTX 3090 TI as well. These values are extremely delicately researched and
-
00:20:33 set for you so that it will make your job easier. Both of the GPUs started generating the video. The
-
00:20:40 speed of RTX 5090 is 82 seconds per IT, but I am recording a video, I will stop video recording,
-
00:20:49 restart and show you the real speed and we will also see the speed of the 3090 TI and you can see
-
00:20:55 that both of the GPUs are running right now on my system. If you are wondering, my system, I already
-
00:21:03 have two tutorials on my channel, this one and this one where I have shown my system in details,
-
00:21:09 I will put their link into the description as well, so you can find them easily. Okay,
-
00:21:15 we got two steps in both of the GPUs and 5090 is 70 seconds per IT, and 3090 TI is 183 seconds per
-
00:21:27 IT. Okay, as a next step, I am going to test Wan 2.1 14 billion parameters, 480 pixel model. This
-
00:21:36 model is way faster than 720 pixel model because it is lower resolution. Therefore, this is more
-
00:21:45 proper for consumer GPUs. If you want to use 720 pixel resolution model, you probably need
-
00:21:52 to use it on cloud services like RunPod or Massed Compute, I recommend Massed Compute. So, let's see
-
00:21:59 the 480 pixel model speed. For this model to work, you need to have an input image. So, I already
-
00:22:07 have an input image for testing, it is here, this image and how you should prompt it. For prompting,
-
00:22:15 I am using Claude and how do I use it? You can also use this for free, this is official and
-
00:22:21 free to use on Poe. You can do a lot of prompts, upload the image into here. Then use a prompt like
-
00:22:29 describe this image like a movie scene. It will be used in a image to video model. So let's see what
-
00:22:38 kind of description it will give us. Okay, it gave a lot of, so I will make it more dense, convert
-
00:22:45 it into a single prompt, single line prompt, just describe the action of the scene. Okay,
-
00:22:55 let's see what it is going to give. Sometimes you need to do multiple prompting. Yes. This is
-
00:23:00 for example, what we need, then copy paste it, copy paste it. Okay. We got the model selected,
-
00:23:07 let's select 32 GB, and let's reduce a little bit. Okay and generate, and also this is RTX 3090 TI,
-
00:23:16 so it will be image to video, 24 GB. Let's copy paste, let's select the image as well here and
-
00:23:25 generate. Then let's see the speed and I will stop video and show you actual speed. All right,
-
00:23:30 it has been some time and we got the speeds. The RTX 5090 is 20.5 seconds per IT, and RTX 3090 TI
-
00:23:41 is 55.6 second IT. There is one very crucial thing that you have to be careful, which is selecting
-
00:23:51 the correct aspect ratio for your uploaded image and selecting auto crop or manually cropping your
-
00:23:58 input image. So, pay attention to them, make sure that you have the prompt, you have the correct
-
00:24:03 aspect ratio, the width and height of the image. If you crop yourself, it is better, otherwise,
-
00:24:09 our application will also auto-crop. It is able to auto-crop both input images and input videos. So,
-
00:24:16 I am going to repeat the test for the most heavy demanding model, 14 billion image to video model,
-
00:24:23 720 pixels. And, I will show you the results. It is exactly same as using the 480 pixel model. So,
-
00:24:30 let's see the speeds. All right, we got the step speeds of the RTX 5090 and 3090 TI. 3090
-
00:24:38 TI is 188 seconds and 5090 is 70 seconds. I have recorded them. So, now, I will begin you showing
-
00:24:49 how to install and use on cloud services, if you don't have a powerful GPU or if you want to scale
-
00:24:55 your generation speed. All right, to use this amazing model on a cloud service Massed Compute,
-
00:25:01 my favorite, first of all, go to the link in the description of the video. You will get to this
-
00:25:06 link and download the attachments zip file from here, or in the attachments you will see the zip
-
00:25:12 file from here, then, extract the zip file into anywhere. Extract, let's open the extraction
-
00:25:20 and you will see that there is Massed Compute instructions .txt file. This is the file that you
-
00:25:26 always need to read. We already have some example to tutorials here. First of all, register to
-
00:25:32 Massed Compute. Please use this link to register. I appreciate that. After registration, go to the
-
00:25:38 billing and add some credits to your account. They also support crypto payment, which is amazing.
-
00:25:44 After that, go to the deploy and you will get to this page. This shows the available GPUs
-
00:25:50 and which GPUs you can use. If you use RTX A6000, currently you need to use at least 2x because the
-
00:25:58 RAM memory of the single image is not enough. I've messaged the team and hopefully they will
-
00:26:04 increase it to 64 GB of RAM memory next week, but so far, until it is increased, you need to use 2,
-
00:26:11 but my recommendation would be L40. This GPU has huge amount of RAM, and also huge amount of
-
00:26:18 storage. As a category, select creator and as an image, select SECourses and you will get my image.
-
00:26:25 Then type our coupon. This will reduce price from 1.05 dollar per hour to only 53 cents. This is an
-
00:26:35 amazing deal, then click Deploy. Once deployed, you will get to this page and you need to wait
-
00:26:41 the status to be initialized. If you haven't used Massed Compute before, you need to use ThinLinc
-
00:26:48 client. Click this link. Download the application according to your operating system. Remember,
-
00:26:54 Massed Compute is a cloud service, so everything will run on a remote machine,
-
00:26:58 not on your computer. I am on Windows, so I will download these Windows. Click it, click Yes,
-
00:27:05 click Next, accept, next, install, then run, then you will get to this page. So, return back to your
-
00:27:12 Massed Compute. Before starting, you need to click Options and go to local devices, uncheck all and
-
00:27:20 check drives, click Details and add a folder here. This will be used to transfer files, but remember,
-
00:27:27 you can only transfer small files, not big ones and make the permission read and write and click
-
00:27:33 okay and click okay and wait for initialization to become green and running. This is super important.
-
00:27:40 This may take between 10 to 15 or 20 minutes. It may sound a lot, but after the initialization has
-
00:27:46 been completed, Massed Compute is the fastest cloud service that you can find and hopefully
-
00:27:51 we will also improve the initialization speed. So the Massed Compute machine has been initialized,
-
00:27:58 let's copy login IP and return back to your ThinLinc client, paste it, copy this username,
-
00:28:04 this is important, paste it, copy your password and paste it. And another thing is that copy your
-
00:28:11 downloaded zip file and go to your Massed Compute share folder, wherever you have set. I have set it
-
00:28:18 here and paste it there, so that you can quickly copy that file into the Massed Compute, you will
-
00:28:24 see and then click Connect and click Continue. You see that there is end existing session,
-
00:28:30 this terminates all of the running applications on Massed Compute. So therefore do not use it
-
00:28:35 unless you need to. Okay, I click it start and it is starting the session. Massed Compute has
-
00:28:41 a desktop interface and this is the Massed Compute interface. We also have other applications you can
-
00:28:47 see. So this is the disk space we have, this is the RAM usage and this is the CPU usage.
-
00:28:51 Open home and after opening home, go to the Thin Drives, go to Massed Compute share it folder, wait
-
00:28:58 for it to load, this is synchronizing with your computer, shared folder. Therefore it may take
-
00:29:04 some time. Do not run anything here or do not transfer big files from here, it won't work. For
-
00:29:11 big files transfer, you need to use like OneDrive, Google Drive, or Hugging Face or such. So,
-
00:29:16 our installer is here, you see, Wan 2.1 v7. Drag and drop it into the downloads folder,
-
00:29:23 wait for copy and then right click and extract here. Then enter inside the folder,
-
00:29:29 open Massed Compute instructions read .txt file. First of all, we will begin installation. So,
-
00:29:35 copy this with control C, open a new terminal and when you get asked of this click Cancel,
-
00:29:41 you don't need to and then click paste. Remember that you have opened the command line interface
-
00:29:48 in the same folder. You see Downloads Wan 2.1 version seven. This is how you can start
-
00:29:54 installation. Wait for Wan 2.1 folder appear, yes, like this, then return back to the instructions,
-
00:30:01 copy this part, Control C and click open terminal. How do I open terminal inside that folder? You see
-
00:30:08 these three dots, open terminal and paste it. And it will ask you which models to download.
-
00:30:14 Let's download 2.1 14 billion parameters model as a test. So it is option four and hit Enter.
-
00:30:22 And the download speed of the Massed Compute is just mind-blowing, let's see in real time.
-
00:30:28 So, it took only 18 seconds for 10 GB of file, yes, it is around 1,000 megabytes per second. So,
-
00:30:36 the downloads of the models are really fast. The installation is also really fast,
-
00:30:41 just wait for installation to be completed. Okay, so the installation has been completed on Massed
-
00:30:46 Compute. How do I know? You will see that virtual environment made and installed properly. The model
-
00:30:52 has already been downloaded. So, return back to Instructions .txt file and copy this prompt. This
-
00:31:00 is for starting the interface, copy it, it will start the application. Return back to the folder
-
00:31:06 and click three dots and open another terminal and paste it. Now, this is going to start the Wan 2.1
-
00:31:13 application and we will be able to use it in our computer or in our tablet, in our phone, anywhere.
-
00:31:21 You see there is this URL, I will copy it and I will use it in my own computer rather than inside
-
00:31:27 the Massed Compute. So, copy paste it and you see the interface is loading in my computer and yes,
-
00:31:34 this is running on a cloud machine on Massed Compute, but I can use it in my computer. So,
-
00:31:40 let's use our downloaded model, let's select the GPU, this is the GPU preset. The usage is same
-
00:31:49 as in Windows, so I will copy paste this, verify your resolution, aspect ratio and everything and
-
00:31:55 click generate. Then it will load the model and start generation to see the progress, return back
-
00:32:01 to your Thin Link client and watch the interface, the command line interface here, let's see what
-
00:32:08 is happening. We can also start nvitop, so open a new terminal like this and type nvitop. Okay,
-
00:32:15 it is loading the model right now. We can see the VRAM usage is increasing. Yes, you see my
-
00:32:21 presets are really optimized. It is using almost entire VRAM. It will take some time on this GPU,
-
00:32:29 but we will see the speed and generation results. So, our generation on Massed Compute has been
-
00:32:35 completed. This is the video. I mean, it worked really decent if we consider the, if we consider
-
00:32:41 the prompt. This is a very weird prompt and it worked really, really well. To download the model,
-
00:32:47 you can use this icon. It will download into your computer. If you generated many videos and if you
-
00:32:52 want to download all of them at once, go to your installation folder, Wan 2.1, Wan 2.1,
-
00:32:58 enter inside output and copy the videos that you want or you can just copy the outputs entirely,
-
00:33:06 move it into the Thin Drives, paste into your synchronization folder, let me demonstrate you.
-
00:33:12 So, I will paste it here with control V and it is copied here, wait for copy to be completed,
-
00:33:18 it may take some time. Then go back to your synchronization folder and it will appear
-
00:33:23 here. So, then copy them into your computer and it will be synchronized as you are seeing right
-
00:33:29 now. On Massed Compute, you have to terminate your machine, there is no stop or resume feature. So,
-
00:33:36 go back to your running instances here and click this terminate icon. However,
-
00:33:42 be careful because when you do that everything will be deleted permanently, there is no restore
-
00:33:49 back, there is no recovery, nothing. So make sure that you did backup everything and then
-
00:33:55 click this icon and it will delete it. And you see we only paid 50 cents for per hour. So this
-
00:34:00 is a great pricing and let's just delete. If you want a faster generation on Massed Compute,
-
00:34:06 the recommended GPUs will be H100 or A100, or you can use L40s, but it is not as fast as these other
-
00:34:15 ones. However, you can also rent multiple A6000 or L40s and start application on each one of them and
-
00:34:24 generate multiple videos on different started applications at the same time, in parallel.
-
00:34:30 That is also perfectly possible. How to do that? Open your Massed Compute instruction files and
-
00:34:36 you are going to add a command here, like export CUDA visible devices equal to 1. So, once you
-
00:34:45 start your application like this, it will run on the GPU ID 1. If you make it 0, it will run on
-
00:34:51 the GPU ID 0. If you make it 2, it will run on the GPU ID 2. So, let's say you have rented four GPUs
-
00:34:58 and you can start four applications like this and each one will run on a different GPU. So,
-
00:35:03 you will be able to generate multiple videos at once. Keep watching the video. Alright,
-
00:35:08 now I will show you how to use this amazing model on a cloud service RunPod. This is one
-
00:35:14 another favorite cloud service. Click the link in the description of the video to open this
-
00:35:19 page. Remember to watch the Windows tutorial part to learn how to use the application. So,
-
00:35:24 download the installer from here or from the attachments you will see here. After downloading
-
00:35:29 the attachments, extract it into any folder and enter inside the folder and you will see that
-
00:35:36 there is RunPod instructions read txt file, open it. I recommend you to register with my
-
00:35:43 link if you haven't yet. I appreciate that. After registration, go to the login with sign up button,
-
00:35:49 then go to the billing and add some balance to your account. After you have added account,
-
00:35:55 some balance, after that go to the pods and click deploy. Now, which GPU you need to use? On RunPod,
-
00:36:02 you can use pretty much every GPU, but according to your GPU, your speed will be slow or fast. So,
-
00:36:09 I recommend to use at least L40S because it has the sufficient RAM and also VRAM,
-
00:36:15 a little bit sufficient VRAM, not fully, but still it will be good. If you want faster speed,
-
00:36:21 you can use H100 PCI or you can use A100 PCI Express as well. Let's go with H100 PCI
-
00:36:29 Express. Click change template and type Pytorch like this and select the Pytorch 2.2.0. This is
-
00:36:38 the template that you need. Click edit template. I really recommend to add a lot of space, if you
-
00:36:44 want to test especially all of the apps, let's add like 300 gigabytes. This is super important,
-
00:36:50 set and then click deploy on demand. Then click my pods. You can also click your pods here. Verify
-
00:36:56 that your machine has sufficient RAM. How much RAM is sufficient? At least 96 gigabytes of RAM, I
-
00:37:03 recommend to get. It will make it faster and wait for pod to be initialized. How you will know it is
-
00:37:10 initialized? The connect button will appear here. You can also refresh this page if you want to see
-
00:37:17 and connect appeared. Then click connect and click connect to Jupyter Lab. You see this interface,
-
00:37:24 click it. This will open the Jupyter Lab interface of the RunPod. Remember, this is running on a
-
00:37:30 cloud machine, not on your computer. Wait for this interface to be loaded. If this interface doesn't
-
00:37:35 load, you need to get a new pod and you may encounter broken pods on RunPod a lot. Moreover,
-
00:37:41 if you want even more cheaper prices, you can go with community cloud. However, this can be
-
00:37:46 extremely slow or more probably broken pod. Then click this icon for upload. Upload the downloaded
-
00:37:53 zip file into the workspace. Once the upload has been completed, right click and click extract
-
00:37:59 archive. It will extract all of the content. Click this to refresh. Then double click and open RunPod
-
00:38:05 instructions txt file. This is the installation command. Copy this, open a new terminal like
-
00:38:12 this and paste it and hit enter. This will start installation. Wait a little bit until you see the
-
00:38:19 folder of Wan 2.1 here. Let's see, let's just wait a little bit more. If you stop your pod and resume
-
00:38:26 later, you need to run this installation again. It will be way faster second time, but remember that.
-
00:38:33 Okay, now we see that Wan 2.1 folder arrived. We can begin downloading models. So for downloading
-
00:38:41 models, copy this, you see download, open a new terminal and paste it. You can also right click
-
00:38:47 and paste and it will ask you allow and it will paste and hit enter. Now, which models you want to
-
00:38:53 download? It will ask you. This is exactly as in the Windows tutorial part. So for demonstration,
-
00:38:58 let's download the option four, 14 billion parameters text to video model. You will notice
-
00:39:05 that I am optimizing the downloader extremely well and therefore the download speed will be really,
-
00:39:12 really fast. Let me show you the download speed. Yes, it is 400 megabytes per second,
-
00:39:17 1 gigabyte per second, 1.5 gigabyte per second because our pod is a good pod, expensive pod and
-
00:39:24 I am optimizing the download speed. If I didn't optimize it, it would be only 40 megabytes per
-
00:39:31 second. You see the difference? It is huge. And then we need to wait for installation to
-
00:39:35 be completed. Installation may take huge time on RunPod. It totally depends on your pod and
-
00:39:41 on RunPod, hard drives are usually very, very slow compared to the Massed Compute. Okay,
-
00:39:47 so the installation on RunPod has been completed. How do you know? You see virtual environment made
-
00:39:54 and installed properly. After installation has been completed and you have downloaded the models,
-
00:39:59 you need to copy this command with Control C, open a new terminal and paste it and it will start the
-
00:40:07 Gradio interface that we can use from our phone, tablet, TV, wherever you want. It will be Gradio
-
00:40:14 live share. If you don't want to use Gradio live share, you can add 7860 port as a proxy and use
-
00:40:21 it, but I recommend Gradio live share. Click this link, you see. It will open the Gradio live
-
00:40:26 share. Then the rest is totally exactly same as in the Windows tutorial part. But as a beginning,
-
00:40:34 let's try and see the speed. So, I selected this and since this is a powerful GPU, I am
-
00:40:40 going to use 80 gigabyte and I am going to disable tiled VAE, so it will be fast. And as a prompt,
-
00:40:48 let's try this prompt. Generate. Yes. And let's see the speed on H100 GPU. Okay, you can monitor
-
00:40:58 the status on here. Let's also open a nvitop to see, pip install nvitop, nvitop and we can see,
-
00:41:10 yes, it is already starting to load. Okay. Wow, this machine is really fast. Let's see the step
-
00:41:17 speed. This is running on cloud machine, not on my computer. Always remember that. It is using 43.10
-
00:41:27 gigabytes of VRAM memory. Okay, we got the first step. It is 57 second per IT. It is not really
-
00:41:37 that fast, unfortunately, as fast as we expected. So, therefore, you can also get L40S GPU and pay
-
00:41:47 lesser. It is up to you, but this is the speed on H100 GPU for the very best model. Therefore,
-
00:41:54 you can get an L40S GPU and get similar speed, pay lesser and really generate a lot of images.
-
00:42:01 For example, I started eight GPUs and I am going to generate on eight GPUs to prepare some of the
-
00:42:08 examples that you have seen in the beginning of the tutorial video. So, that is how I am scaling
-
00:42:16 my generations using multiple GPUs. I am going to download all of the models here. And how I
-
00:42:23 am going to do that? I am going to assign a GPU to every instance. It will be like export CUDA
-
00:42:32 visible devices equal to 1, 2, 3, 4. So, each one will run on the different GPU. Therefore,
-
00:42:40 I will be able to generate multiple videos in parallel. This works on Massed Compute
-
00:42:46 as well. This works everywhere, on Windows as well. In Windows, it is set, not export,
-
00:42:51 but this is the logic. So, this is the logic of using RunPod, exactly same as in the Windows part.
-
00:42:59 You just make the installation as this way and you generate and you download things you want. So,
-
00:43:05 our RunPod generation has been completed. We can see the time it took and we got the result.
-
00:43:13 The result is just mind blowingly amazing. It is extremely high quality as you are seeing, really,
-
00:43:20 really good from this description. I really like it. So, how you can download it? Click here and
-
00:43:27 it will download the video into your computer or or go to the workspace, Wan 2.1 folder and
-
00:43:34 outputs. Right click and download as an archive and it will download all of the generated videos
-
00:43:41 inside a zip file like this. So, you can open and see them. If you don't want to spend any money,
-
00:43:47 you can stop your pod from here, click stop and stop. It will use minimum amount of money. Then
-
00:43:54 you can resume with start and just run the installer again. It will be very quick and
-
00:44:00 start again. If you don't want to spend any money, just terminate, but this will delete everything
-
00:44:06 forever. So, be careful with that, just terminate. If you want to use storage system of the RunPod,
-
00:44:13 I have a full tutorial for that. Into the YouTube, type SECourses RunPod Network and
-
00:44:20 you will get to this tutorial. This tutorial shows you how to use permanent network storage system,
-
00:44:27 if you need permanent network storage system on RunPod. Thank you so much for watching. Hopefully,
-
00:44:33 we will meet at more amazing tutorial videos. Please go to our Stable Diffusion Generative AI
-
00:44:41 GitHub repository and star it, fork it, watch it. If you sponsor, I appreciate it. Please also go to
-
00:44:49 our Reddit. We have a Reddit page. I am constantly sharing extremely useful information here. We are
-
00:44:55 growing. So, follow our Reddit. Also, I have a LinkedIn profile. You can go to my LinkedIn
-
00:45:02 profile and follow me here. I am constantly sharing updates, a lot of information. You see,
-
00:45:08 I already have 6,000 followers. I appreciate everything. Also, subscribe to our channel,
-
00:45:14 leave a comment and hopefully see you later in further tutorial videos.